
For todays DIY we are sharing how to make those sweet little paper flower arrangements you may have seen at our GWS booth at The Cream! Paper flowers are a hit right now and we love all the possibilities of flowers you can make with paper! So we crafted up our favorite paper flower in shades of pinks + reds. And the best thing about paper flowers is of course that they never die! You can keep them after your wedding and use them as home decor – in fact, I have these all displayed in our dining room and LOVE looking at them each morning. :)
We couldn’t have crafted these lovelies without the help of Carte Fini – who provided the most colorful selection of crepe paper! Crepe paper is a flexible and easy material to work with, perfect for fluffing out flower petals and making them pretty! We highly recommend using crepe paper from them if you are looking for some. They have the best color selection we could find online, plus great customer service!
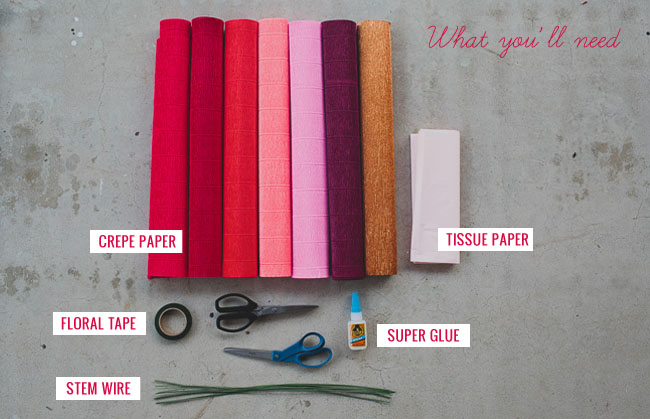
What You’ll Need:
• crepe paper (we used these colors, but you could use any you like – Crimson, Red Velvet, Coral, Salmon, Pink Suede, Burgundy, Copper Metallic)
• super glue (we found the gorilla super glue works best for this project)
• tissue paper
• floral tape
• stem wire
• scissors
• paper shredder scissors
Note about crepe paper: Crepe paper is very flexible, and can be stretched double its size. We made note to stretch before we measured the pieces we used. For the petals, you can stretch after so that your petals take shape and curve the way you like. Also, when you are cutting the crepe paper, it is best to cut with the lines vertical so that you have room to stretch and form your petals.
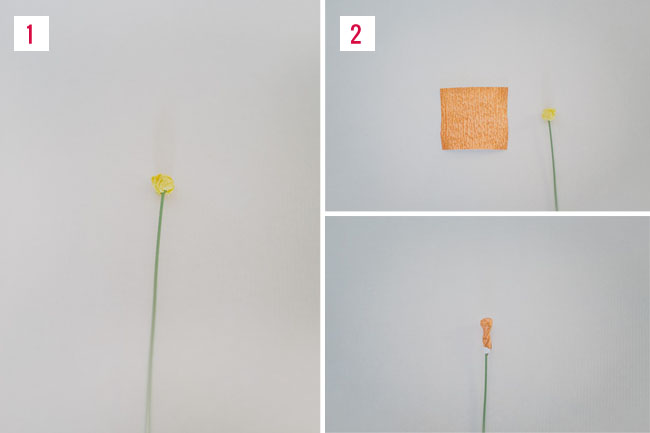
Step 1: Cut a 2×2 inch square of tissue paper. Crumple into a ball and superglue onto a stem wire.
Step 2: Cut copper crepe paper into 1 1/2″ x 1 1/2″ square. Make sure the crepe paper is stretched out before you take your measurement. Dap a bit of glue onto the paper and wrap the copper paper around the stamen (tissue paper). This will serve as your center!
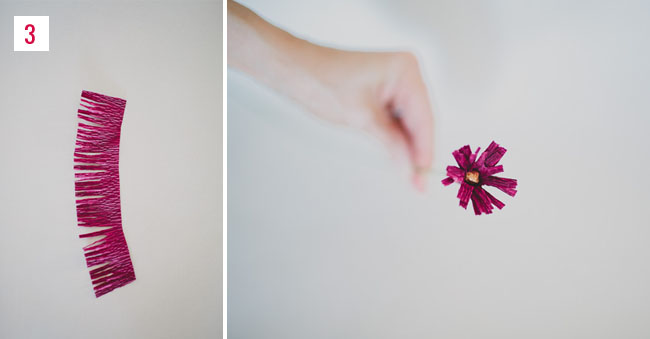
Step 3: Pick the crepe paper color you’d like for the center fringe – we used Burgundy for this one. Cut a piece of 1×6 inches and make sure the paper is stretched. Then use your shredder scissors to cut the fringe (you can also use regular scissors to create the fringe also). The fringe should be 3/4 the length of the paper. Now put a line of glue on the edge and wrap the fringe around the stamen. Add a dab of glue at the end also to hold tight.
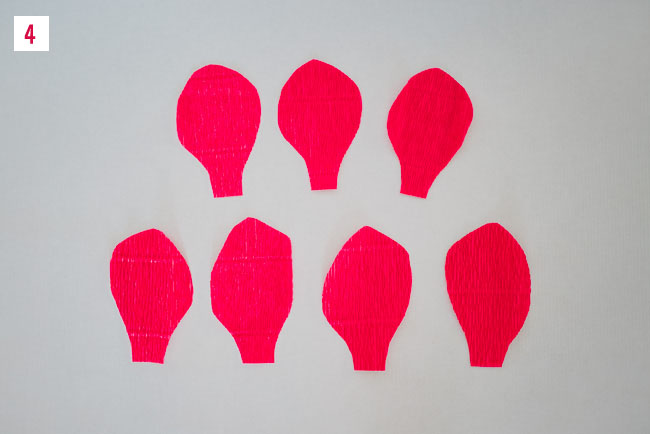
Step 4: Now it’s time to cut the petals! We used 7 petals total for one flower and cut 3 with 3 1/2″ in length and 4 with 4″ in length so that the flower had varying heights, like real petals!
Note: Crepe paper is very stretchy which is great when forming the petals. You can adjust the way they open or fold to mimic that of a real flower. Also, be sure to cut the petals so the lines on the crepe paper are vertical (otherwise when you go to stretch the petals, they won’t look as realistic).
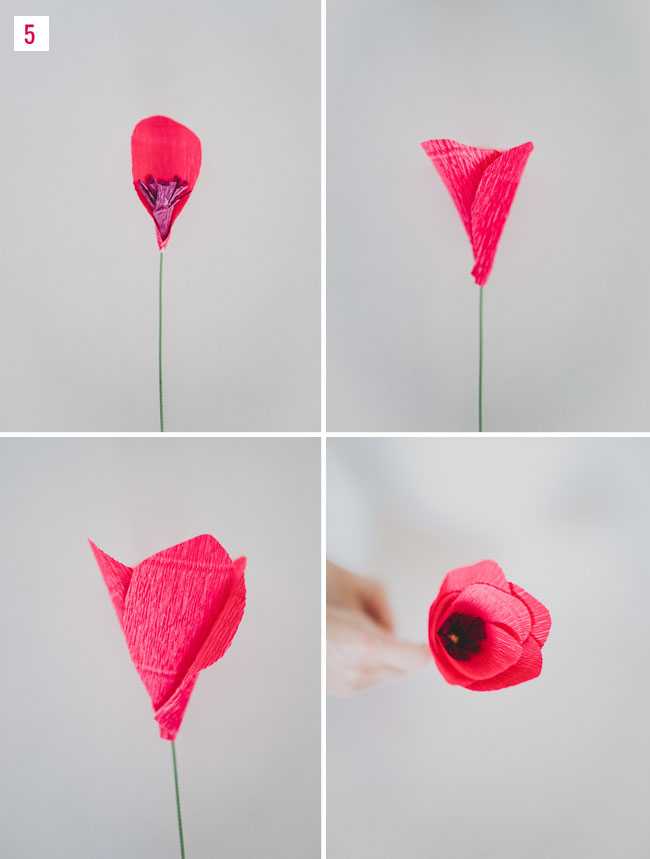

Step 5: Start with one of your smaller petals and with a dab of glue attach to the stamen. Now, repeat with the other 2 smaller petals while continuing in a circle around the stamen. Repeat again with the 4 larger petals so they are staggered. Once all the petals are attached, it’s time to fluff out the petals! The crepe paper is very maleable, so play around with the petals until you get the shape you like best. We also wrapped a piece of pretty copper washi tape on the base to bring the copper color out like the stamen.
Have fun trying different combinations of crepe paper colors and petal sizes! So many different shapes you can make to create some pretty flowers!
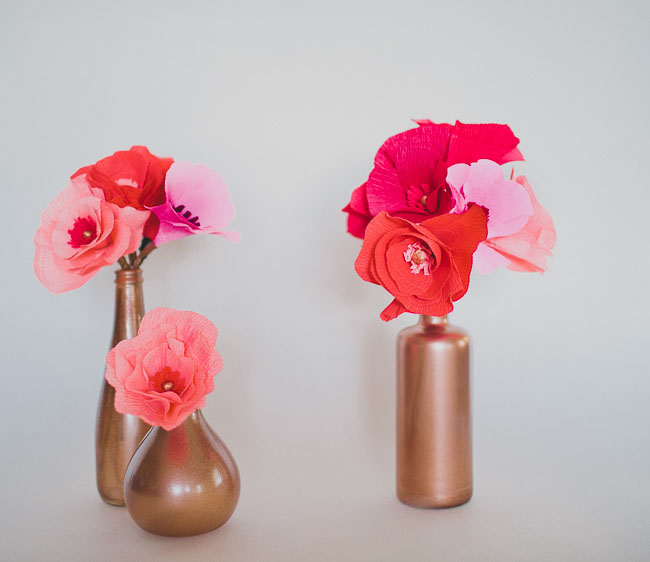
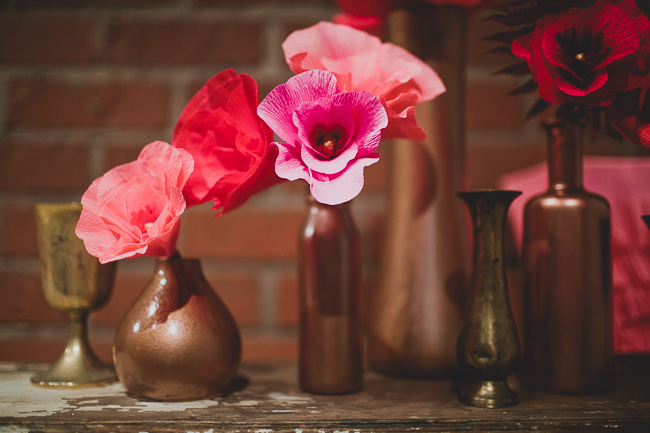
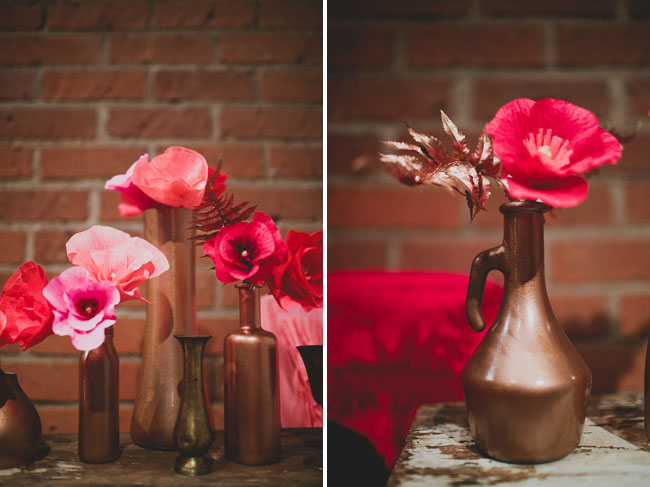

Love these beauties in vases that we found + bought from Michaels, then spray painted copper and gold! We also spray painted a few plastic ferns to add a bit more texture in our display.
If you make these paper flowers, we’d love to see how they turn out, so please share on Instagram along with the hashtag #GreenWeddingShoesDIY
Thanks to Katie Pritchard for the photos!

What a lovely tutorial. I am going to have to try this.
Just curious, did you spray paint the vases and jars from the inside or the outside? I love the way they look!
From the outside! So easy and love the way they turned out, right?! :) Thank you!!
Cute handicrafts and cute vases!
Love this tutorial. I did something similar for my wedding bouquet, but it was made out of coffee filters. I then used water color to paint it.
Did you use the 180 gram paper? I’m new to crafting and would like to use what you used. (Hopefully recreating the results)