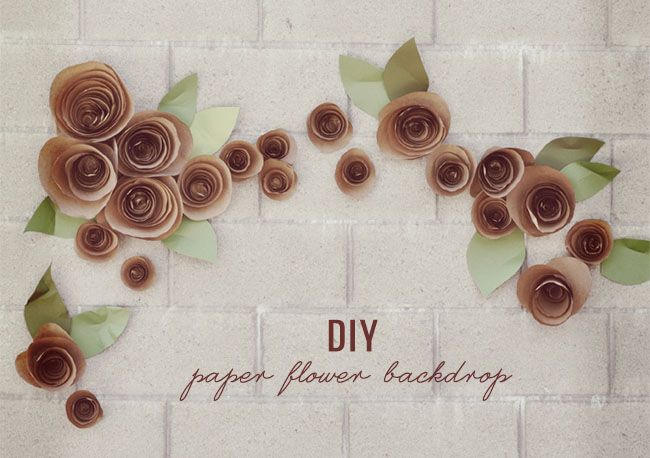
We love paper flowers and the creative gals from Smitten on Paper are back today to share a fun + easy DIY for paper flowers! You could use butcher paper for these as in the DIY or mix things up and use watercolor paper for a pretty ombre effect. This would be perfect for a ceremony backdrop, dessert backdrop or behind your head table at the reception. Let’s see how it’s made…
Materials:
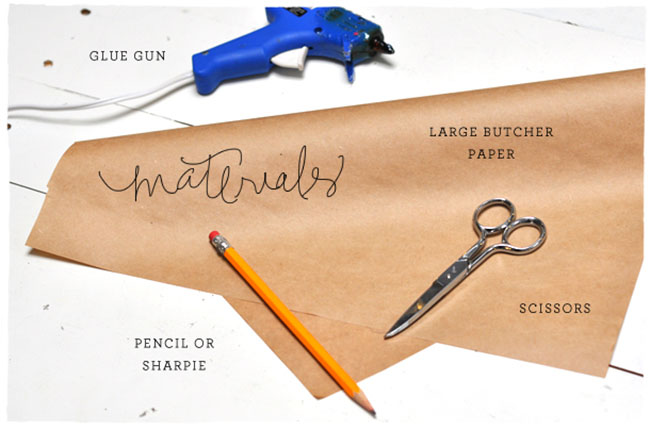
• large sheets of butcher paper to make larger flowers
• sharpie or pencil
• scissors
• glue gun
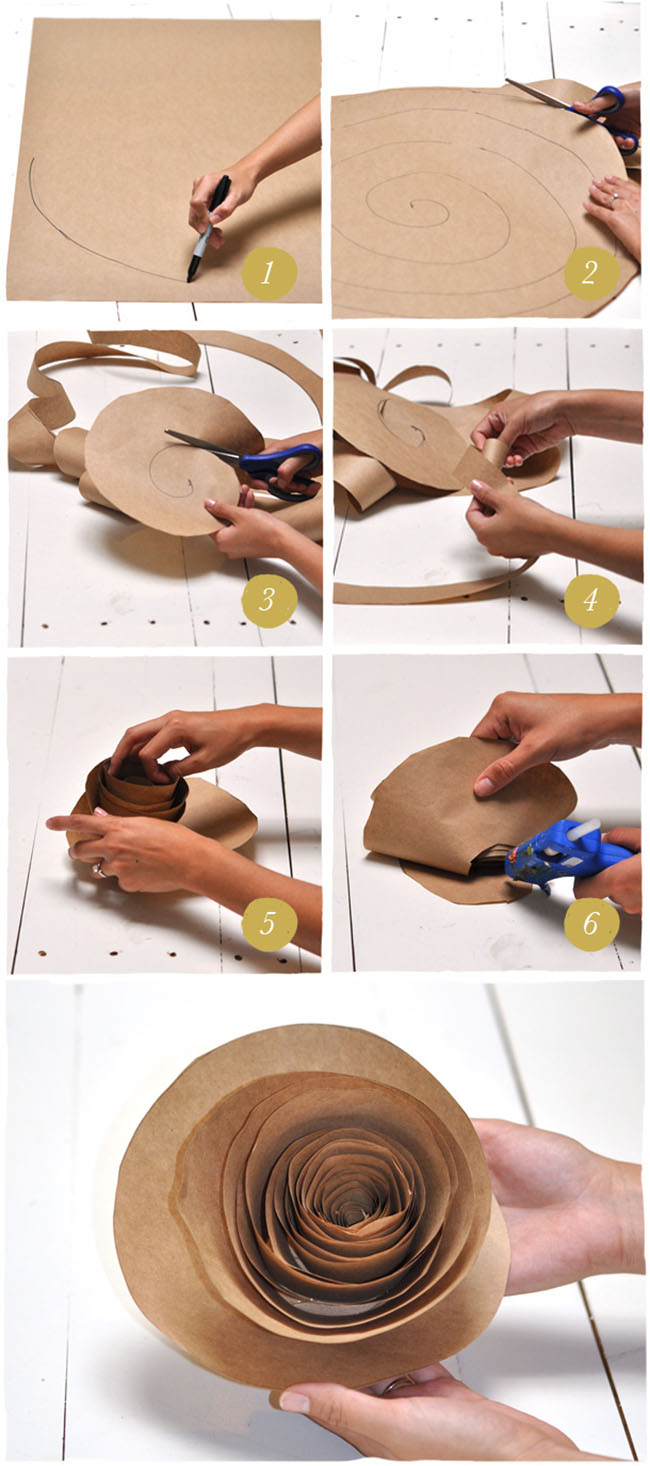
Step 1: Starting from the outside draw a spiral on your butcher paper. Make the outer rings narrow and widen them as you move closer to the center.
Step 2 & 3: Cut out your spiral shape starting from the outside.
Step 4: Curl your spiral shape into itself. Start with the outside end and continue to curl until you reach what was once the center of your spiral.
Step 5: Let your flower unravel into itself a bit. Do not let go while it unravels! You want a flower that is a bit loose.
Step 6: Add a bit of glue to what was once the center of your flower.
Done!
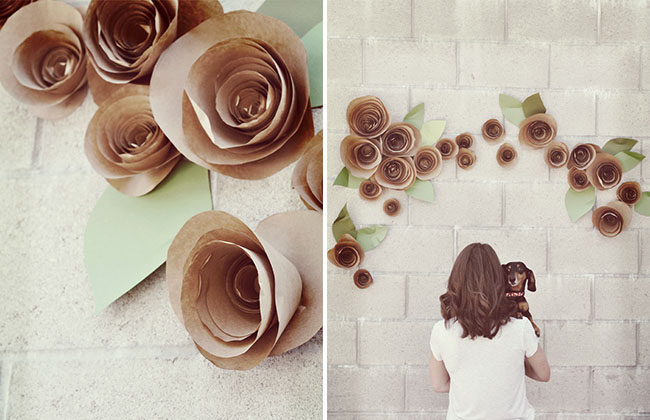
While putting together this DIY, we thought using watercolor or patterned paper would be fun to do. These flowers are so easy to make and look adorable when they’re huge! To create our paper flower backdrop we scattered the flowers on a wall and added leaves in different shades of green. Send us pictures if you try this one out! #GWSDIY

DIY created exclusively for Green Wedding Shoes by Smitten on Paper. Check out more of their design work at Smitten on Paper!

Great ideas, Thanks for sharing! I like the step by step instructions how to create these flowers
Love this, so easy and so cute! How were they attached to the wall though?
This is brilliant and I love love the idea with the flowers. I also love the color choice. As a photographer you can never have too many neutral colors! Thanks for sharing!
Useful idea and easy to do. Thank you very much for sharing this <3
Brilliant idea, thanks for sharing it!
I would love to try this- how did you attach the flowers to the wall?
I, too, desperately want to know how you attached it to the wall??