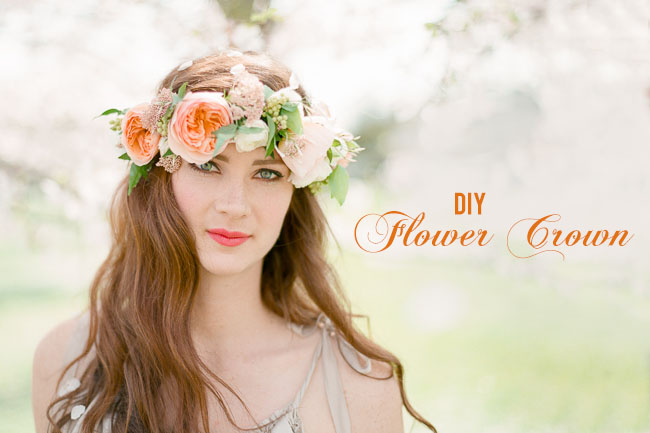
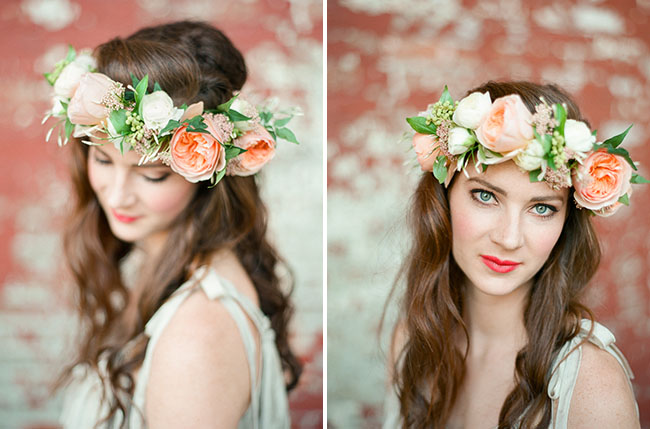
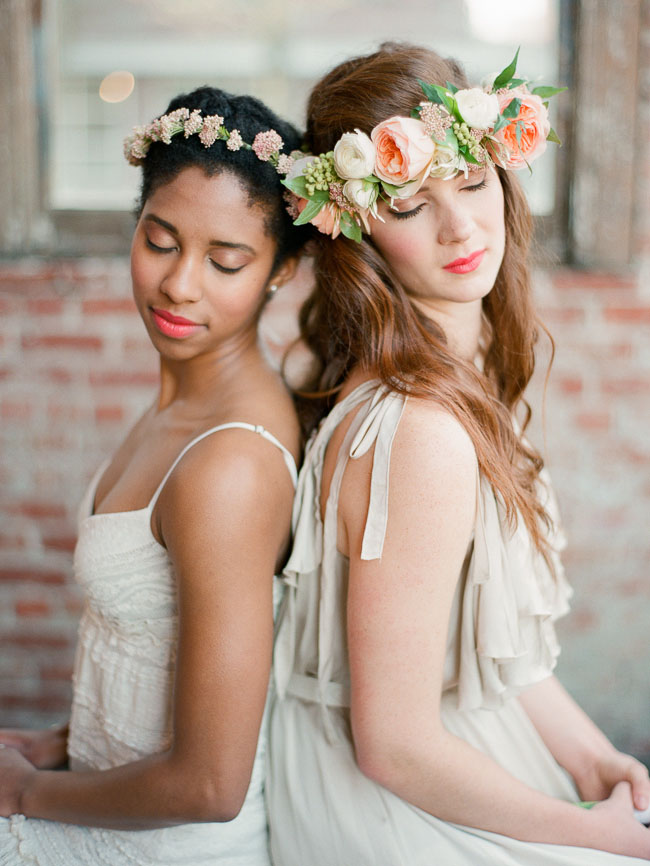
It’s no secret how much I love flower crowns! Such a bohemian chic way to style your hair for your wedding or a fun photoshoot. Last year I shared a fun flower crown DIY using silk flowers – which is great since it lasts forever and you can make it a month in advance. Well, today we have a GORGEOUS DIY using the prettiest spring flowers! It’s a bit trickier since you’ll need to make it the day before your wedding, but it really is such a pretty flower crown and we have tips on how to keep it looking fresh at the end of the post. Big thanks to blüm floral design for creating this fun DIY for us and to Brown Butter Photography for the lovely photos!
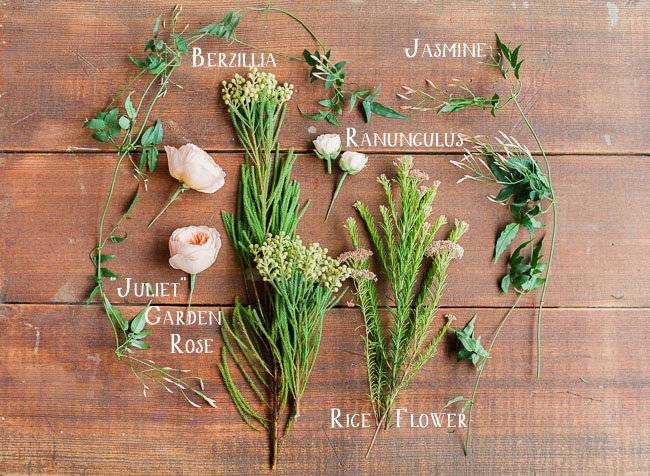
flowers needed:
• “Juliet” Garden Roses (5)
• Berzillia Berries (a few stems)
• Jasmine (1 stem)
• Ranunculus (10)
• Rice Flower (2 stems)
hard goods:
• 4′ 3/8″ Frech Double Satin Ribbon
• Green Florist tape
• 16 gauge straight wire
• Ribbon Shears
• Bonsai Shears
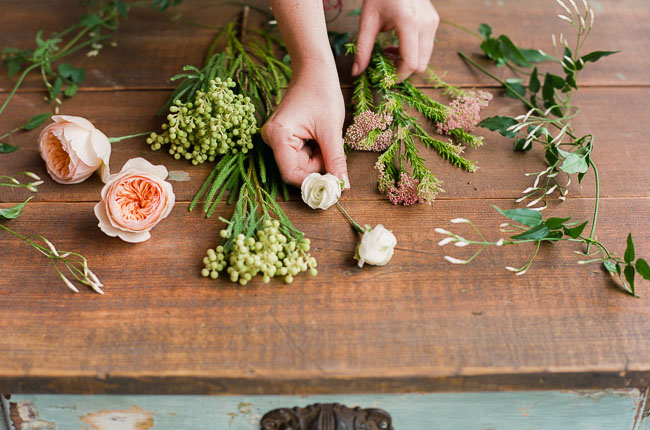
1. Take the flowers and cut all the stems to 2-3″ in length.
2. Wire and tape large blooms (the roses and ranunculus) individually so that they’ll be sturdy in the halo. Arrange all blooms on table before beginning. I like to have everything ready before I start the assembly so I don’t have to stop midway to cut more product.
3. Cut a piece of ribbon about 4′ long. It needs to be long enough to wrap around the head, tie into a bow and still have some streamers to hang down. I like to measure the circumference of the head with the ribbon first and mark the beginning and end of where the flowers should be and then add at least a foot extra on either side.. For the ribbon itself, I like 3/8″ french satin ribbon but anything that’s sturdy and not too thick will work well. I also like the using the ribbon because it makes the floral crown adjustable.

4. Take a piece of 16″ gauge wire and use floral tape to attach it to the ribbon about a foot from the end. The wire adds some sturdiness to the floral crown and is especially important when using heavier flowers like the garden roses.
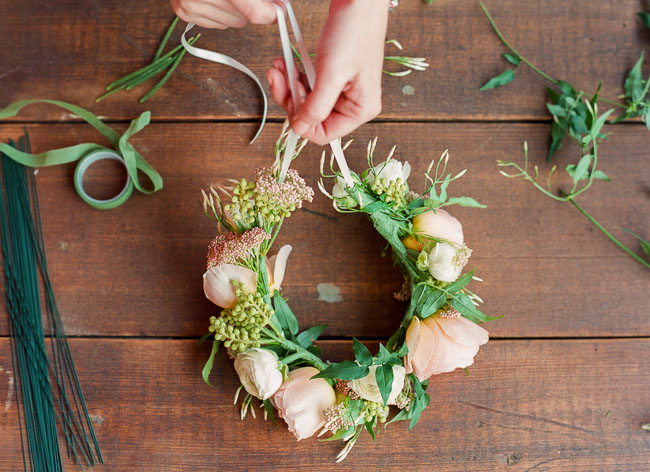
5. Now you can add the flowers! Tape in your first product with the ribbon and wire. Begin with something that extends a bit over the end so it’s sure to hide any visible tape. I used the jasmine leaves and buds.
6. Add and alternate product to your liking by taping in each piece individually. The flowers should be fairly tight together and also taped on very sturdily. As you add product clip off any extra wire or stems with the bonsai shears. The less product and wire on the halo the lighter weight and more comfortable it will be to wear. After I clip any wires I always tape over the ends as well to make sure there’s nothing poking out.
7. About three inches before the end of where you want the flowers to end it’s time to flip the product the opposite direction and tape it that way so both ends look finished.
And you are done! Storage Tip: Spritz the halo with water or floral finishing spray to help maintain moisture, store in an airtight bag or tupperware container and place in the fridge. The halo can be made the day before the wedding as long as it’s in the fridge for as long as possible.
To wear the halo simply place around the head and tie the ribbons. For extra hold you may want to secure with a few bobby pins.
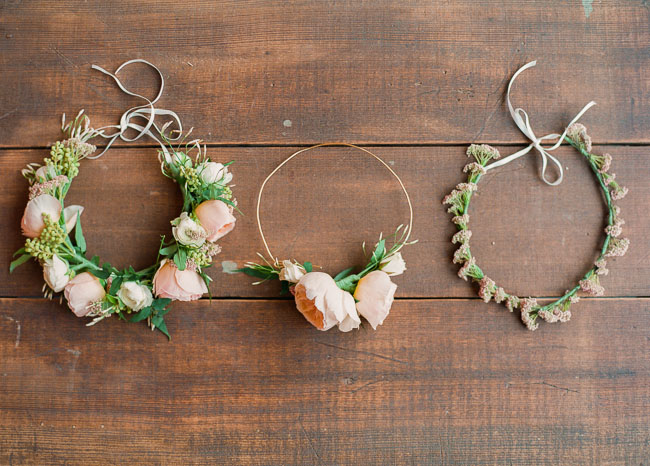
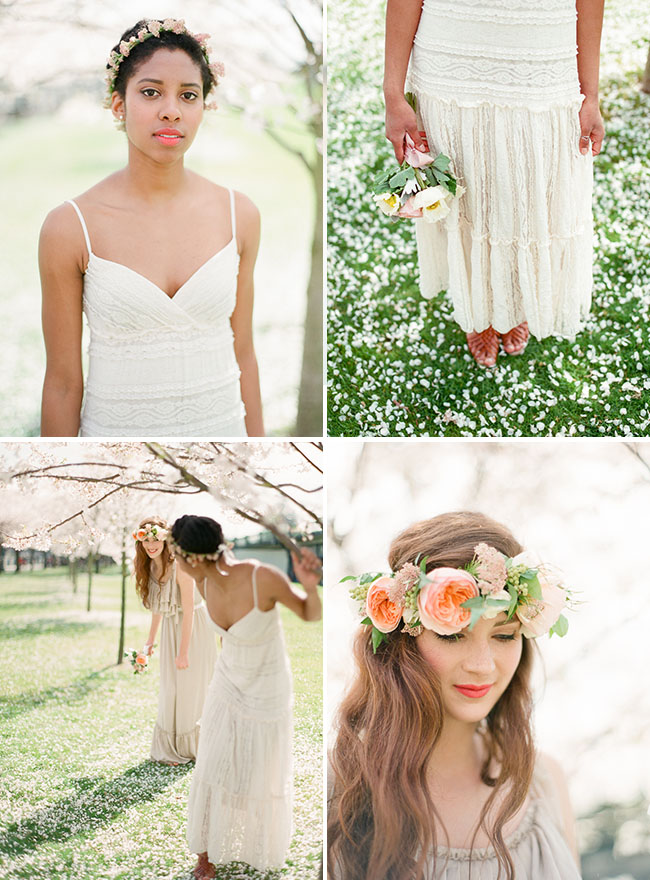
And a few other fun variations from the same flowers…

Such a pretty flower crown, right?! Hope you have fun creating this one for yourself!

photography: Brown Butter Photography // florals: blüm floral design // make-up artist: Kendra Stanton // vintage table: Something Borrowed

Wow! Everything is so beautiful! Will def. have to give this a try!
Me too :)
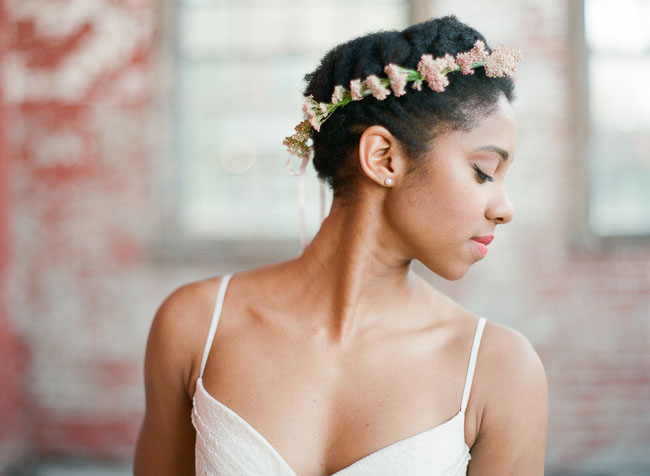
Love the last photo! Very dreamy and fairtale look
Hi there! I’ve been looking a tutorial to do this headband, I tried to do it on my own but didn’t come up as expected, this will help a lot! Thank you for sharing and being very inspiring.
<3
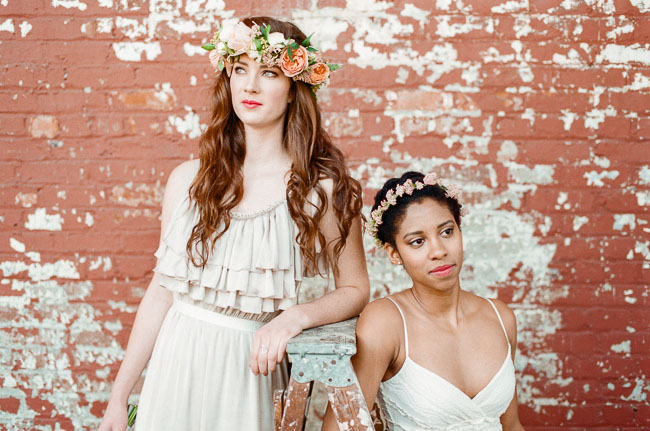
i love the dress with the ruffles! where is it from?
LOVE! That model is SO gorgeous!!!!
I completed the process and went within, making the lawn to them, with a big grin on my experience and a sensation all was right with the globe, not something we get too often.
So so gorgeous! Definitely something I would like for my own wedding :)
So pretty!
Thank you so much for the tutorial! I made my own with a range of coloured fake flowers and leaves. It turned out great and looks realistic. I love it!
Hi there, this flower crown looks fabulous! I was wondering where do you buy your artificial flowers?
Thank you very much for your answer!
Manon
Thanks for this! We can save some of our money instead of buying expensive flower crowns! :)
BUT HOW DO U ATTACH THE RIBBON TO THE CROWN?? (i’ve never done this before ;-;)
NEVERMIND. the whole crown is the ribbon. (sorry)
Hey! I just wanted to let you know that I will be sharing this diy on my blog tomorrow! <3
http://lazyexplorers.blogspot.com/
I love the flower crown. I think its a beautiful trend.
I love this DIY crown. It really is so easy to do and seriously ladies you will feel like a princess. I like to substitute raffia for every day use. What not everyone wears a flower crown all day ery day?! Seriouly inexpensive way to use blooms and ferns from your garden with out needing wire and green florist tape.
PS. WHERE WAS THIS SHOO? love those cherry blossoms.
What font did you use for the flower names that are laid out on the wood paneling background? I adore it! Thank you for this tutorial. I am going to attempt it this weekend.
LOVELY, I WANNA MAKE MY OWN TOO :D
Awesome article !
Beautiful. Thanks for the editorial!
I really like this post. Informative Stuff.
Beautiful flower crown. Love it. Thanks for showing how to make it yourself.
Beautiful, my wife will love this.
Very interesting article!
I tried this DIY process, and believe me, the results were awesome! I would recommend this with white and peach roses :)
Thanks for sharing
I love the pics and most like the dress very much… Love it…
Wow! These crowns are looking adorable in the pics. Absolutely beautiful blog..
Your way to define the creation of these crowns is just so beautiful. Lovely blog..
Your DIY spring flower crown is so beautiful and fantastic.
The Way to define the crown is so different. It’s very nice..
Thanks
Wow this flower crown is DA BOMB! I need one.
The crown made of Spring Flowers is really beautiful. I would like to thank DIY for share the tips on how to make the crown and keep it fresh even if it is prepared one day before the wedding day. Well Done
Amazing blogs, if we can create such a beautiful crown by our own by using beautiful n fresh flowers, then I think Miss World, Miss universe should prefer such crowns instead of diamond & silver crown, Flower crown will suit their natural beauty. & again amazing post, love to subscribe you.
Crown Made of flowers in increasing the beauty. So unique
Awesome, thanks for the blog always read your blog
Nice photography .. I Love all picture
the Flowers Designs are really awesome
I tried to do it on my own but didn’t come up as expected, this will help a lot! your DIY spring flower crown is so beautiful and fantastic. Thank you for sharing and being very inspiring
https://thewildorchid.ca
Awesome post ! The crown ideas are flawless. If once wore no one would wish remove it from the head.
Best designs for spring flowers.
Nice crowns! There is no girl in the world who will not like to wear the beautiful rose flower crowns like these. Thanks for sharing..
This Crown Made of flowers always creases the beauty flowers bouquets. it’s really so unique.
thank for sharing amazing post !!
wow adorable pics. these crowns are really beautiful.
Great Work..
Very gorgeous crown. I loved it ! Thank you for the post!
OMG !!! these crowns look so much beautiful and the pictures as well. well done.
I never knew one can craft such a beautiful crown using flowers. This is gorgeous. It’s hard to find such kind of flowers delivery in India.
Magnificent piece of Work!
Wow !! Great, I saw it now and it is very beautiful creation, very innovative work with flowers, I love it , thanks for sharing the post.
Wow!! Awesome pics. these crowns are really gorgeous.
very beautiful pics of crown
Thank you so much for the Diy spring flower crown. I like so much your post
Thanks for posting! i really liked all the images!
Wow!! Awesome Pictures.
Really appreciate your work
Thanks for sharing the valuable information
tHANKYOU FOR POSTING SUCH AN AWESOME CONTENT
THANX FOR POSTING SUCH AN AWESOME CONTENT ABOUT DIY FLOWERS
very nice
It’s Beautiful!
Best idea for bridesmaid. Thanx for sharing!!
It was a mind-blowing pose, and I have also tried this all poses at my home. And guess what I got the fantastic result. Thanks for this interesting article :)
This gown is really beautiful.
its the spring flower crown i liked the most.
I have never seen this type of gown before.
Wow very beautiful, i like this sweet and simple flower-crown tutorial.
It is so beautiful and simple flower crown. I admire the valuable information you offer in your articles.
I really appreciate your work
Wow ! I really loved the way you made this Spring flower crown and will definitely try to make one of these on my own.
This is so creative.
Very Beautiful Flower crown idea <3
This is great
Very Great and interesting article.
Very beautiful flowers, i like last one.
Beautiful information you have shared. I’ll wait for your next blog.
thank you for sharing such a beautiful article.
Really appreciate the work you put in. This is a really nice DIY crown you made there. Thanks for sharing.
Thanks For sharing some innocent article
it’s really informative
Thank you!! Loved your idea and aesthetic.
Thank you for such a wonderful diy spring flower crown. I’ll try to make one for me.
Crown Made of flowers in increasing the beauty and looking awesome, thanks for sharing
Thanks for this! I can save some of our money instead of buying expensive flower crowns! :)
Really good information, Will Share to my circle!
Just Love It Very Nice!
This was wonderful, after reading and watching these gorgeous pictures I fall in love with flowers.
lovely flower and great combination
Thank you so much for the Diy spring flower crown. I like so much your post
This is great. I should try this😊.
Woow! Perfect creativity! this is such a awesome thing.
Wow! these are some of the best spring flower crowns I have ever seen!
Amazing flowers crown for wedding woman. thanks for share
This is a very creative idea and it looks good
That was very helpful. We tried it.
This article is something that we need to share beacuse of the information that might help others.
Thanks for this post. I am going to see which all flowers can be replaced for a nice flower crown to suit the Indian conditions. Thanks.
Great post about DIY: Spring Flower Crown thank you so mush great knowlage
This article is something that we need to share beacuse of the information that might help others.
Great thanks for sharing it was very informative blog. A useful wording is a great way to highlight the significant aspects of the topic keep it up.
Great! Thanks for sharing the wonderful information with us.
A Big thanks for sharing wonderful information with us.
Adorable flowers crown for wedding woman. thanks for sharing the post
What a wonderful Article! Thanks for Sharing.
This article is very helpful. thanks for sharing.
Very informative
I’m a huge fan of flower crowns. Beautiful!
Wow, this is so cool. We can now try this at a Nepalese wedding.
thank you for sharing such useful information!!
wow ! such a nice and lovely one,
Wow! Everything is so beautiful! Will def.
Thanks for share…
thank you for sharing such useful information!!
Such a great article. Very helpful for us. Thank you for sharing good knowledge and information it’s very helpful and understanding.
Hi, Thank you very much!! this flower crown is beautiful! I’m so grateful good information
Favorite flower wreath for wedding ladies. Thanks for sharing this post
Amazing Idea, I will definately try this one.
I love the color of the dress and the amazing pictures and very much… Love it…
Superb!
Thanks for the post.Really looking forward to read more. Cool.
Great Content guys thank you so much for such a amazing work
I love the flower crown. I think its a beautiful trend.
I appreciate the dress’ colour, the stunning photos, and everything about it.
Thank you so much for sharing it. We hope that you will keep giving us such information. If you want to order some great gifts for this festive occasion then follow this link. https://www.sendbestgift.com/gifts-delivery-online
I adore the final image! Very hazy and fairytale-like appearance
Fabolous Post and i love the dress.
I always love to read your blogs. Please keep sharing with us!
I love the colours!
Absolutely love this DIY spring flower crown tutorial! So easy to follow, and the result is pure floral magic.
Thanks for sharing such a great information about spring flower crown.