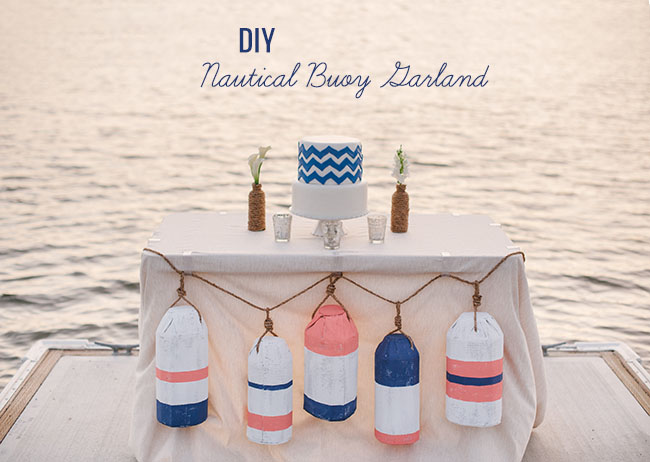
We have a pretty awesome nautical DIY to share with you all today thanks to our DIY contributors, Going Lovely! This buoy garland makes the perfect accent for a dessert table, a fun backdrop for your ceremony or even a photo booth backdrop! So many ways to incorporate this into your nautical or seaside wedding! Let’s see how they crafted up this fun display….
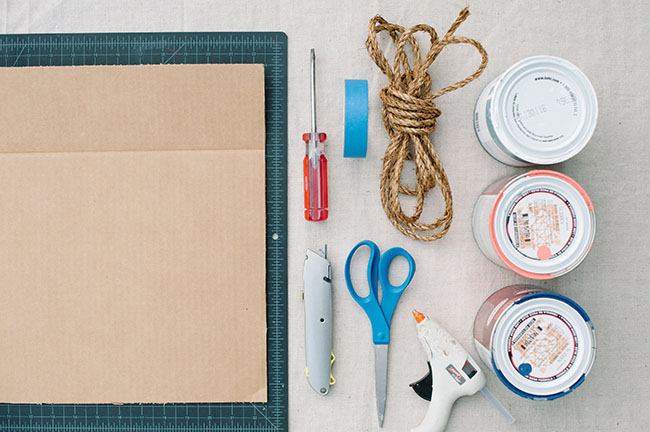
Supplies
Self-healing cutting mat (or a surface to easily cut on)
Large cardboard box
Box cutter
Scissors
Flat head screw driver or other paint can opener
Rope
White paint and other colors of your choice
Paint brushes
Painters tape
Hot glue gun + glue sticks
Canvas drop cloth
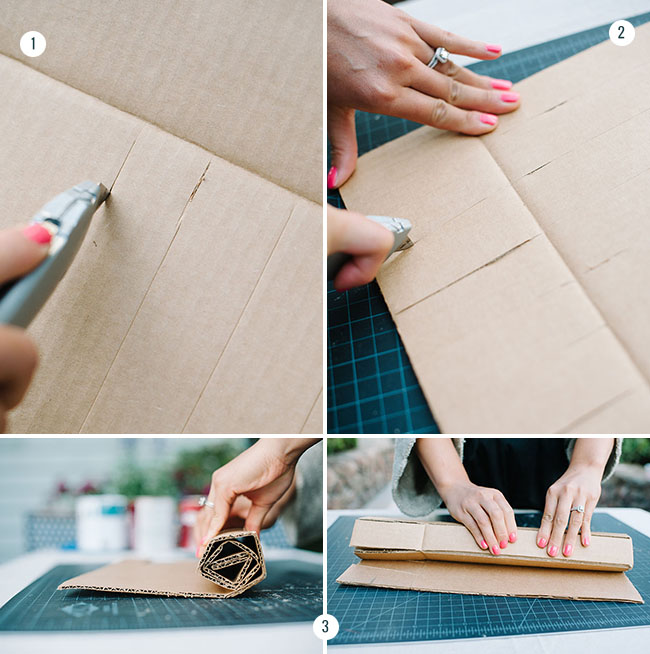
Step 1 Lay your cardboard box flat and use your box cutter to cut your cardboard box into a 22″ x 15″ rectangle shape. Lay it horizontally so the 15″ is on the side, and fold the top 4 inches to make a crease. Then, score the cardboard with vertical strokes every 2 inches. Be careful not to cut all the way through the box!
Step 2 Turn your cardboard upside down, and cut all the way through the pre-existing score marks on the 4″ flap to make your “tabs”
Step 3 Roll your piece of cardboard up so that all the score marks are bent and defined.
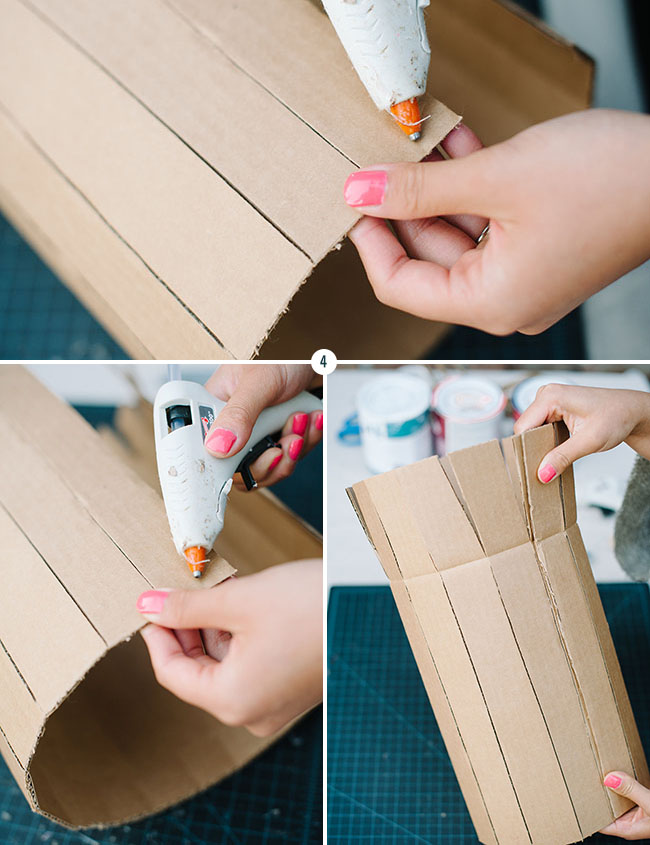
Step 4 Unroll your cardboard and hot glue the ends together so that you now have a tube-like form.
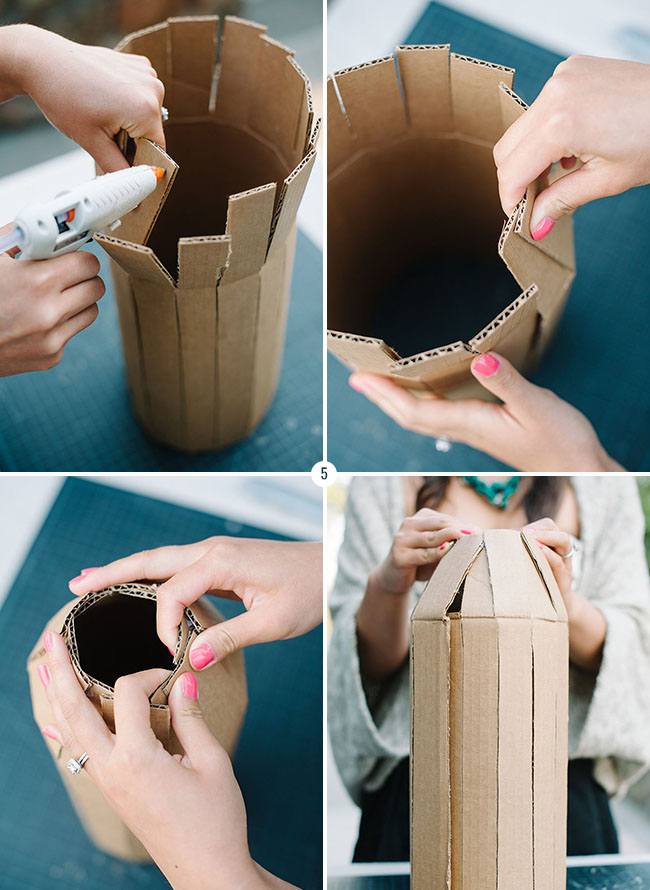
Step 5 Hot glue the tabs in a pattern so that every other piece is glued on top of each other. This will create the tapered end of your buoy.
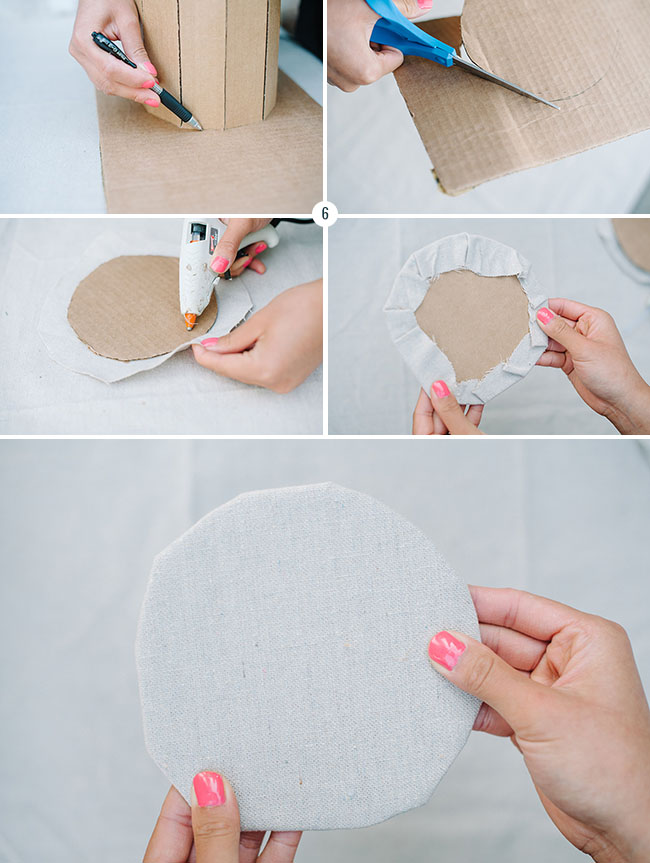
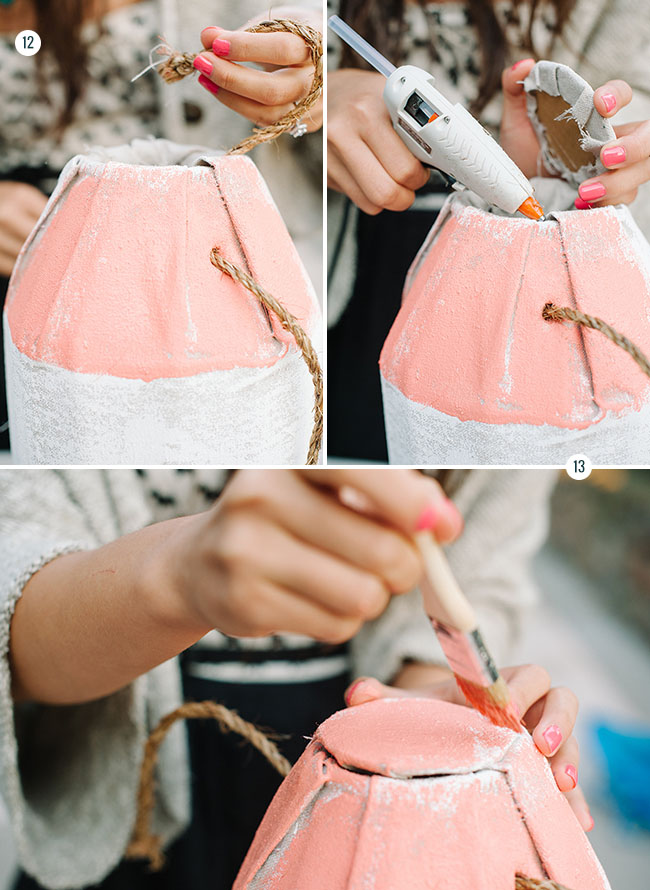
Step 6 Trace the bottom of the buoy on an extra piece of cardboard from your box, cut it out and cover the cardboard circle by using hot glue to wrap a piece of canvas over it. Then, repeat for the top of the buoy.
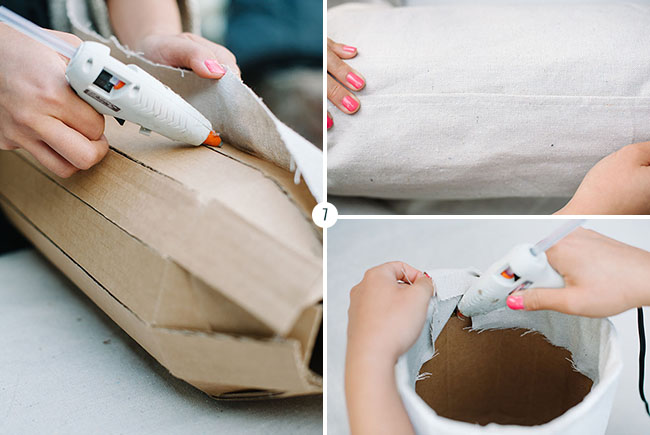
Step 7 Lay your cardboard buoy on a piece of drop cloth that is 24 x 20 inches. Take one of the 24″ sides and hot glue along the seam of the cardboard buoy. Wrap the other 24″ side around the buoy as tightly as possible, and fold the edge under itself about half an inch, and glue it to the first seam so that it’s nice and clean. Tuck the bottom of the canvas into the bottom of the buoy and glue it down to the cardboard. Repeat on the top of the buoy.
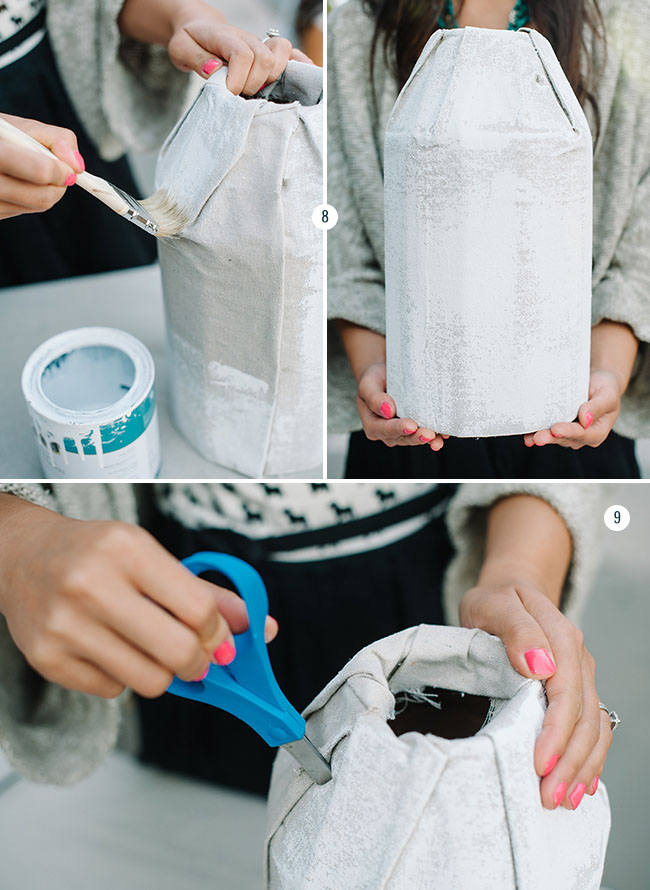
Step 8 Open up your can of white paint and lightly dip your paint brush in the paint. Paint your buoy using a “drybrush” technique so that the buoy looks more weathered.
Step 9 Take your scissors and carefully poke holes on the opposite ends of the top of the buoy. You will use these holes to thread your rope later.

Step 10 Using your painters tape, create your desired striped pattern.
Step 11 Then use your two paint colors of choice to paint on your pattern, making sure you don’t get paint past the tape.
Step 12 After the paint is dry, remove the painter’s tape and thread a piece of rope about 2 feet long through the holes.
Step 13 Glue the bottom and top pieces you made in step 7 onto the buoy and paint them to complete your painted design.
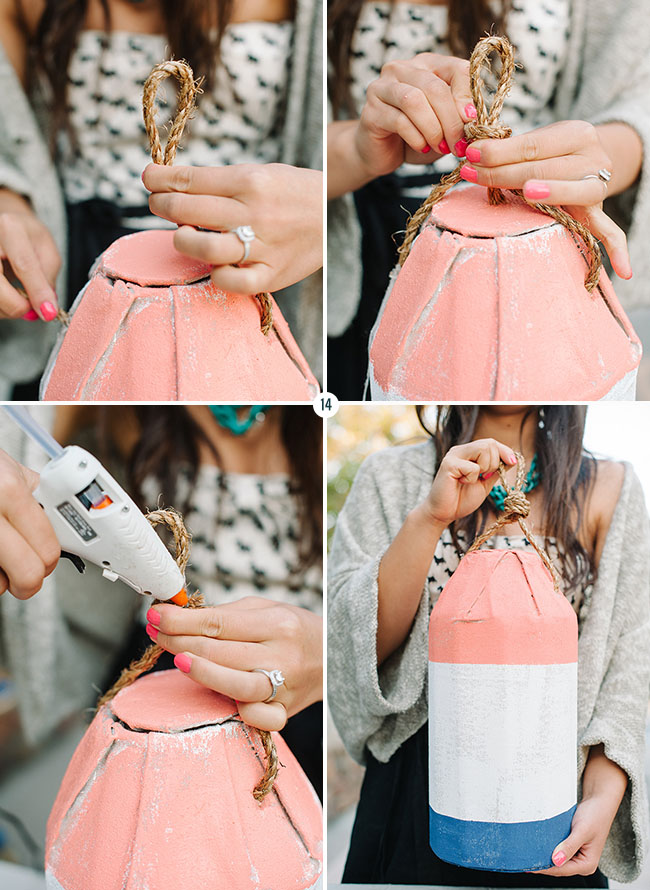
Step 14 Take one end of your rope and create a loop. Take the other end and wrap it around the base of loop several times and finish it off with some hot glue.
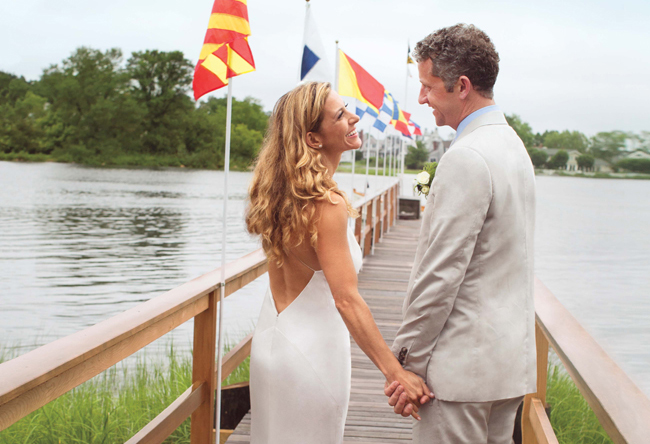
Style the buoy wherever you decide! We chose a nautical themed cake table but this could be styled however you’d like!

DIY created by Going Lovely exclusively for Green Wedding Shoes. Looking for creative event design + coordination? Check out San Francisco based Going Lovely for your wedding day! Big thanks also to Pictilio for the photography.
super cute for the nautical bride/groom!
I actually love that cake!
This is so fun! I love this idea!
Thanks for sharing this tutorial – <3 the pictures and the descriptive steps makes it really easy to follow!
This is a great idea! We used nautical buoys to tie off the paneled curtains made out of fishing nets on our rustic nautical wedding arbor in this Outer Banks wedding venue – http://www.avonharborweddings.com/outer-banks-wedding-venue/. Check it out :) !