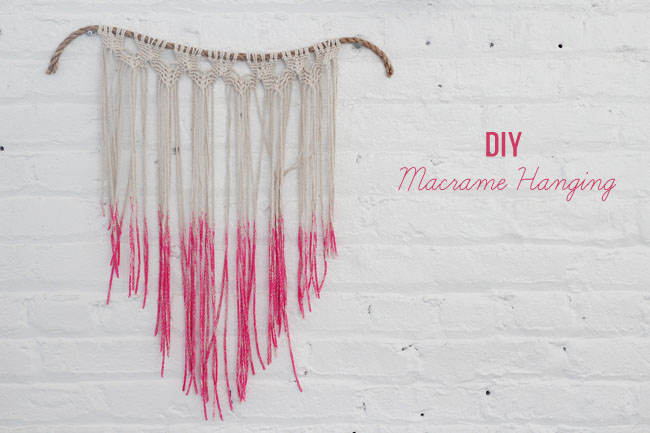
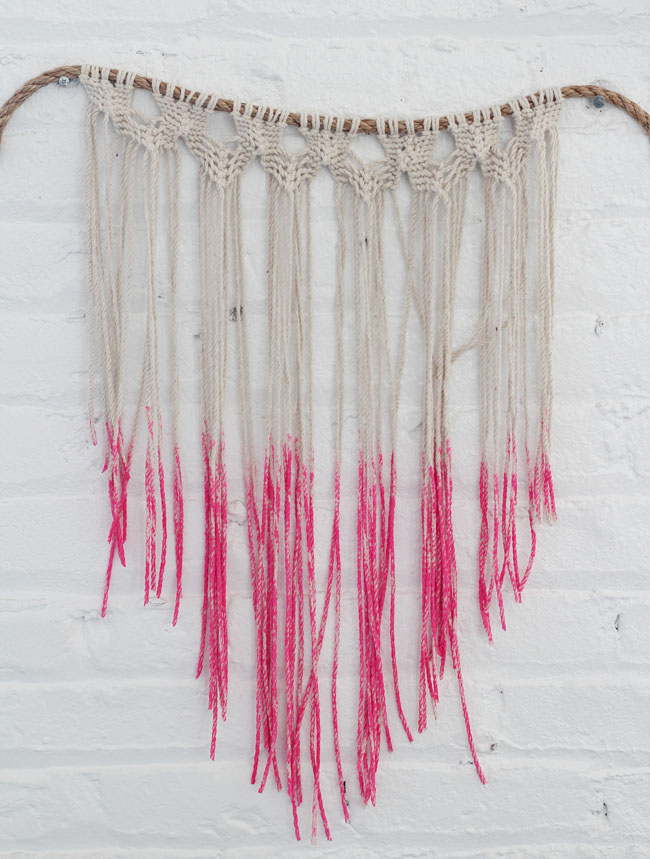
We are excited to share this DIY for a macrame hanging from Michelle Edgemont! If you loved our Colorful Parker Palm Springs Wedding with macrame details earlier – here’s your chance to make some fun macrame details for your own wedding or just a fun piece to hang on your walls! This hanging makes a perfect backdrop piece, or even pretty chair decor, which we’ll share style at the end of the post. Here’s how to make one…
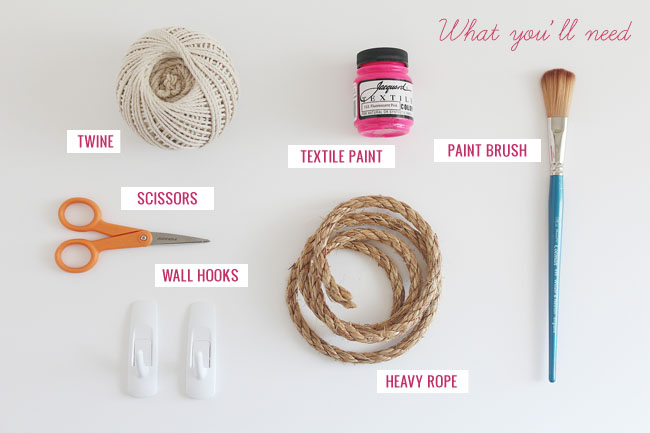
What You’ll Need:
• Twine – 200 feet per chair
• Heavy Rope – 20” per chair
• Scissors
• Two removable wall hooks
• Paint Brush
• Textile Paint
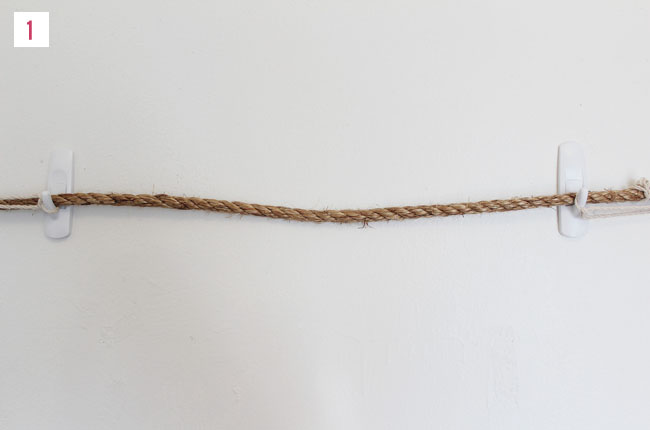
Step 1: Stick your hooks 15” apart on a wall. Tie the heavy rope to the hooks. This will make it easier to knot the twine.
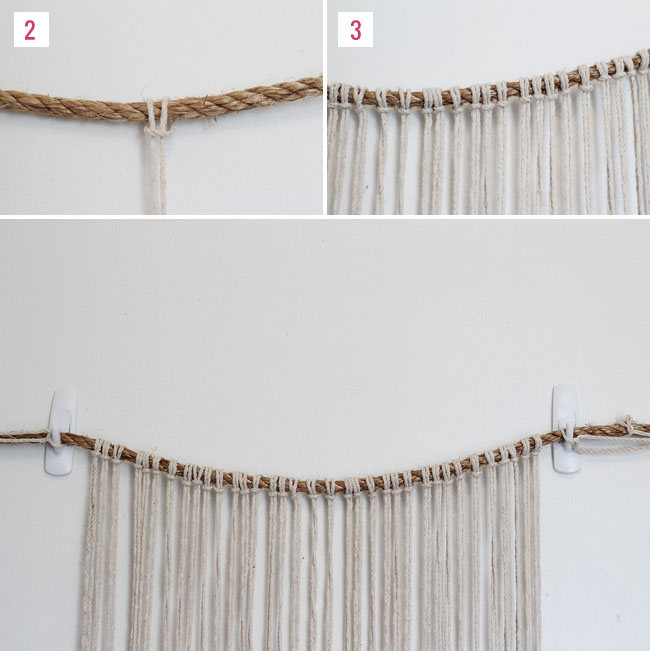
Step 2: Cut 35 strands of 70” long twine. Fold one in half and loop it around the rope as shown.
Step 3: Loop all 35 strands around the rope.
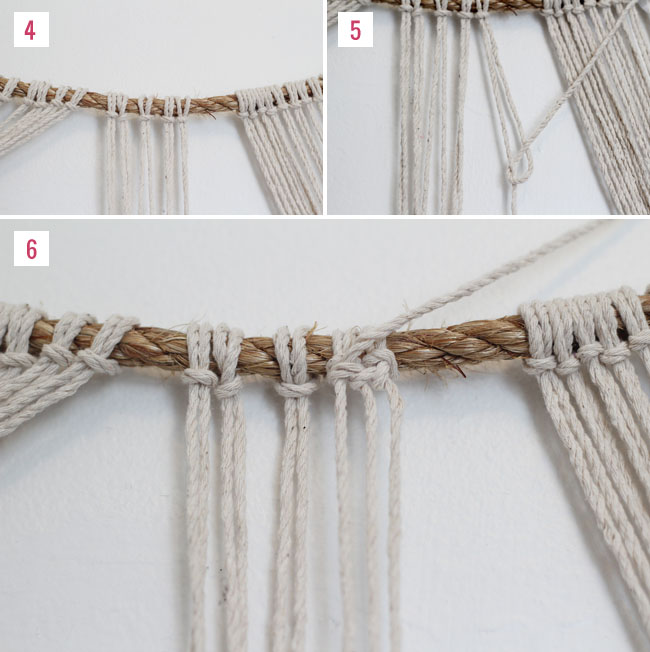
Step 4: Separate the twine into groups of ten individual strands.
Step 5: You’re going to be working with each group of ten strands at a time. In your first group, start with the strand on the furthest right. Knot it onto the strand to the left.
Step 6: Keep working with the same strand and knot it across the next piece of twine.
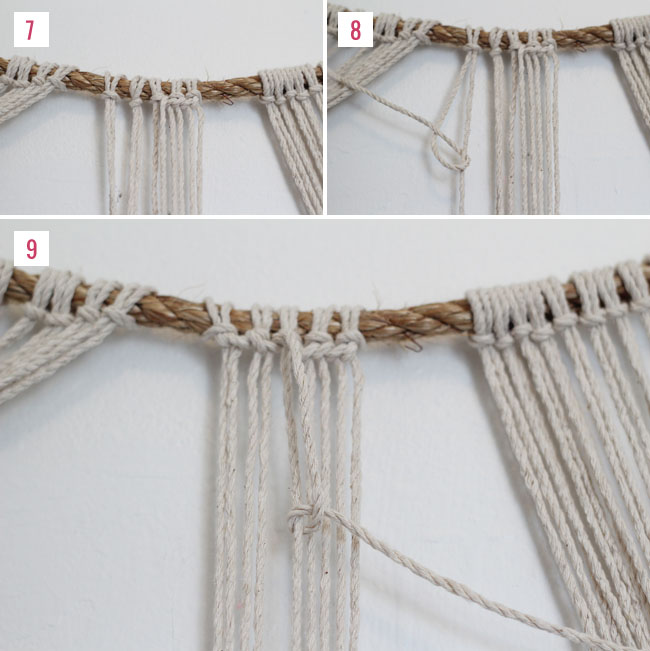
Step 7: Work right to left knotting on four strands. Stop in the middle.
Step 8: Pick up the strand on the furthest left and knot it onto the strand to it’s right.
Step 9: Work left to right using the same strand to make a knot onto four pieces of twine. When you read the middle, make two knots onto the strand you were using to knot from the right.
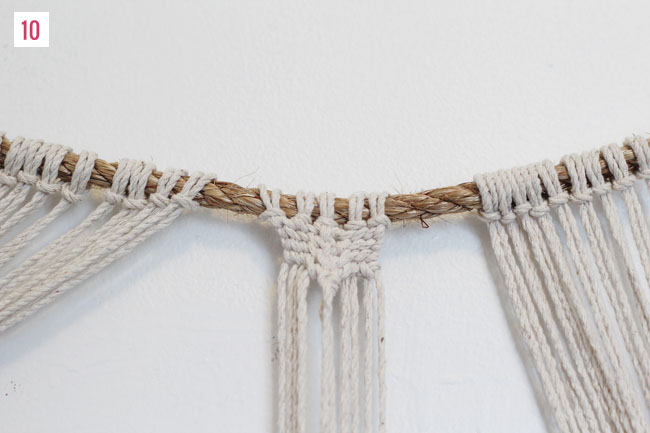
Step 10: Repeat this same knotting technique for four rows of knots.

Step 11: Do the same on all the other groups of ten strands of twine all the way across the rope.
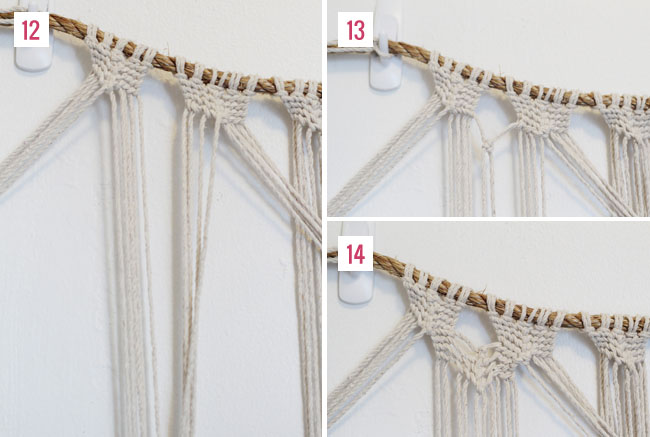
Step 12: Starting on the left, separate the first two sections down the middle. Tape the strands you won’t be working with to the side.
Step 13: Using the same technique as steps 6 – 12, start with the strand furthest on the right and knot your first row of knots. These knots should be pretty loose. [update to this step for those that found it a bit confusing — See on step 12 where there are 10 strands hanging down? Treat those 10 strands the same exact way as the strands in steps 5-10. Make the knots a little loose at first. The photo on step 13 is showing what it should look like after the first row of knots is done. Hope this helps! ]
Step 14: Repeat steps 6-12 until you’ve knotted four rows.
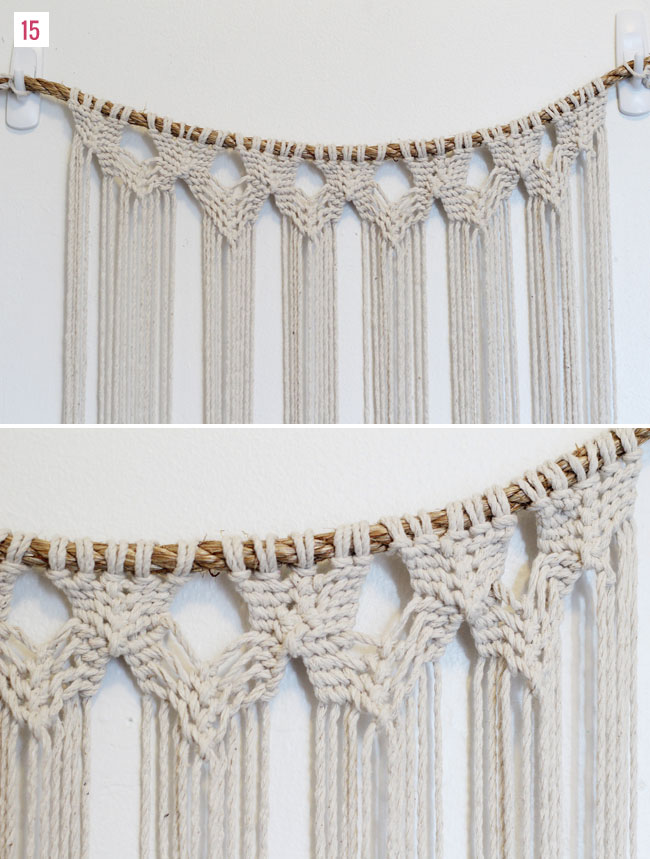
Step 15: Repeat across the rope by separating each original group of ten strands in half and knotting together.
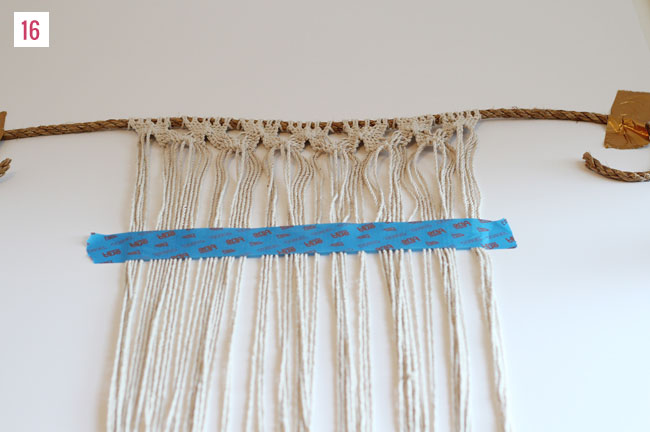
Step 16: Tape the rope to a flat surface. Use painters tape to take the twine down about 10” from the top.
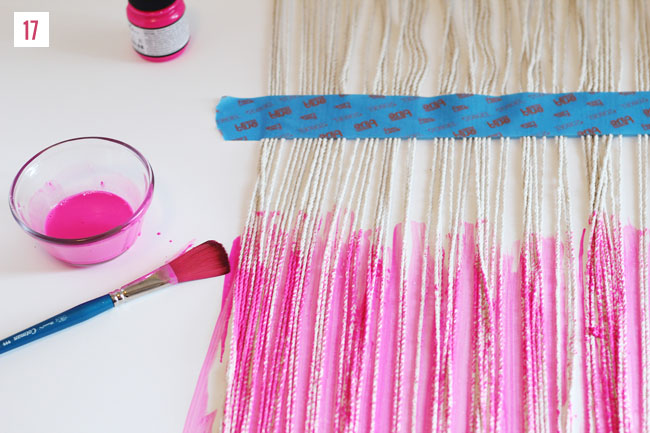
Step 17: Mix some of the paint with water and paint the bottom half of the twine.
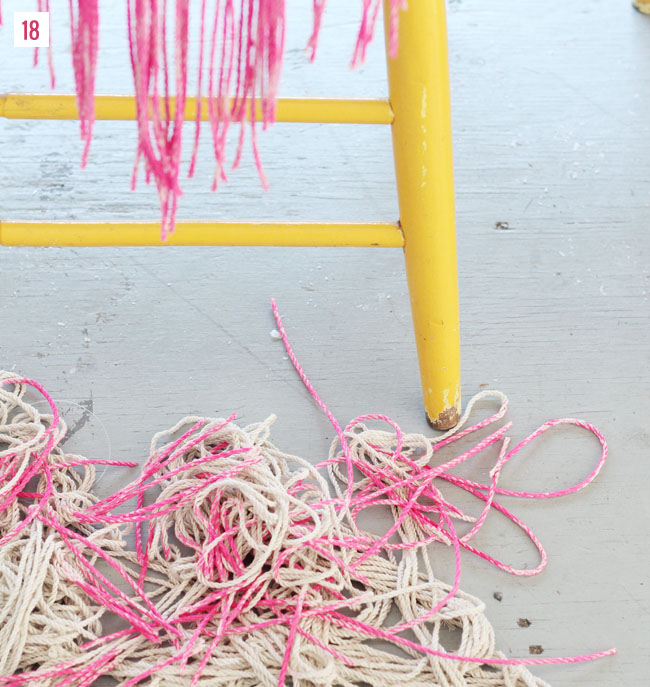
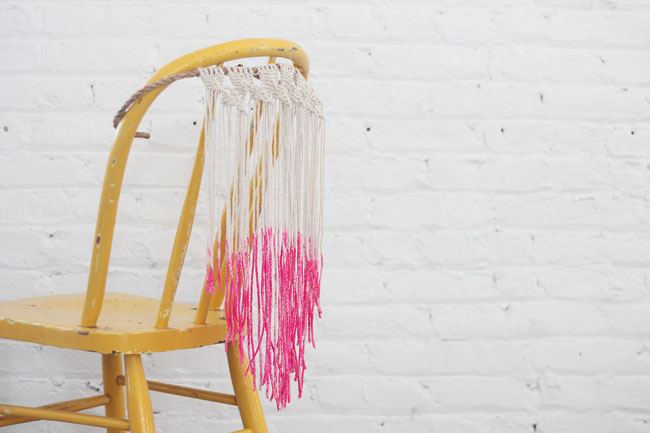
Step 18: Tie the rope to a chair and trim off all of the extra twine creating a triangle shape.
And below is how we think you could style one for your mr. + mrs. chair…
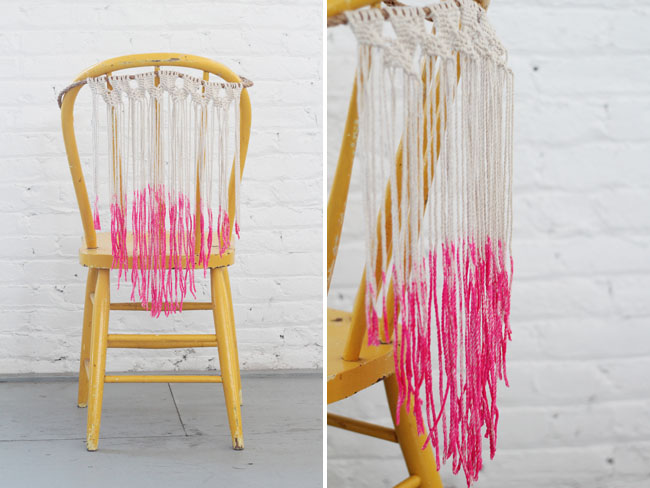

So pretty + whimsical! And remember, if you make one of our DIY projects, we’d love to see how it turned out so be sure to share with us on Instagram using the hashtag #GreenWeddingShoesDIY.
DIY created by Michelle Edgemont exclusively for Green Wedding Shoes. Looking for creative event styling, handmade details or flowers for your wedding? Check out Brooklyn based Michelle Edgemont for your wedding day!
Big thanks also to Patina Rental for the chairs, table + studio for the final styled shots


These are absolutely wonderful!They would be a really neat little diy to try for summer to spice things up a little!
that’s a lovely, lovely diy!
what’s the name of this stitch?
also, would love a little opinion on this, please: my stitches are getting a little crumpled and warped. Am I possibly straining the strings too much?
Thanks and thanks for sharing!!
.. sorry, a last question: if I’m not mistaken, there are no instructions for step 13, on which it appears that a specific knot was created. could you guys please be kind enough to provide some information on that too, please?
thanks a lot!
xx
su
Hi Su! For warped stitches, try making them looser. As for step 13, I realize the photo is a little misleading, my apologies. See on step 12 where there are 10 strands hanging down? Treat those 10 strands the same exact way as the strands in steps 5-10. Make the knots a little loose at first. The photo on step 13 is showing what it should look like after the first row of knots is done. Hope this helps!
Love the project! Started it, but I’m also stuck, like Su, on step #13. I don’t see how your combining these strings once you reach the center. Thanks in advance of any help! =)
Hi Talia! As for step 13, I realize the photo is a little misleading, my apologies. See on step 12 where there are 10 strands hanging down? Treat those 10 strands the same exact way as the strands in steps 5-10. Make the knots a little loose at first. The photo on step 13 is showing what it should look like after the first row of knots is done. The center knot is the same as step 9. Hope this helps!
What a great idea! Loved the concept!
Thanks for sharing such great and beautiful diy idea. I would love to try it someday!
http://www.perthweddinghireservices.com.au/
I just began this project and I am already a little stuck. Is there a video to this? I am stuck on steps 6-9. Please help, thanks!
Hi McKenzie,
So sorry we don’t have a video for this but it is something we are considering for the future. Hope you are able to figure out the steps!!
I am working on the project but am stuck on step 5. How do you separate the strands into groups of 10 if there are only 35?
Hi Adriana,
There should be 7 groups of 5 (which equals 35) but the 5 are now 10 — if that makes sense! If you look ahead at photo 15, I think it will make sense :)
So I made it to step #13 and I successfully made the first row of knots and now mine looks exactly like picture #13. However now I am on the second row and have made it to the middle part again, but these strings don’t tie the same. I started from the left, and once I make it to the 4th string, It doesn’t stay tied. is there a different way to tie the strings when you reach this part?
Please make a video. These instructions are hard to follow. I love this pattern but the instructions are really confusing.
There’s nothing worse then going and buying supplies… spending a few hours on a DIY to realize a step later on doesn’t make sense in the instructions…. even with your clarity you tried to provide you are missing a key step. Like what Hannah stated “once I make it to the 4th string, It doesn’t stay tied. is there a different way to tie the strings when you reach this part?” The steps 13/14 is where the issue lies. It is not the exact same knot as step 6. In doing it the exact same you are left with a string that does not get knotted and a SUPER messy macrame :( Kinda bummed. But I’ll hopefully find another tutorial to help me finish what I’ve started.
so so Cute ! brilliant idea !
So cute. I love this DIY tutorial idea.