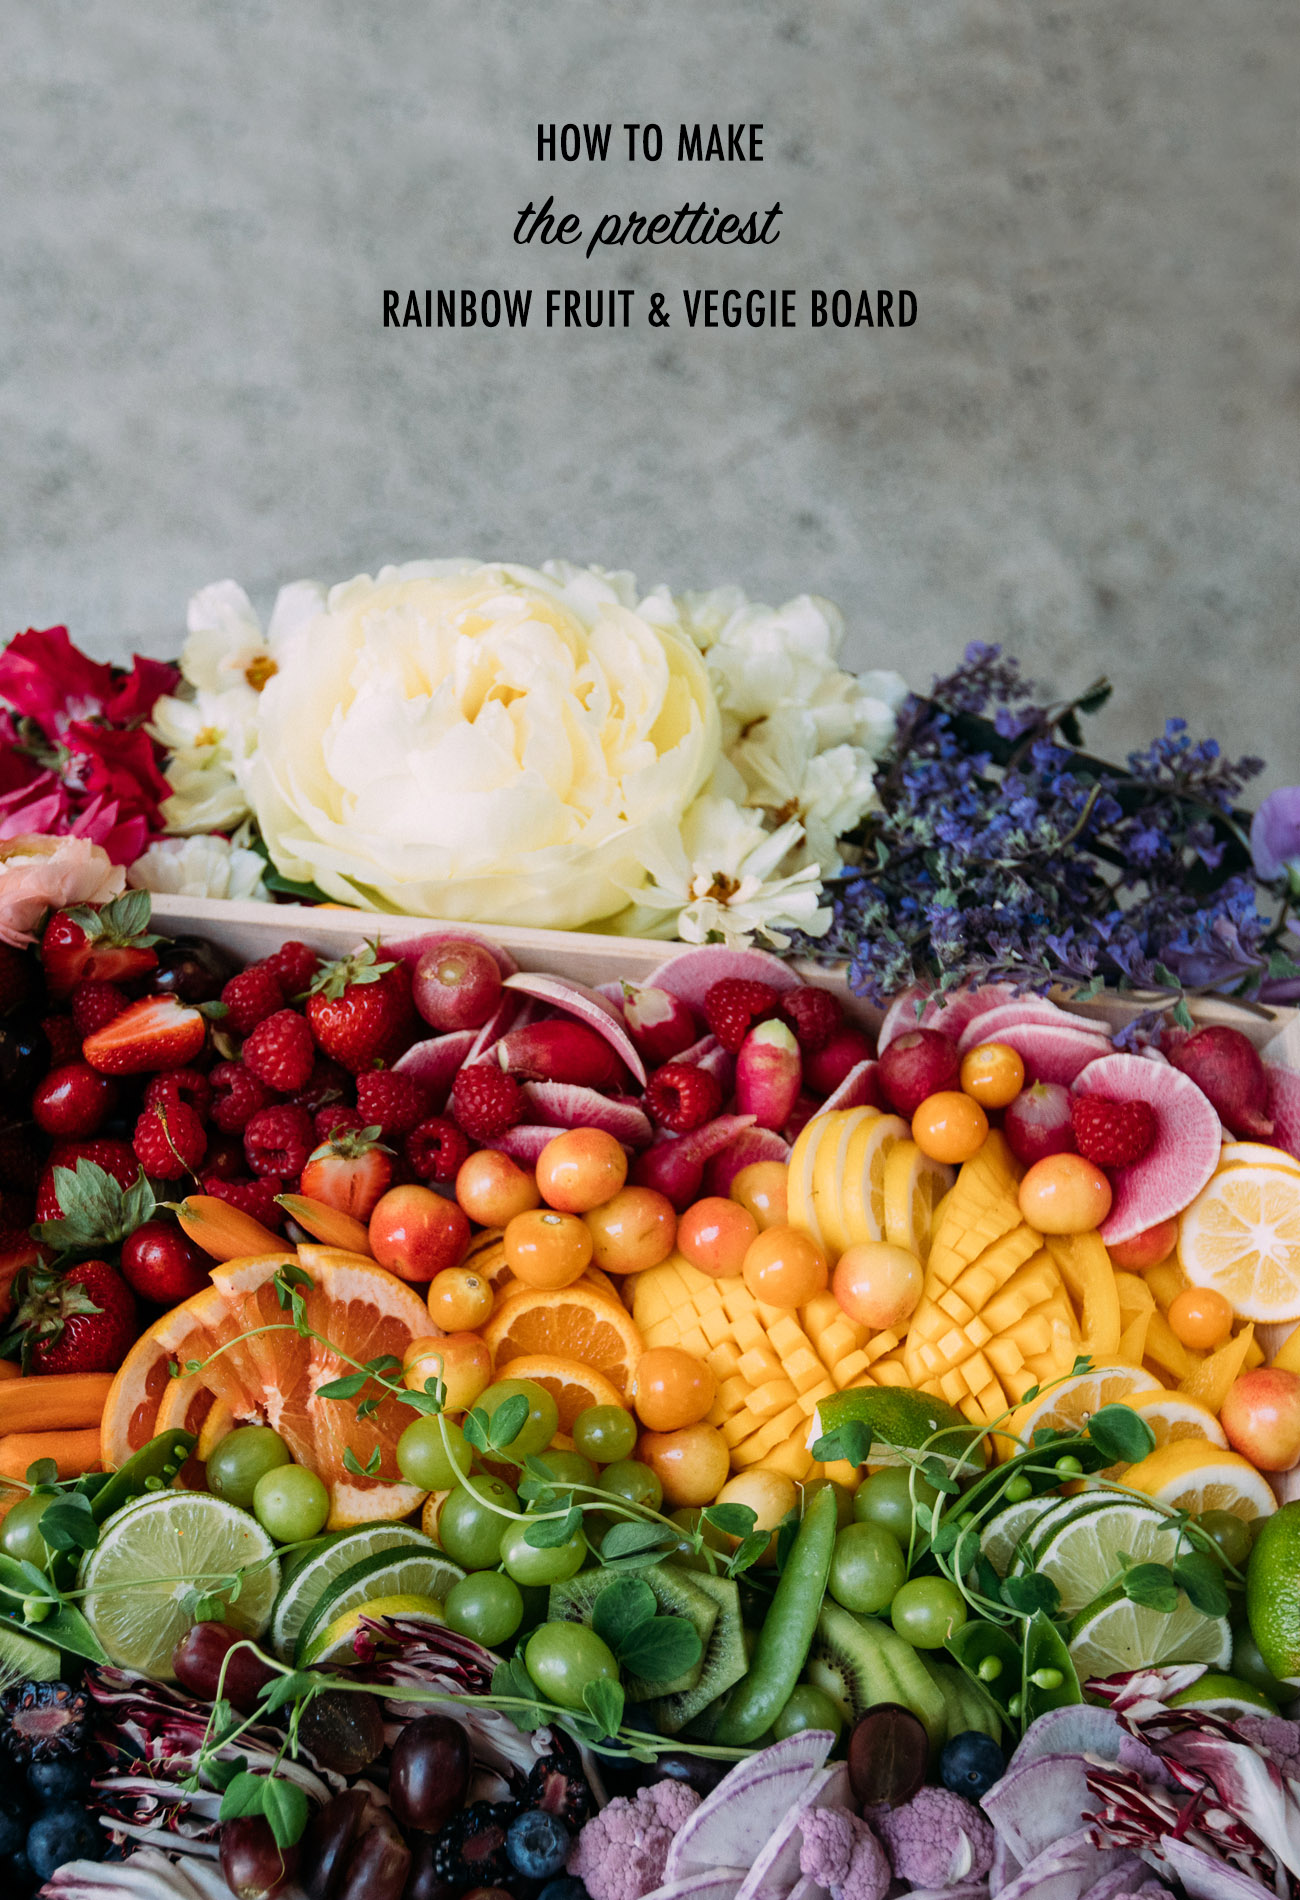
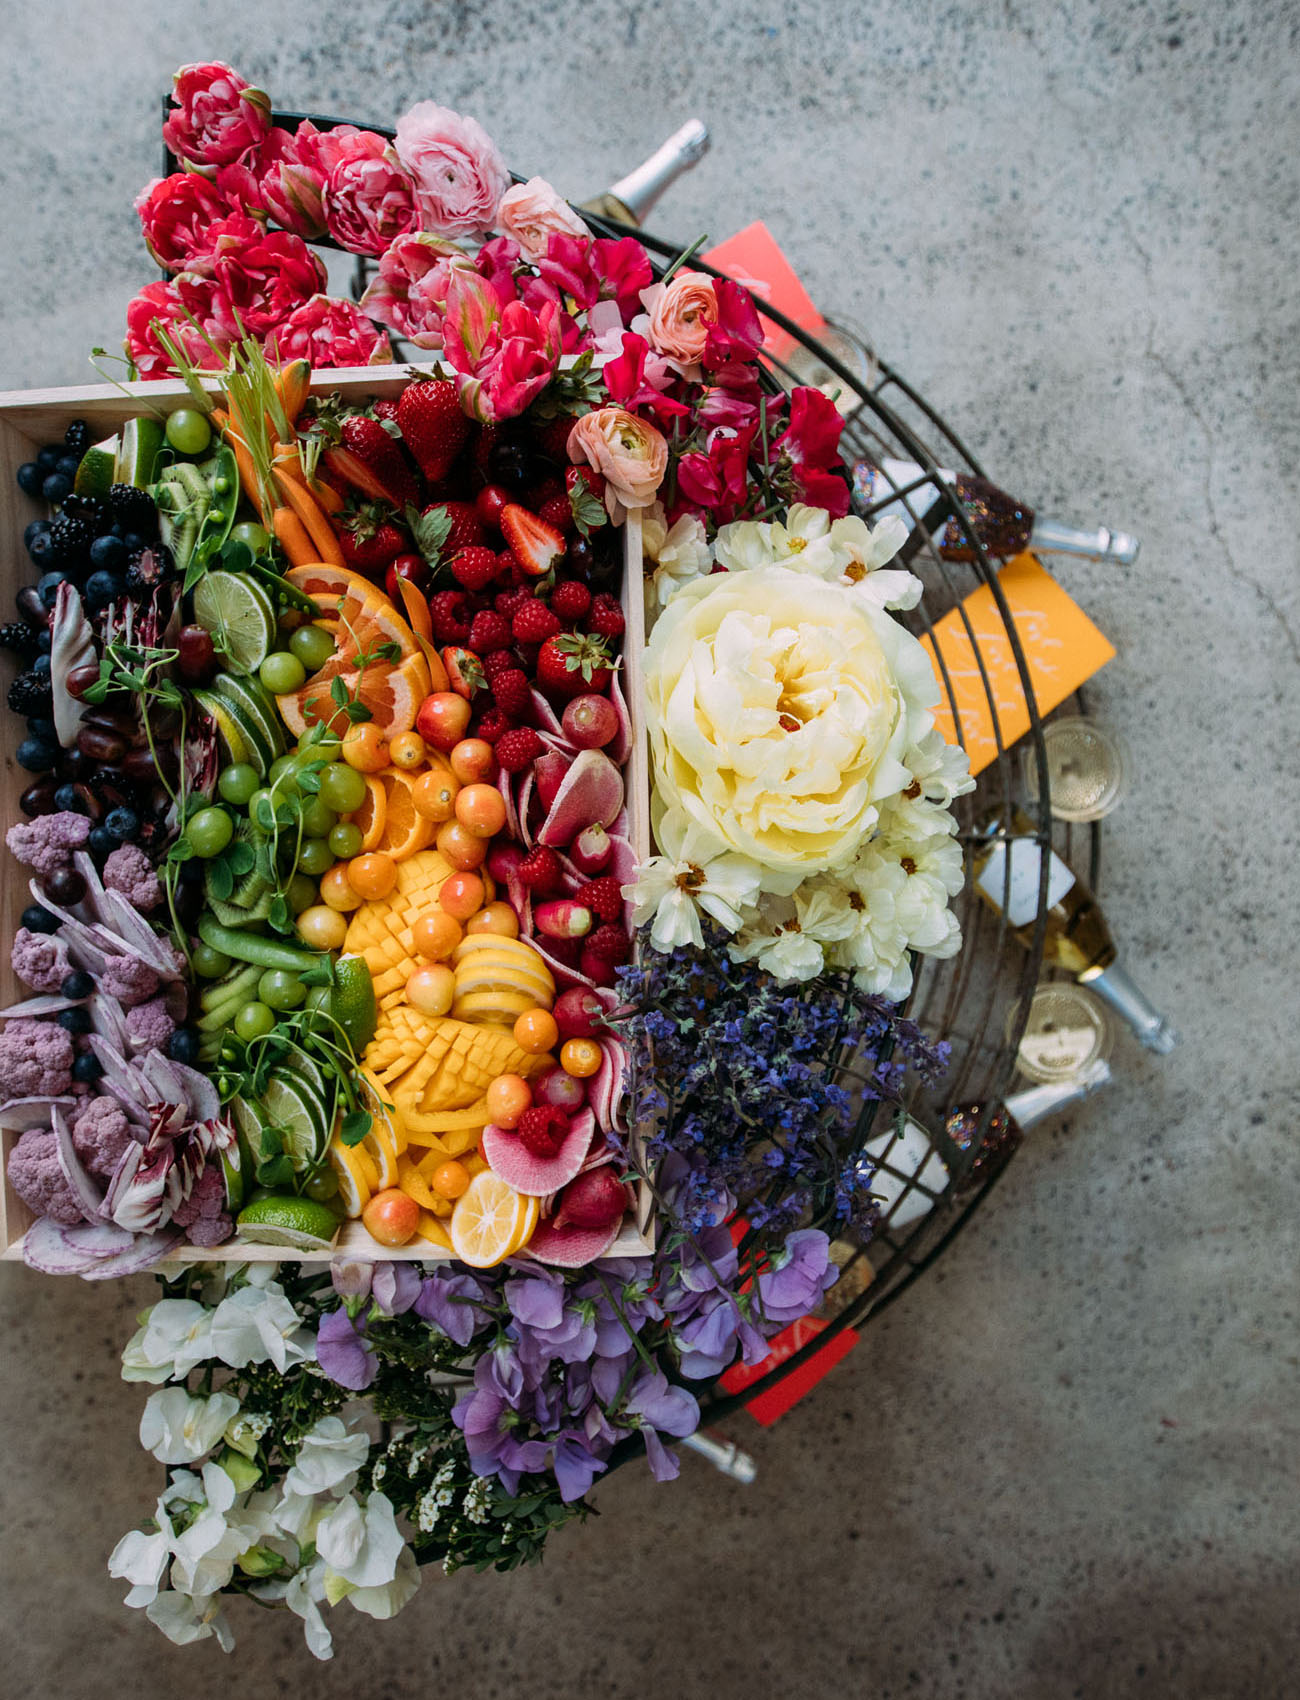
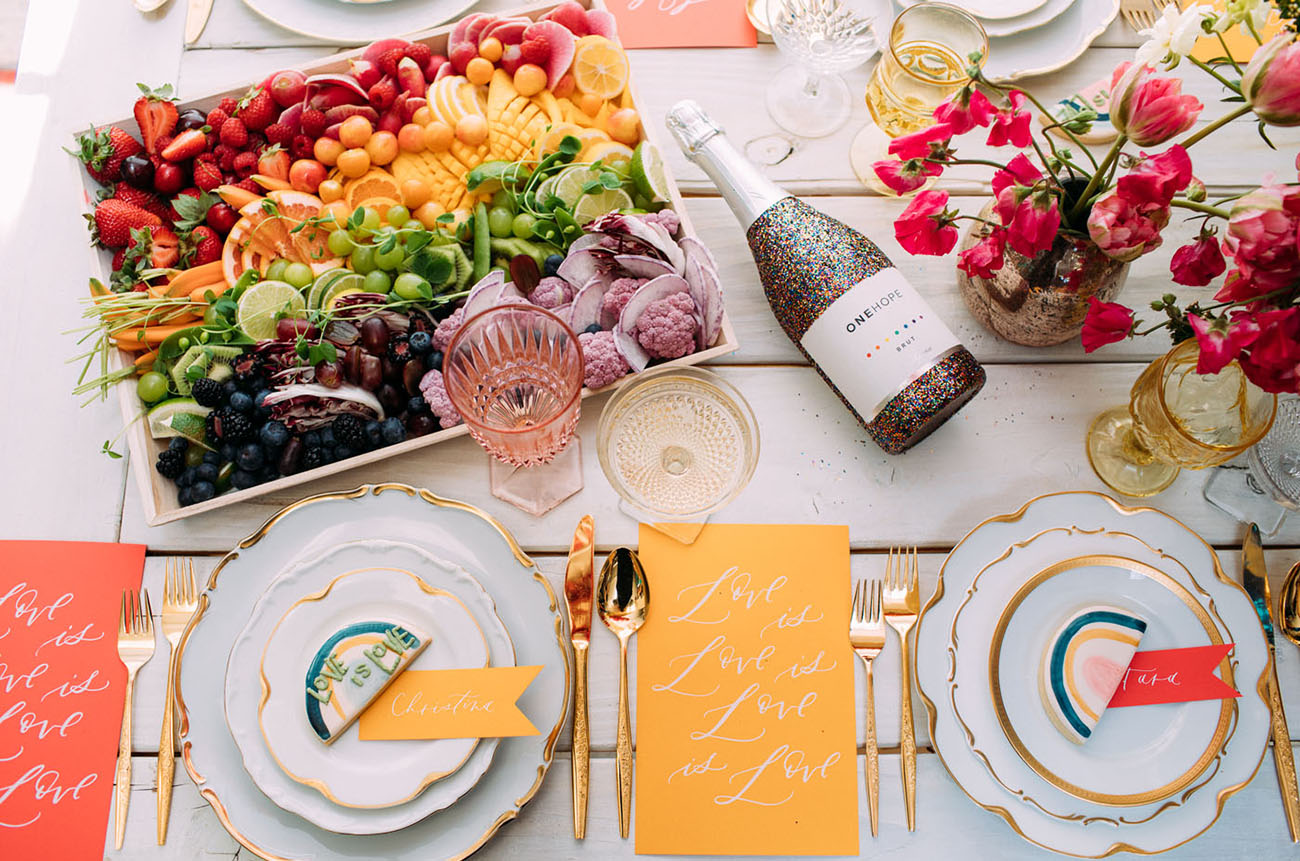
Who agrees that the best food is the prettiest food?! We’re taking a deep dive into the rainbow fruit + veggie platter from this morning’s joyful Pride Party inspiration to give you the low down on how to make it at home!
First of all, if you live in the OC area, Step 1 is to call up Graes Platters and order one for yourself. Obviously, that is the best option here. However…for those of you not quite within OC distance, we’ve got a few tips to pull off a platter of another color with seasonal produce + items in your own kitchen.
Ready? Let’s get to it!
Step 1: Find the Perfect Platter
You’re fruit + veggie tray is going to need some support, which is why we suggest something with a lip. Here’s a good place to start if you don’t feel like rummaging around the kitchen:

Carousel
Carousel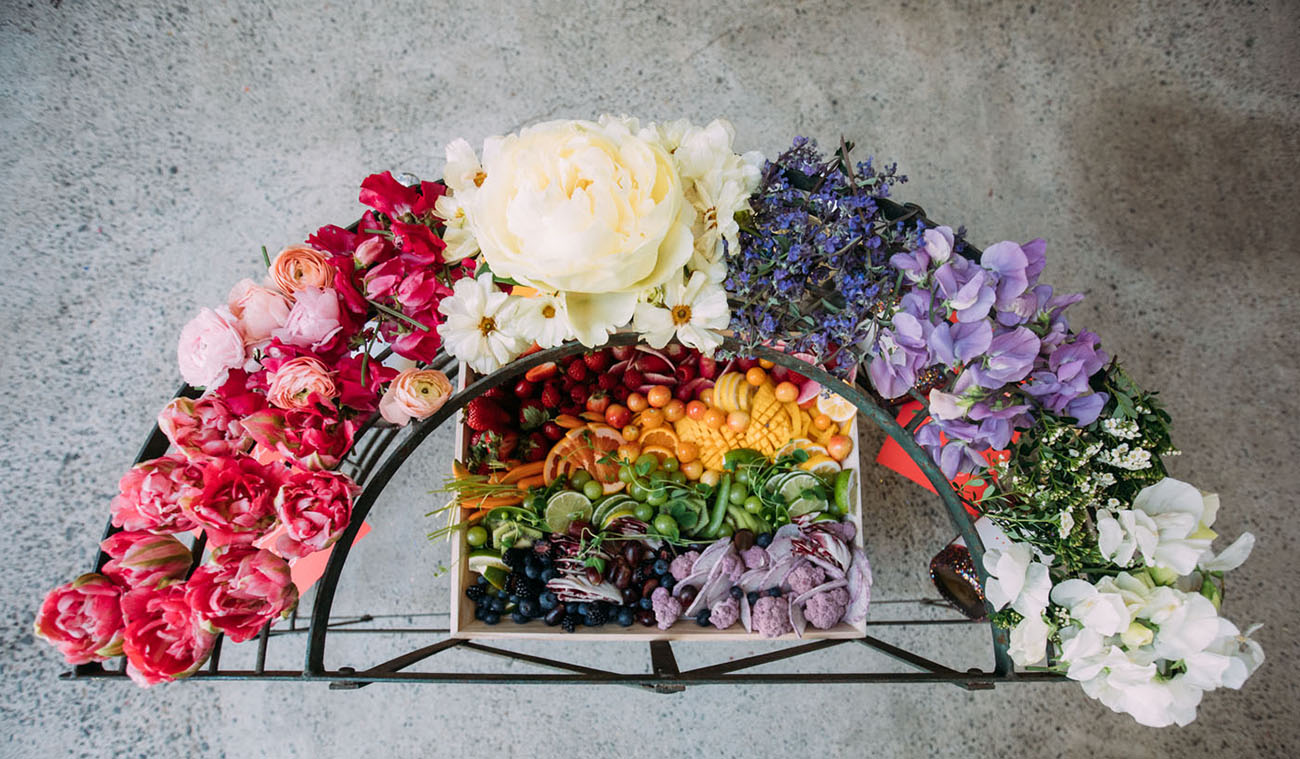
Step 2: Shop for Produce by Color + Season
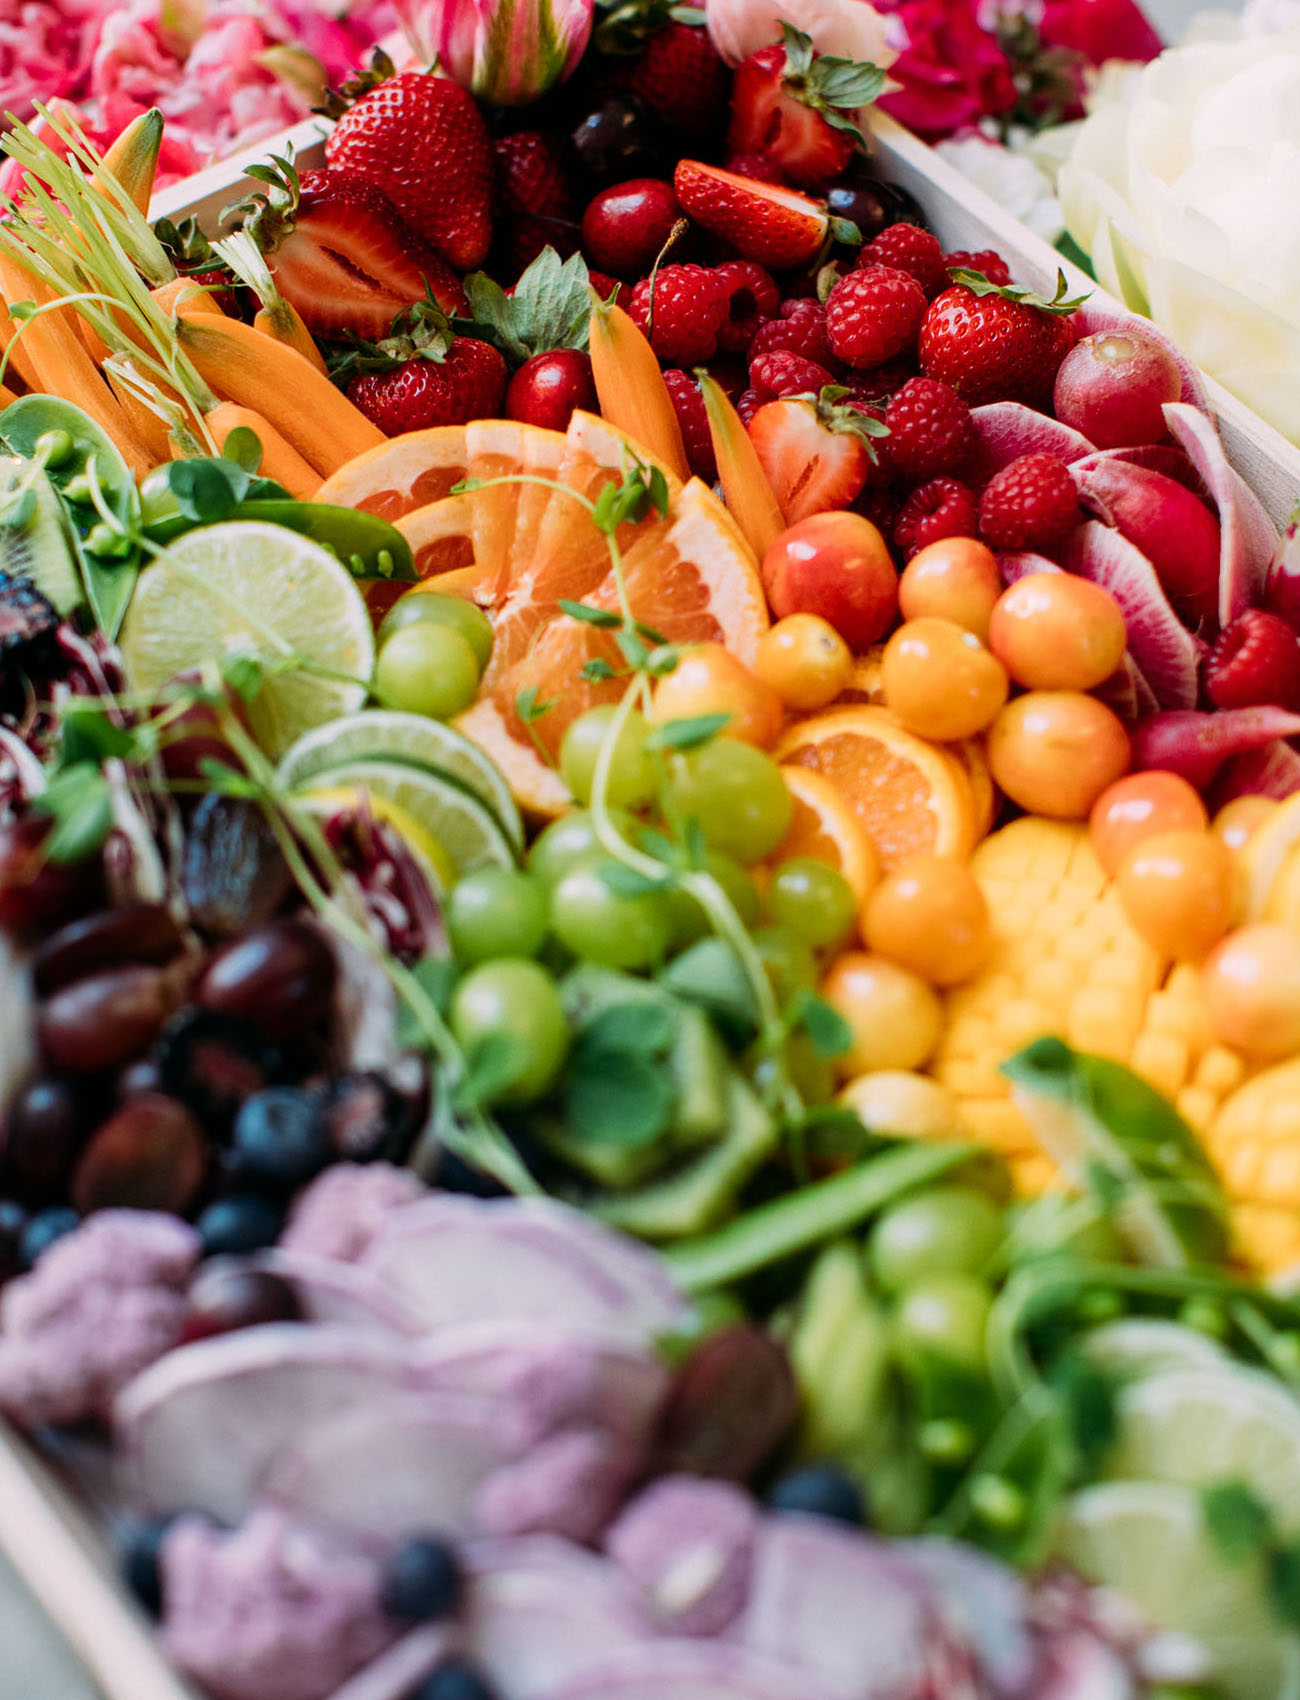
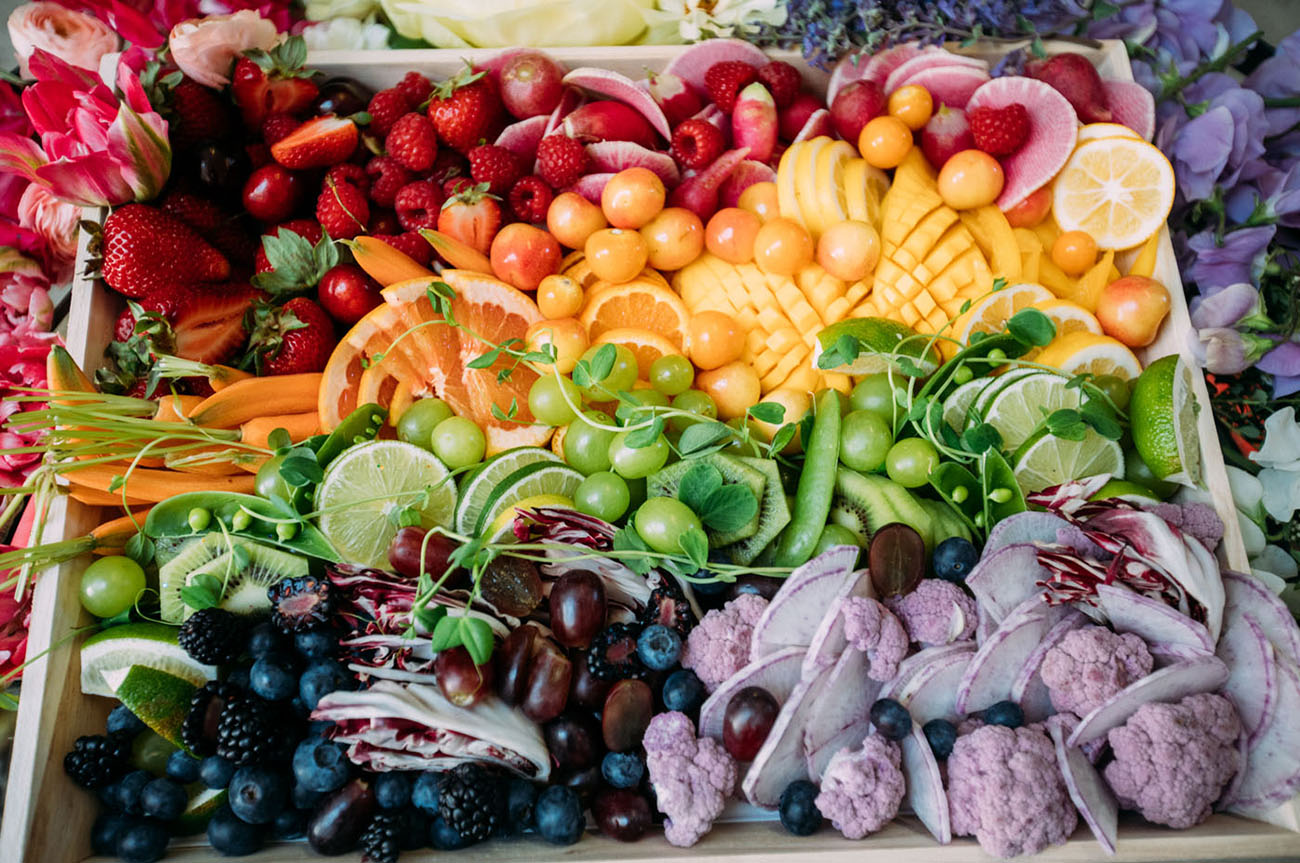
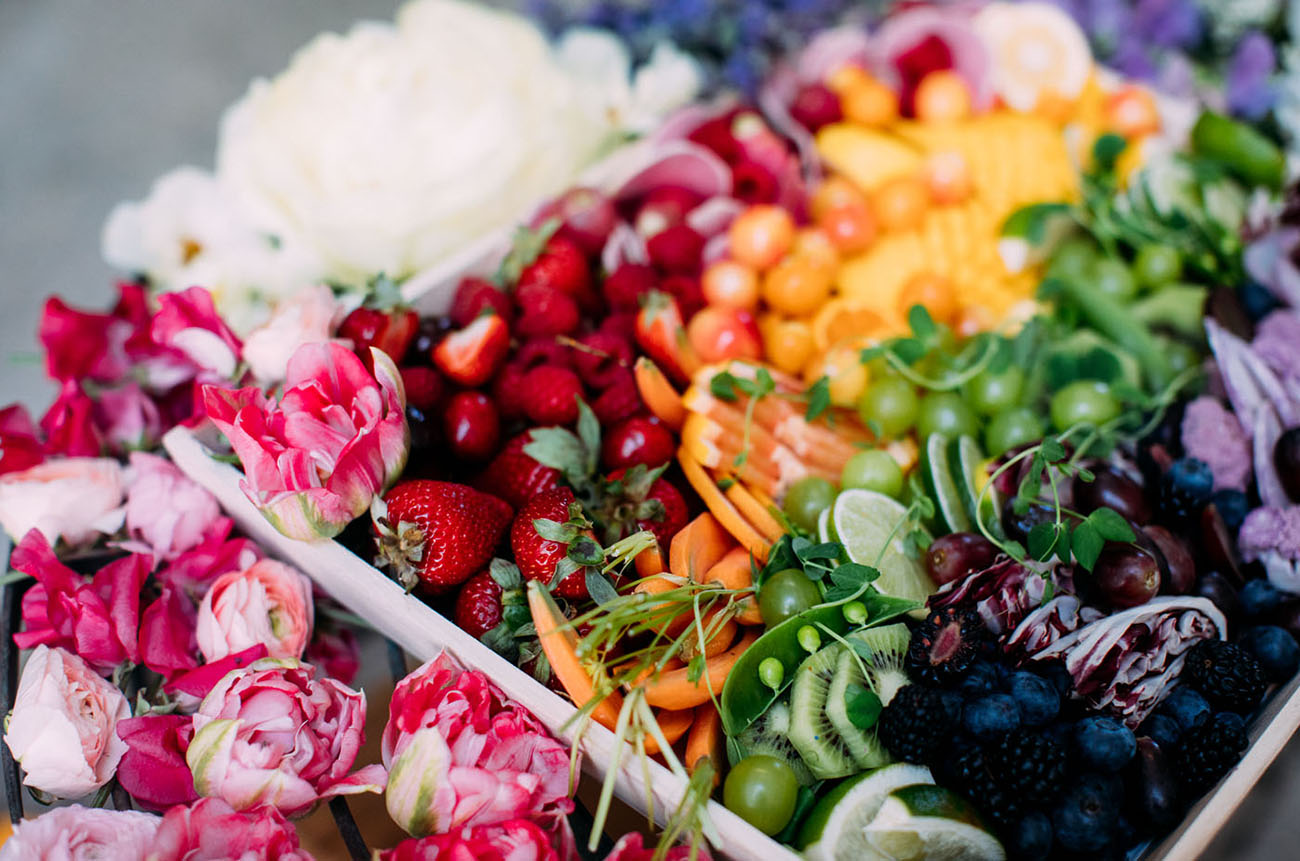
Summer is obviously going to be a great time to create the freshest, most colorful platter. But you can make it work in other seasons, too! The idea is to shop for 2-3 fruits and raw veggies total per color. The more texture + unique shapes you can find, the more interesting your platter will be.
Here’s a summer shopping list to get you started!
- RED: Strawberries, Cherry Tomatoes, Raspberries (Dragonfruit + Watermelon Radishes would be fun, too!)
- ORANGE: Oranges, Kumquats, Carrots
- YELLOW: Mango, Lemon, Bell Peppers
- GREEN: Grapes, Kiwi, Cucumber
- BLUE: Blueberries, Blackberries, Plums
- PURPLE: Purple Cauliflower, Figs, Beets
Step 4: Wash, Chop, and Arrange
Once everything is all rinsed and dried, the creativity begins. You may not want to chop it all up as usual because we’re thinking aesthetics, here. A hulled strawberry just isn’t as pretty as one sliced down the middle with a green stem poking out the top. Using Graes Platters as inspiration, test out a few options like slicing some fruits super thin and leaving others whole.
When it comes to arranging, separate everything on your workspace and begin with the largest item from every group to create a foundation. Try to keep a basic ROYGBIV order, but have fun with it! Layer in each item by fanning out certain ones and tucking others, then watch the rainbow come to life.
Step 4: Add a Flourish

Finally, add a fun flourish like some edible flowers or a few sprigs of mint! Serve alongside some delicious dips (and wine) and let the oohs + aahs begin. Happy snacking!

photography: Zoom Theory // venue name: Sweet Salvage Rentals, Santa Ana, California, USA // event design: Beijos Events // planning: Beijos Events // florals: Third & Park // paper goods: Twinkle & Toast // calligraphy: Twinkle & Toast // catering: Graes Platters // desserts: Frost Your Cookie // tabletop rentals: Cherished Rentals // furniture rentals: Sweet Salvage Rentals // wine: One Hope

Very creative, love it!