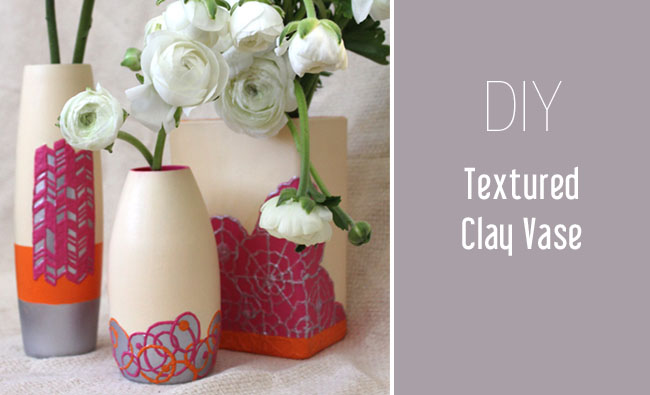
After this morning’s fun + color wedding at The Parker, I thought this DIY was a perfect fit for today. AND I’m excited to announce our newest DIY contributor! Christy is the designer behind One Handspun Day. You may remember this sweet personalized mug DIY she created last winter for the bundled up bachelorette party. I just love Christy’s designs (be sure to check them out here) and her fun + whimsical approach to weddings. Welcome aboard Christy!!
There are so many fun things you can do with these vases: put table numbers on them and use them as centerpieces at your wedding. Add one letter per vase to spell out ‘Just Married.’ And they can also make wonderful gifts for newlyweds – just trace a photo of them to create a silhouette! Let’s see how to make them…
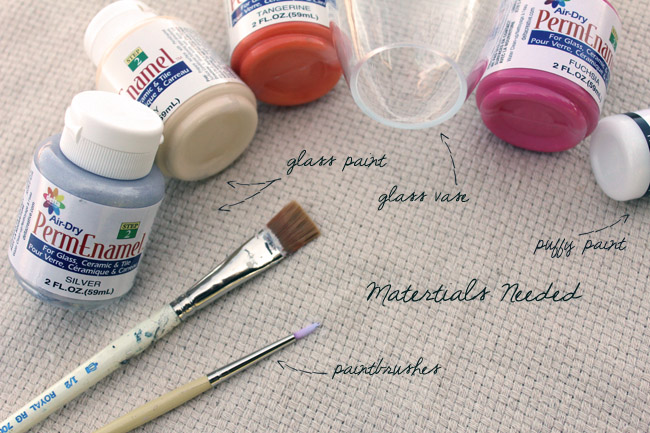
Materials Needed:
• Glass Vase
• Glass Paint (I used PermEnamel)
• Puffy Paint (I used Scribbles Crystal Gel)
• Clear Sealant (I used Krylon Make it Last!)
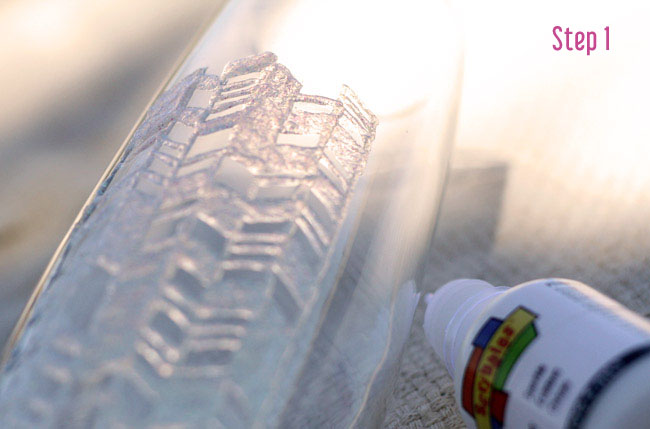
Step One: Draw or trace your design using puffy paint
Draw or trace your design directly onto the outside surface of the vase. You can use any color of puffy paint since it won’t end up showing when you are done, but I recommend using a lighter color that will be easy to cover with paint. I drew a variety of patterns onto my vases freehand, but if you are not feeling confident in your freehand skills then you could also use a tracing method to get the same effect.
A quick and easy ‘cheat’ for tracing on glass is to simply tape the design you want to the inside surface of the glass – that way you don’t have to transfer the design at all and can trace directly onto the outside of the glass! The puffy paint is what will give you that beautiful 3D clay texture effect, so make sure your lines have volume and are raised on the glass.
Allow your design to dry for a couple of hours before moving on to the next step.
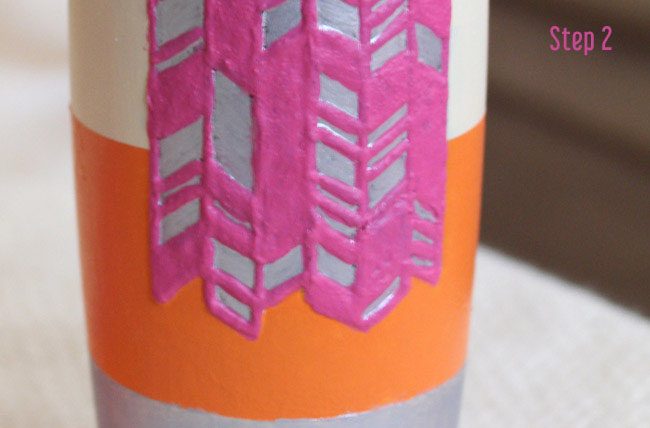
Step Two: Paint your vase
Now it’s time to paint your vase! I was inspired by this year’s spring colors, so I had some fun with fuchsia, tangerine, ivory and silver. You can paint your vase all one color, but the textured parts will show up better if you paint them in a different color. And if you want to give your vase some extra ‘pop,’ try painting the inside rim a different color too! Apply 2-3 coats of paint, waiting an hour in between coats. You’ll notice that with each coat of paint your vase will look and feel less like glass and more like clay!
Step Three: Spray with sealant
The final step is to follow the instructions on your clear sealant and spray your finished vase to protect it. You now have a lovely textured, clay-like vase waiting to be filled with pretty spring blooms!
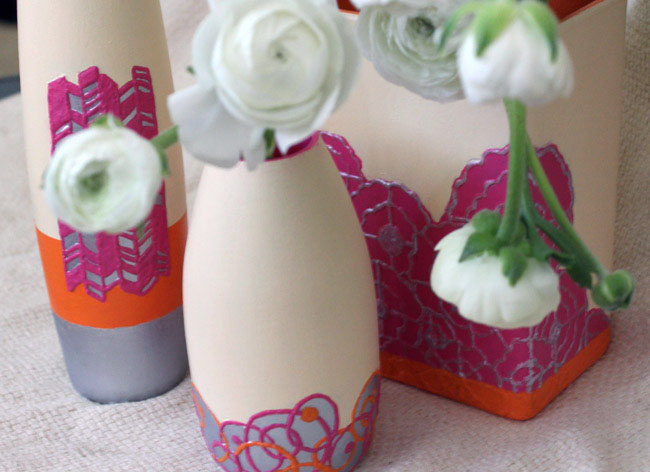

Thanks so much Christy!
DIY created by Christy of One Handspun Day exclusively for Green Wedding Shoes
This looks just lovely – great idea! :-)
these are SO fun! they would make such great gifts in addition to decor :)
Omg what fun! Loving the colors they chose as well. Im going to try this!