
Today’s awesome DIY is being shared from the lovely Jesyka D’Itri Marés! Thanks so much Jesyka + congrats on your recent wedding!!
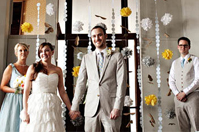
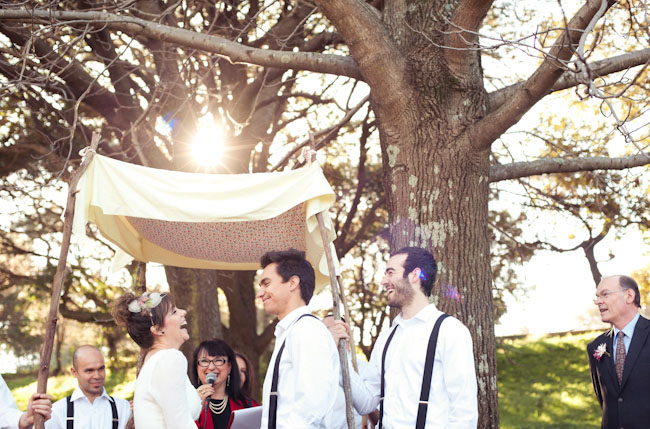
If you love the garlands from Confetti System but don’t have the budget to buy a bunch of them for your wedding, here is a great DIY from Jesyka to make them yourself in the colors for your wedding. The garland would make a great ceremony backdrop as seen here or behind a dessert table, right?! If you can afford the garlands from Confetti System, please do support their shop but if you are more of a DIY kind of gal, then this one is for you! Please do note that from Jesyka, this project is A LOT of work. It took her and 4 other people 15 hours to do two 12 foot garlands. But if you love working on projects then this is a great project to create the garland in your specific colors. Could be a fun project to work on with your bridesmaids, right? :) If DIY isn’t your thing, or you just don’t have time to dedicate to it, do not think twice about spending the money on a beautiful garland straight from the Confetti System’s shop.
Okay, now that the disclaimer is over, let’s get down to business…

Materials:
1. A new pack of tissue in assorted colors. Do not wrinkle! This is very important if you want the lovely straight drapey-ness that really can make or break these garlands. Also, you will probably want some mylar/metallic tissue. In my opinion, the shinys are a crucial detail. :)
2. 4 yards of rope trim.
3. Tacky glue. If you are using metallic/mylar paper, then you’ll (also) need hot glue.
4. A long pointy object to help you pick up the tissue. A knife, razor or even a chopstick will work.
- Rotary Cutter (*Tip* Don’t throw out your old and dulled rotary blades! Save them for paper! )
- A self healing mat
- A straight edge
6. Scissors

Instructions:
Step 1: Cutting the strips. Open a tissue pack. The sheets of tissue should be folded in half horizontally, and then folded over vertically a few times. Unfold it until it is only folded in half. Lay the tissue with the folded side to the top of your cutting mat, and line it up with the guide lines. Place your straight edge along another guide line, and cut 4-5 1/2″ strips from the sheets of tissue.

Step 2: Picking up the strips. Using a knife, chopstick, or other thin and long device find the center of the first stack of cut tissue, and place them over your index finger. Firmly hold this stack while you do the same with the next, and gently place the second stack over the first. Repeat until you have four of five stacks (whenever you feel like you have enough strips to make a nice pouf).

Step 3: Twist the strips together. At the center of your stack of strips, bend inward, and begin to twist the tissue strips as if you are wringing out a rag. Continue to twist until the twisted part measures about 4″ total, with the center of the twist being the center of the stack of strips.

Step 4: Twisting on the rope. Place the center of the strips over the rope trim (It really helps to have your rope secured on both ends). Bring each end down over the rope. While twisting, bring the back piece over the front piece. Continue like this until you have 3 or 4 twists. *It is important to twist the tissue with each continual movement! That is how you get the nice tight rope shape that mimicks the rope trim, and it is an important, if small, detail * Note: The tissue may break a in a few spots at this point. Do not be discouraged. Save the fall out for a jar of confetti!

Step 5: Gluing. Squeeze a small dollop of glue at the point where the last twist meets. Let dry. (Use tacky glue for tissue, and hot glue for mylar. Hot glue is the only thing I have found that works for mylar! If you have any other suggestions, please let me know!)

Step 6: Fluffing. This is the finishing touch, and one of the most important steps. If you neglect to “fluff” your tissue tassel, it will look limp and lifeless. This is also potentially the most time consuming step. You need to go through each individual strip and pull it apart and away from the other pieces. Do this until you have a nice shape all around. When done right, they always remind me of little ball gowns or ballerina skirts. The tissue should come out at least a 90° angle from the twists.

Step 7: Trimming. Take your scissors and trim off the uneven pieces of the tassel as if you would trim hair. This way your tassels have a nice clean edge at the bottom. Collect the trimmings in your jar of confetti!

Super pretty, right? And something to save for after the wedding also!


DIY information and photos courtesy of Jesyka D’Itri Marés for Green Wedding Shoes
What a cute decorating idea
Super cute! Street cred for the Aileene’s.
This is such a great project. It definitely looks time-consuming, but totally worth it if you have more time than cash. I love Confetti System’s work too.
love this – so creative!!
I love Confetti System and I made these tissue garlands as a backdrop for my dessert table. SO much cheaper to DIY and there is a bit of time that goes into making it, but the reward to see it all come together is so worth it!
Cute and great for outdoor weddings!
Great Tutorial! I’ve always admired these tassels in wedding photos and just might have to attempt it for home decor.. so pretty! The color combinations are endless!
this is the coolest looking thing!!! thanks so much for the step by step!!
This is beautiful — I love this!! Can’t wait to make it this weekend. Thanks :)
where can I purchase the silver and gold metallic tissue paper I can’t seem to find them online or maybe I’m searching the wrong words. Could you direct me?
thank you so much for this fabulous tutorial! i linked to it on my post ‘merry and bright christmas: simple last minute touches to your holiday table decor’ http://journeywithjohnsons.blogspot.com/2013/12/merry-and-bright-christmas-simple-last.html
This seems like a great project for my nieces! I know this is an older post, but I’m glad I found it.
Very neat! I’ll be recommending this to my sister for my nephew’s birthday!
Absolutely brilliant! Great pocket-friendly project ideas you have! Good Job.