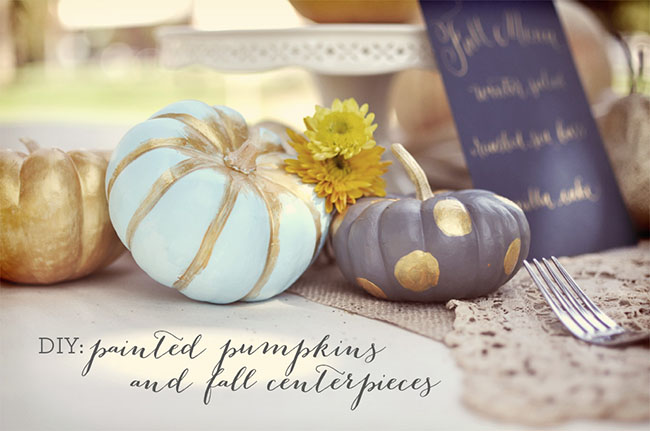
We love fall at Smitten on Paper so we were really happy to put together a fall inspired DIY post. We took a different take on pumpkins this year and really dressed them up! Long gone are the days of pumpkin carving, now it’s all about paint, glitter and patterns! Take a look at how we transformed our pumpkins into a gorgeous centerpiece…
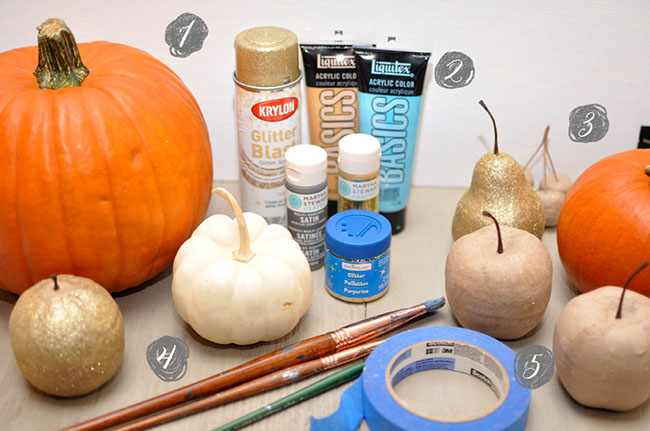
Materials:
1. pumpkins of all sizes and colors (of course)
2. paints – we used the following: glitter spray paint, satin finish acrylic paint, and metallic finish acrylic paint
3. extra accessories – we picked up some faux pears & apples
4. paintbrushes
5. painter’s tape

Step 1: Start painting your pumpkins. You’ll want a good base if you plan on painting patterns or adding details like glitter. We mixed white, yellow and a bit of gray to create ivory for this first pumpkin.
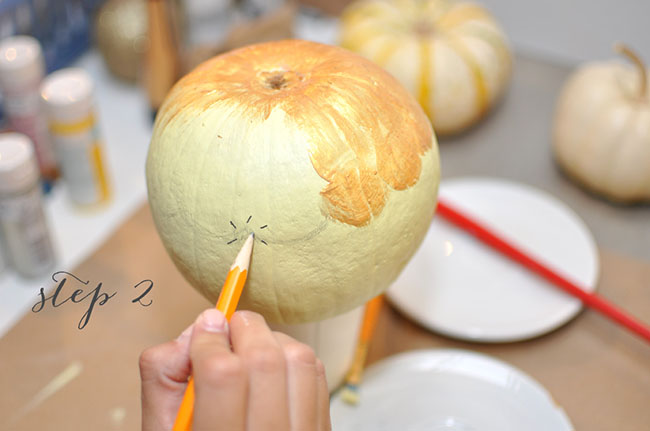
Step 2: Roughly draw out your pattern if it’s a bit complex. We decided to do a scallop base for this pumpkin, so we quickly drew the shape around the pumpkin.
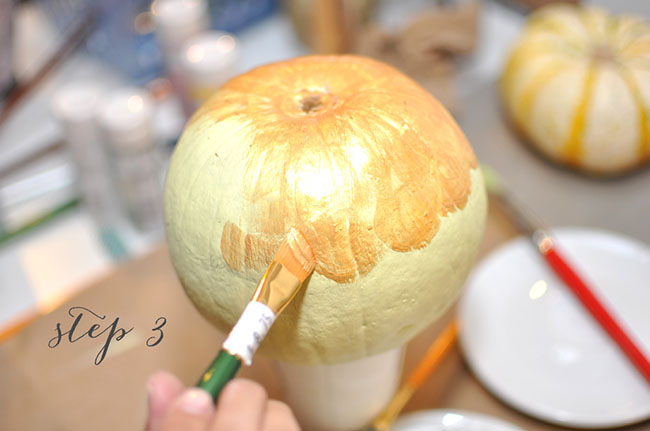
Step 3: Paint away!!! This is the fun part. You can get really creative with your pumpkins. We did a couple different things with our pumpkins which you can see. The satin finish paints will give your pumpkins a pretty solid base and do a great job of covering up the true color of your pumpkin. The metallic paints are great for a textured antique look to the pumpkins and perfect if you want a bit of the color beneath it to show through.
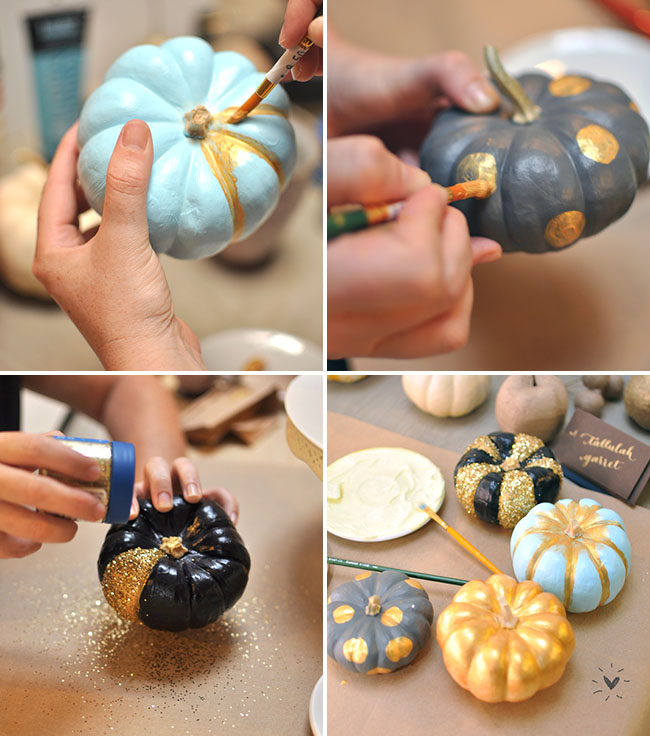
Some highlights of what we did:
We did a couple different things with our pumpkins. We used the metallic gold as an all over cover which is great if you want the antique look. It’s so classy! We also tried using the metallic gold as an accent in the natural creases of the pumpkin as well as polka dots! Our adventurous pumpkin was painted in navy and covered with glitter! There’s really so much you can do.
Now all you have to do is set up your centerpiece! This really makes such a fun setting for a fall dinner. Carve out the center of one of your pumpkins and add some flowers (you’ll want to carve the pumpkin before you being to paint it). Add some hand done place cards and menus and you’re set. This project is really easy and you can even get the little ones involved!

DIY created exclusively for Green Wedding Shoes by Smitten on Paper.
The painted pumpkins are the best idea. They are so festive, but still so fall!
I love, love, love the gold and blue pumpkin!
May I ask what font the directions on the pictures is?
:)
Very lovely. Especially the dots and the glitter.
Love this idea! Such a fun activity for the girls in the family to do for a girls night. With so many options for fall weddings, DIY projects are sometimes what set each bride apart from the other. Thanks for this post.
What whimsical and fun decor!
What is the font used on the photos in this post, the scripty one. I just love it! Does anyone know?
It’s called Bombshell Pro by Emily Conners.
http://www.myfonts.com/fonts/emily-lime/bombshell-pro/
I would totally go for it, adorable and cheap too; what can you ask for more?
these pumpkins are awesome :X love the fall weddings
Love.
Love.
LOVE!
Creative, inexpensive, beautiful!
Yipee! Love those pumpkins!! You should enter them into Craftbaby’s DIY a Pumpkin Challenge! :)
http://www.craftbaby.com/contests/34/diy-a-pumpkin
they look super impressive, will be giving these a go this weekend although i’m not sure i’ve ever seen pumpkins as small as yours there. heh
These are so adorable, I have to try this DIY project for my house.
Love this DIY :)
This is an excellent DIY to teach my kids. Thank you for this post.