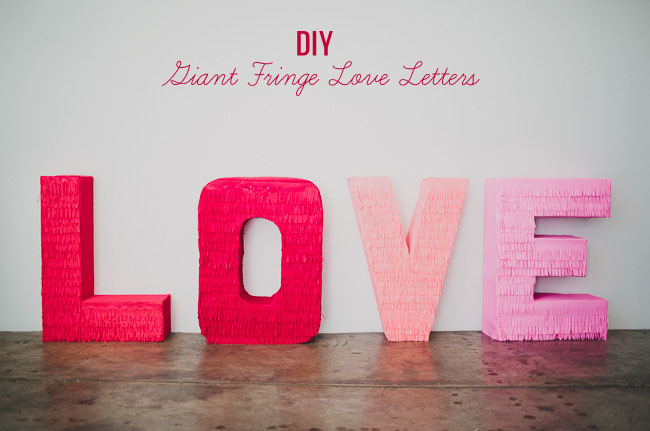
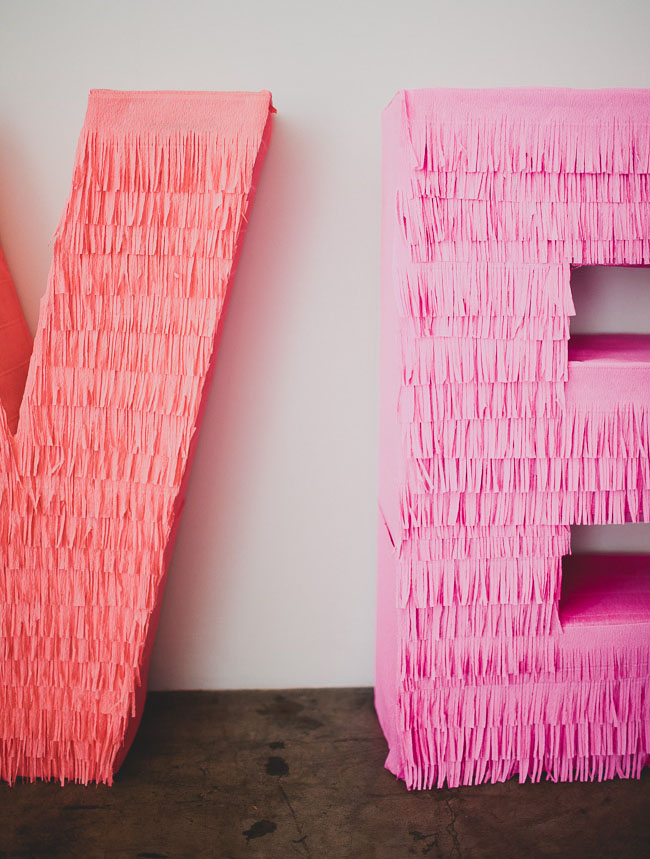
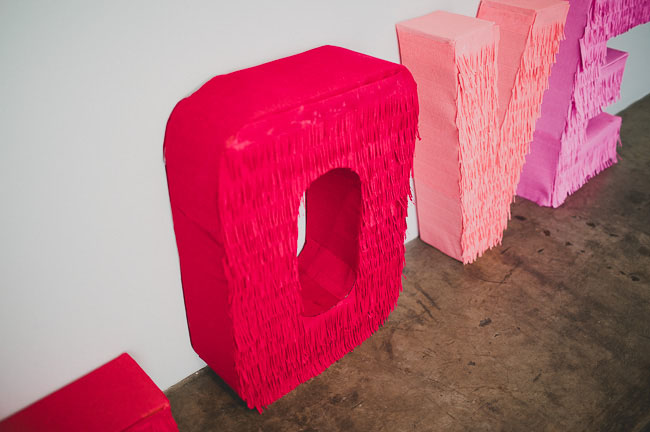
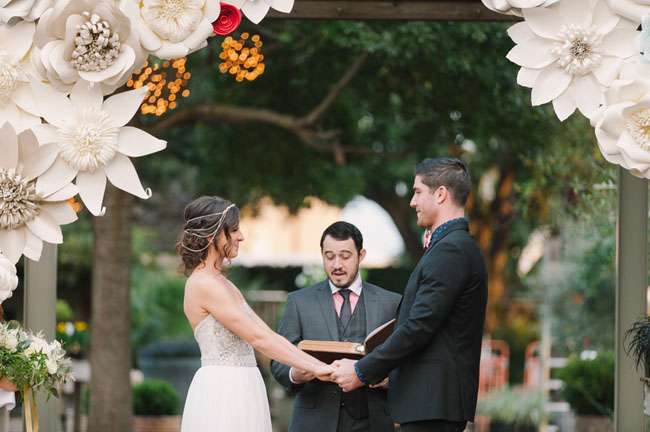
Today we are sharing how to make those giant fringe LOVE letters you saw from our GWS booth from The Cream Event! These letters would make a super fun ceremony backdrop, or reception decor piece! You could even spell out your new last name, nicknames or other sweet words! Love all the possibilities!
One thing to note before we share how to create these…we wanted to use crepe paper for these and had a hard time finding crepe paper (in the colors we wanted) in any stores, but then we discovered Carte Fini and they have the BEST selection we have found! So many different pretty colors and great customer service. Highly recommend them if you are looking for crepe paper. Another note about crepe paper, it is much thicker and more flexible than tissue paper, so it helps make the fringe on these letters much sturdier. We love crepe paper! :)
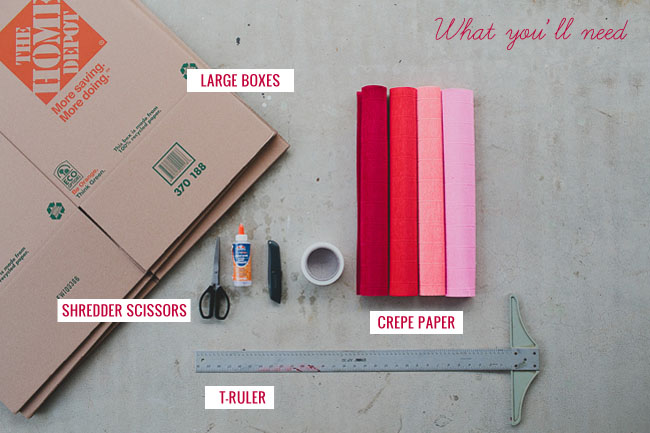
What You’ll Need
• 4 large boxes
• Box cutter
• Crepe paper (we used these colors, but you could use any you like – Red Velvet,Coral, Salmon, Pink Suede)
• Shredder scissors
• Duct tape
• T-ruler
• Glue (paper specific)
Our letters all stand 30″ tall and 22″ wide. You could make your letters smaller or larger also!

Step 1: Measure 22″ x 30″ square on your box. This is the space you will use to draw your ‘love’ letters in. Draw your letters in each box individually (we used one box per letter) and in the largest space on the box, inside the slats. Use a t-ruler to make your lines exact. We drew all our letters to have a 7 inch width.
*Note: our ‘V’ letter has a deeper bottom than 7″ due to spacing. As long as the arms of the ‘V’ are 7″ you are good! For the ‘O’ we drew a box in the middle that had 7″ spacing on the sides, so the middle was a square. Then we free-handed the curves of the inside.
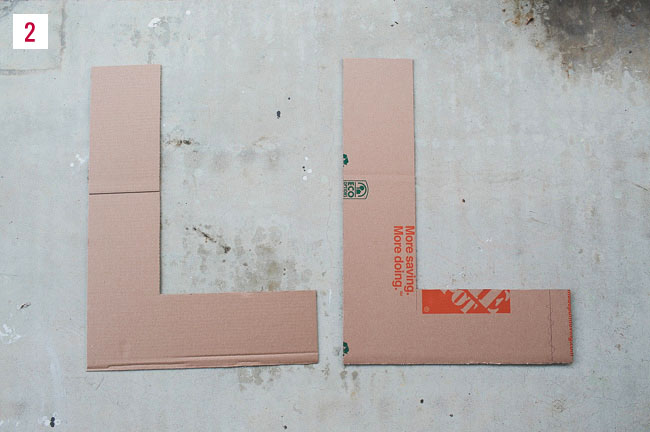
Step 2: Cut your letters out with the box cutter and make sure you are doing this on a surface that can’t be damaged by the cutter (i.e. a cement floor, place an extra box underneath). Since the boxes have two sides, cut through both layers so you can save time with having to cut out the other letter again.
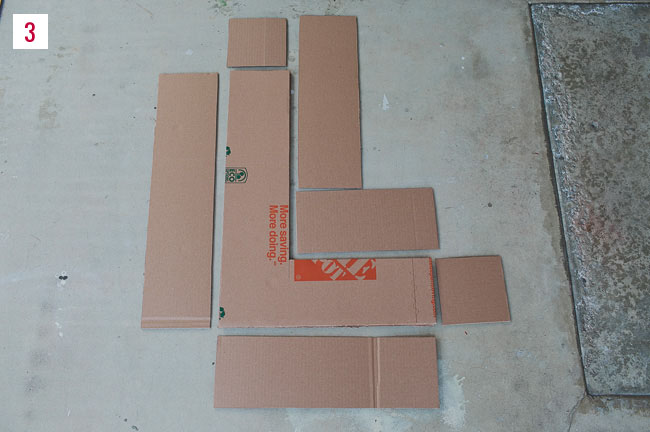
Step 3: Once your letters are cut out, measure the sides to be the depth of your letter which gives your shape its the 3D quality. To measure these, figure out how many sides there are on your letter, and make that many pieces in the same length, with the width of 7″. Cut these out.
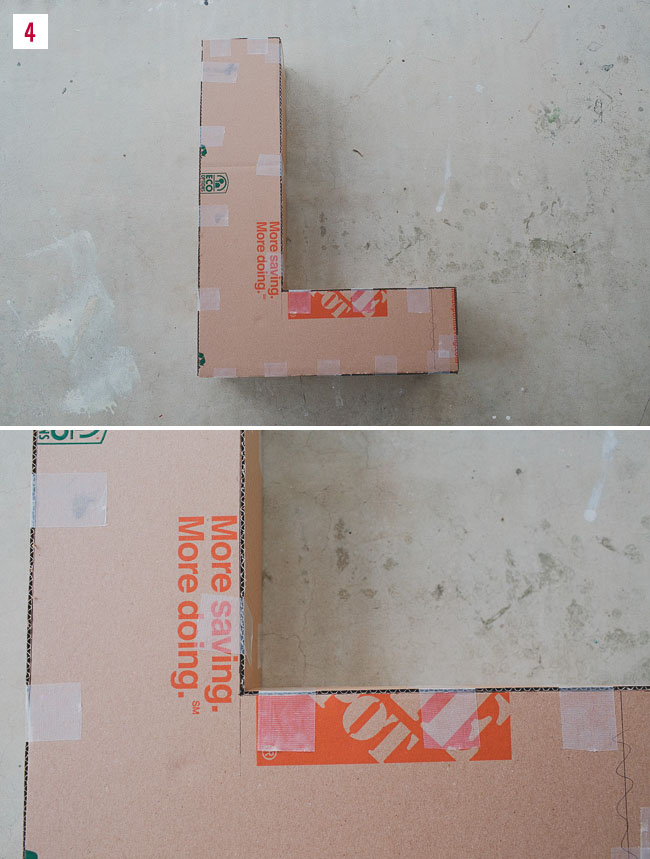
Step 4: Now that all your pieces are cut out, tape them together. We used small pieces of clear duct tape to put the sides together.
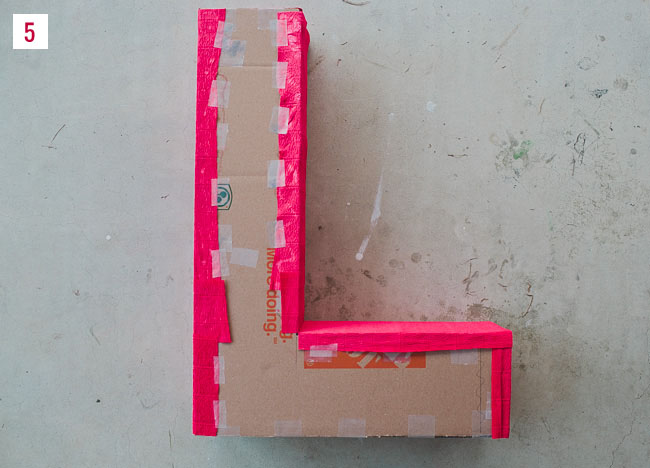
Step 5: For the fringe and paper, we only covered the front part of the letter. For the rest of the sides and insides we glued the crepe paper flat around the sides. So start by covering the insides and sides with crepe paper and glue down. You can stretch these pieces of paper to give double the length needed.
*Note: For the top and ends, we tucked the paper down the sides to give the paper a “seamless” look so you couldn’t see the edges of the box.
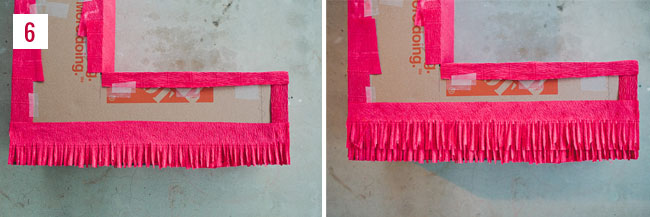
Step 6: Cut your fringe pieces out for the front. We measured strips of paper for each row and cut. You can leave some extra length on the side and then trim down later if needed. Start at the bottom and glue piece by piece going up the letter. Make sure to have each piece cover the gap from the fringe underneath.

So fun! If you make these fringe letters, we’d love to see how they turn out, so please share on Instagram along with the hashtag #GreenWeddingShoesDIY
Thanks to Katie Pritchard for the photos!
So cute!! How many rolls of crepe paper do you need per letter? Thanks!
Freaking awesome! These would look amazing at any wedding or engagement party
These letters as a backdrop decor are fabulous! I think they would add a great vibe to most venues!