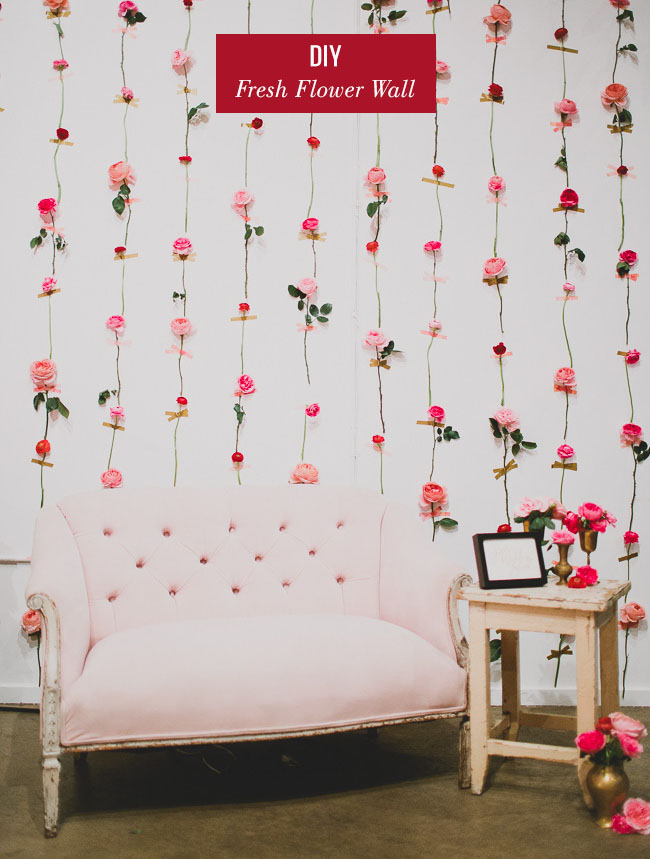
If you loved our fresh flower wall from our GWS display at The Cream then you’re in luck! We are sharing the simple + easy DIY on how to re-create it today! We love how whimsical + pretty fresh blooms look on a wall and think this would make the most perfect ceremony or photo booth backdrop! We saw tons of you snapping Instagrams against the wall and loved it!
Big thanks to Flower Muse who supplied us with the prettiest shades of pink flowers for our wall!
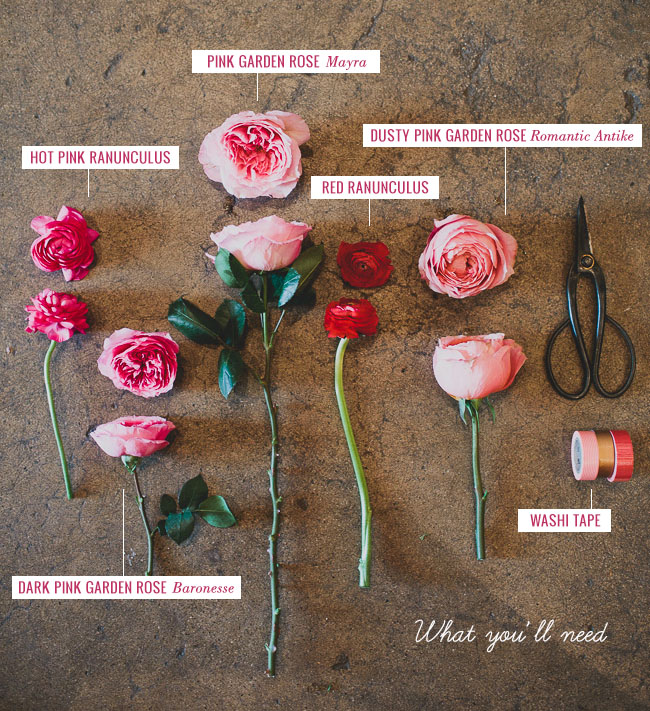
What You’ll Need:
• Hot Pink Ranunculus
• Dark Pink Garden Rose – Baronesse
• Pink Garden Rose – Mayra
• Red Ranunculus
• Dusty Pink Garden Rose – Romantic Antike
• florals scissors
• washi tape (one of the gold colors we used)
*Tip: We bought both traditional washi tape and Scotch brand washi tape in variations of 3 different colors/patterns. We found later that the Scotch brand held up the flowers stronger than the traditional washi tape, so we recommended using Scotch brand as the other washi tape didn’t hold up.
Prep: We ordered our flowers using Flower Muse. They have such a great selection of blooms and we can’t sing their praises enough! Our flowers arrived 2 days in advance to the event. Once they arrived, we cut an inch from all the stems and soaked the flowers in cool water and placed in our garage until we were ready to use them on Sunday morning.
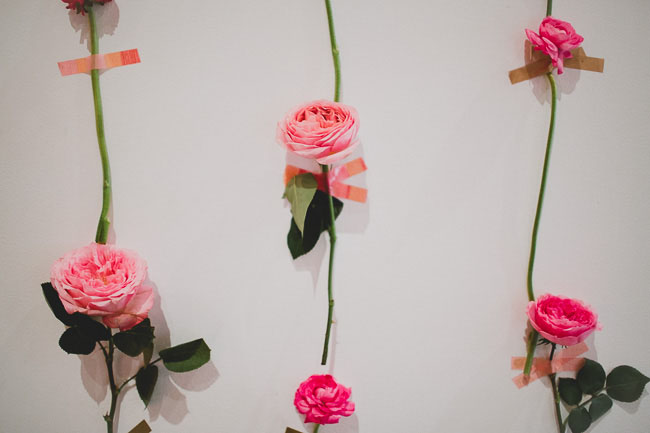
The day of your event, you’ll want to start by stripping your stems of extra leaves and trim to desired lengths. We used varying lengths so that flowers would be different in height next to each row. Spray flowers with water to help keep moisture in them as you work. Also weed out crooked flowers that bow too much as they are harder to maintain a straight line on the wall when you go to tape them up. Measure on your wall how far apart you want each row of flowers to be and mark with a piece of tape/pencil. You can stagger the top height as well, we just chose to keep it the same.
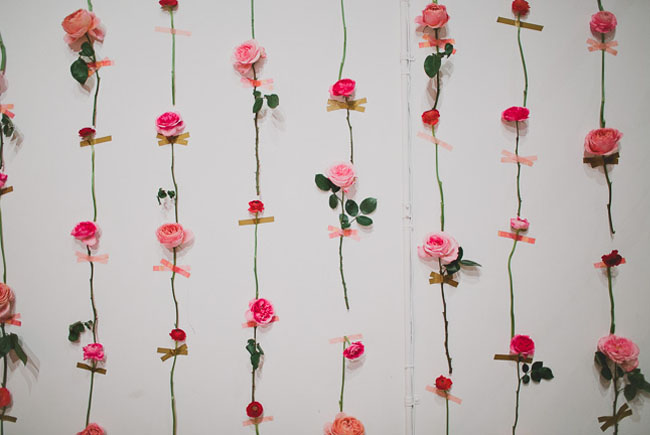
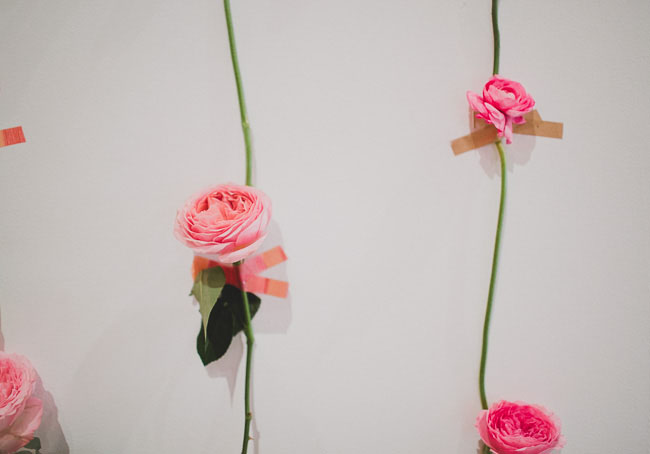
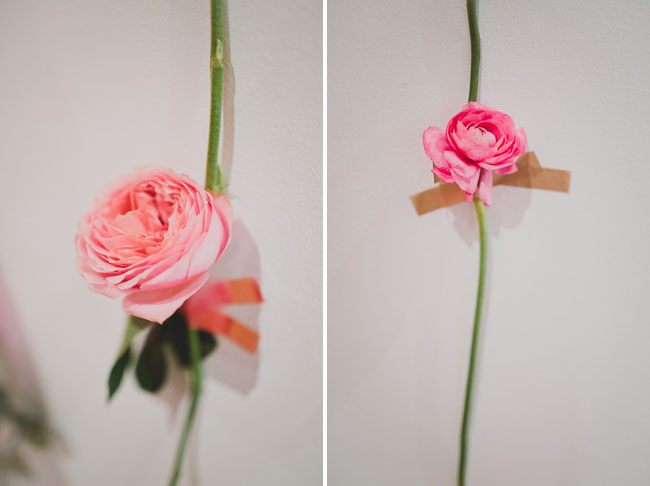
Start at the top of your wall and begin by moving down as you attach flowers. Tape a flower using a narrow ‘x’ design (see below) to help hold the flowers at a stable strength.
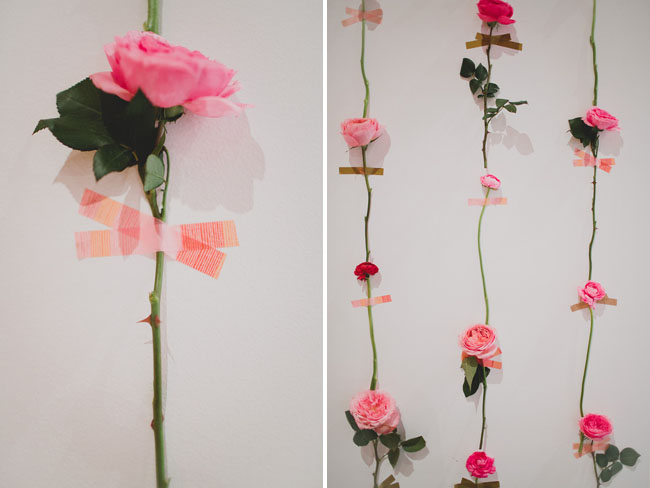
*Tip: Flowers with flimsy heads need taping closer to the top of the flower, like the ranunculus. Also good to note, leaving some leaves on the stem add texture + color.
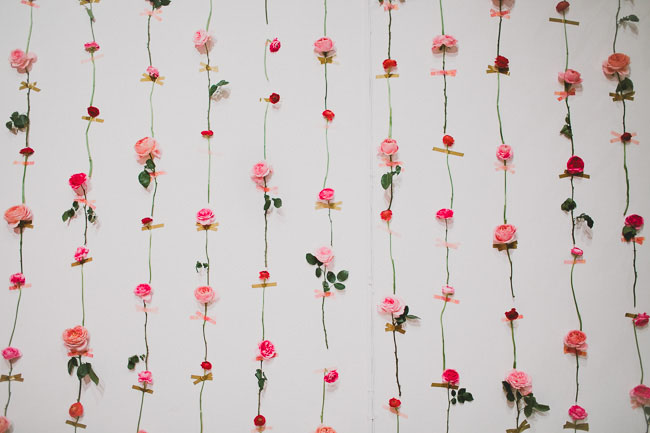

So lovely! And of course you could recreate using different flowers, these are the ones we used since we wanted to keep a pink ombre feel with our wall. A few other helpful things to note: It took us 3 hours to complete the wall with 3 people working on it; We started the wall at 10am and the flowers still looked great at 10pm. :)
If you create your own fresh flower wall, we’d love to see how it turns out, so please share it on Instagram along with the hashtag #GreenWeddingShoesDIY
Thanks so much again to Flower Muse for the pretty florals!
Lovely!
Sí al sí quiero
Thank you for the great detailed tips…it makes a lovely backdrop.. I can not wait to try this.
This is amazing, so simple yet such a striking effect! Perfect for spring wedding.
Love this! I would want to keep it in my home but my cats would like it too much :)
here’s a cool flower wall, too! love this one and the tips are right on. http://www.campmakery.com/content/fabulous-floral-wall-wedding-backdrop-idea
How many flowers did you need to order? And how big was the surface area that you covered? Wondering if this could be done on a flat sheet that could then be hung on a wall….
I like flowers and are really impressed when you see this way of you
Love this! I would want to keep it in my home but my cats would like it too much :)
I like flowers and are really impressed when you see this way of you
Almost an elixir! Great 🙂
Love this! I would want to keep it in my home but my cats would like it too much :)
So pretty, can use it for photo background. But I think use dutch tape will more impressed.