
This morning we shared a few fun ways to incorporate marbleized details into your day. One of the easiest ways is by creating your own marbled paper – which you can use for confetti, favors, invites – so many ways! Our DIY contributor Smitten on Paper is sharing how easy it is to create your own marbled paper, so I’ll let them take it away…
Materials
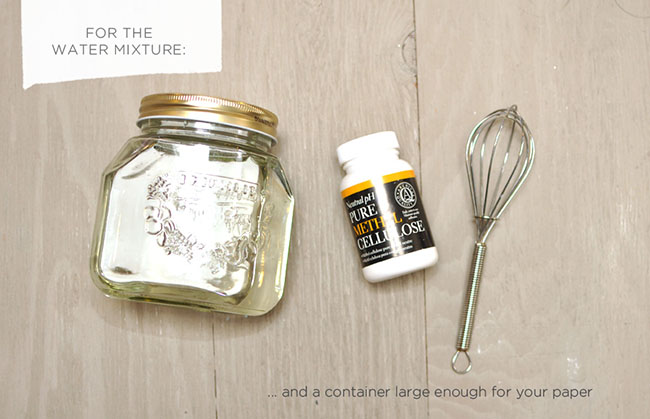
For water mixture:
• 4 cups of water
• 1/4 cup of Methyl Cellulose
• Whisk
• Container large enough for your paper to fit into
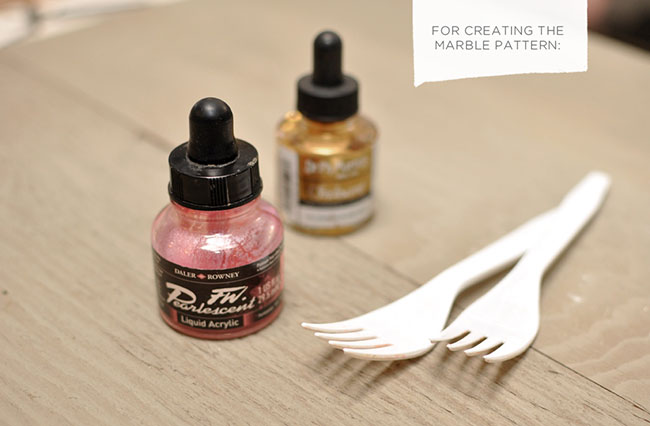
For Marbling:
• Liquid acrylic
• Forks or toothpicks
• Cotton paper
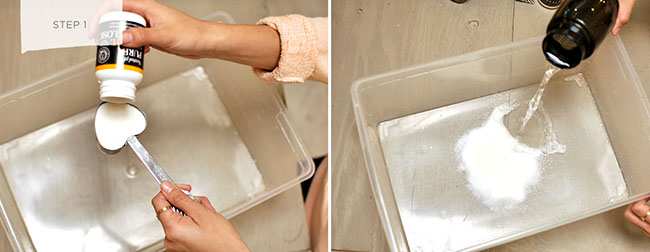
Step 1: Mix the methyl cellulose and water together in your container. We used a storage container we had lying around, but you can use a cookie sheet or tray. It just needs to be deep enough for at least an inch of water and wide enough for your paper. Once you have mixed the water and methyl cellulose together, let it sit for about an hour while mixing it about every 15 minutes. You want a thick, gel-like consistency, this keeps your paint from sinking to the bottom. Bubbles are bad so if the surface of your mixture is covered in bubbles, place pieces of newspaper on top, give it a gentle pat and then lift it off. This should remove the bubbles.
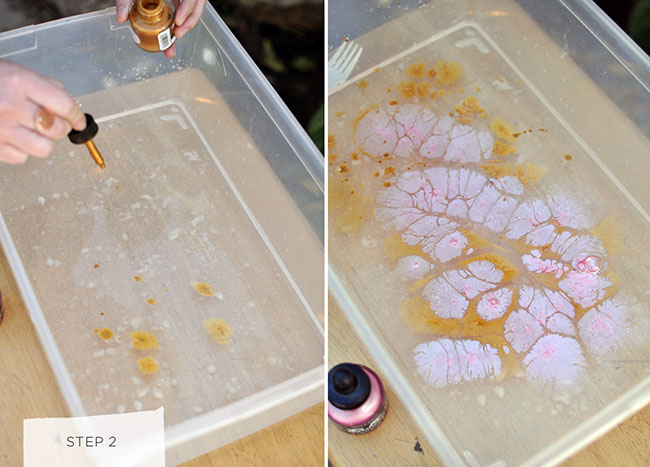
Step 2: Add your liquid acrylic. We used calligrapher’s ink because it was a perfect consistency and we didn’t have to worry about watering down normal acrylic paint. We used gold and hot pink!
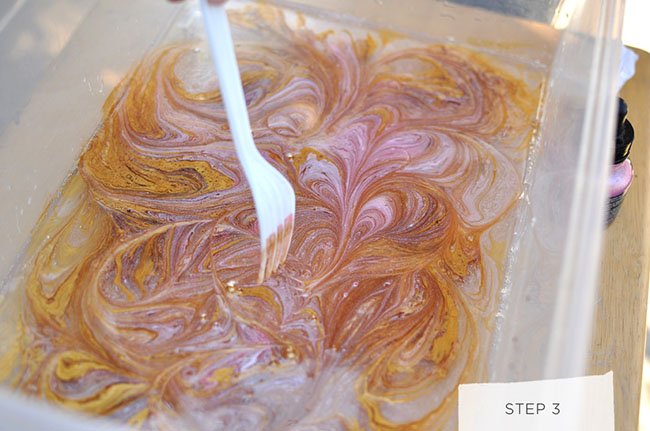
Step 3: Now create your patten! You can use toothpicks or a plastic fork like we did (real fancy).
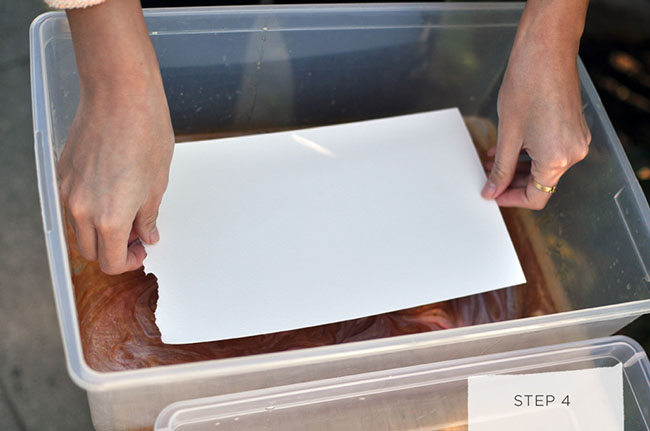
Step 4: Place a sheet of paper on top of the mixture and gently pat the entire backside so the entire surface comes in contact with the paint. You only need it sit atop the mixture for about 30 seconds.
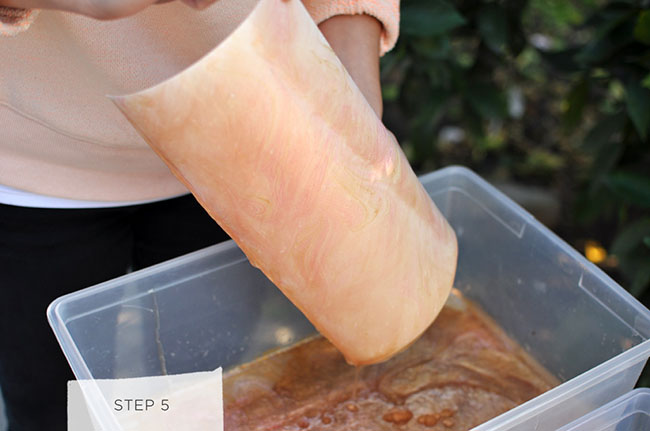
Step 5: Grab one corner of your paper and lift it, give it a little shake so the extra gel runs off.
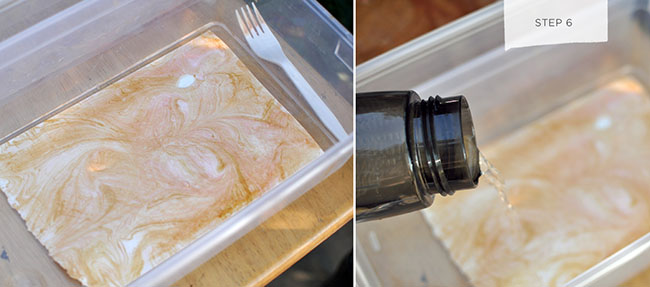
Step 6: Place your sheet of paper into another container that is filled with a couple inches of water. Gently pour water over the paper. This will help wash off the excess gel.
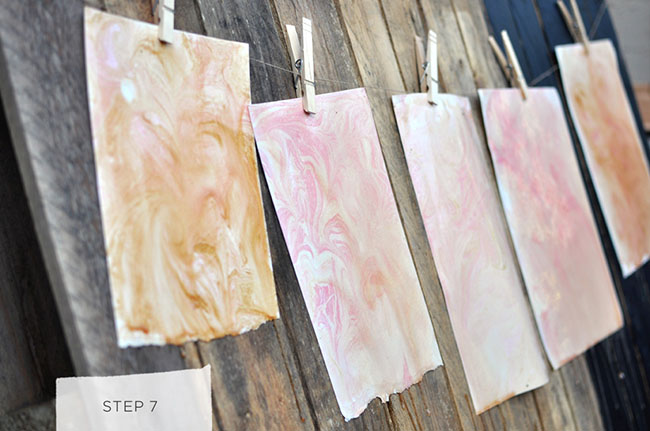
Step 7: Let your paper dry! To do multiple sheets you will need to repeat steps 2 and 3 between rounds otherwise you will end up with a blob of ink on your sheet of paper. Your paper might curl while it’s drying, we just ironed it down with a regular household iron.
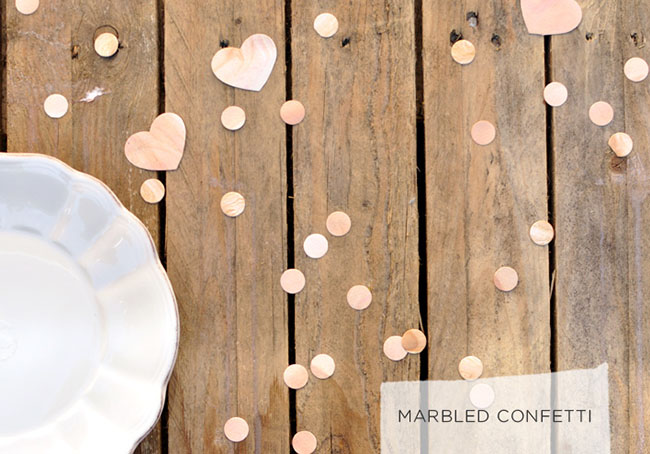
You can use this paper for almost anything. We made really adorable confetti, mini favor boxes, tags and wraps for our lager favor boxes.


DIY created exclusively for Green Wedding Shoes by Smitten on Paper. Check out more of their design work at Smitten on Paper!
Love this DIY, can’t wait to try, thank you!
This is so beautiful and effective, and looks so acheivable too!! Am definitely going to give this a try!!
You can actually just do the marble with shaving cream and food coloring. Fill a pan with some shaving cream, add drops of food coloring and swirl with a butter knife. Lay your paper on top and gently press down, peel the paper off and then wipe off the paper. When the shaving cream starts to get muddy, just rinse the pan and put in new.
Really love these, cant wait to give them a go!
This is so great! Thanks for sharing this tip!!
A really simple but effective idea