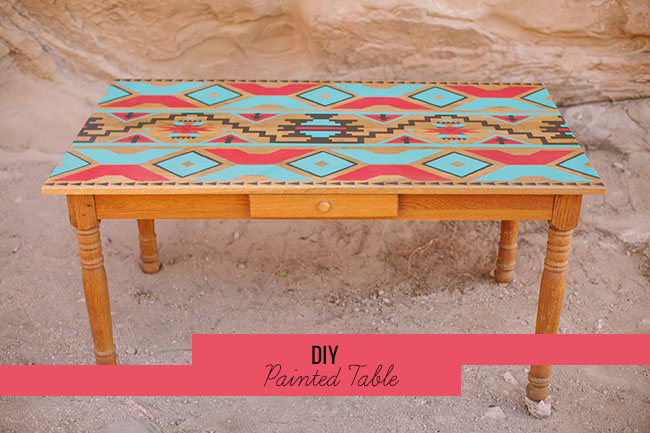
We just loved the awesome pattern on the table above from the Into the Wild shoot we shared earlier today. While painting a pattern on all your tables most likely isn’t realistic, I think this would be a great DIY project for a program table, dessert table or other decor for your event. Finding a cheap table on Craigslist or a yard sale and then adding a fun pattern would be a super affordable way to add a big impact to your day, right?!
We asked the La Bohéme Events gals how they transfered their pattern to the table, so here are their tips to recreate a pretty painted table for your wedding or next event!
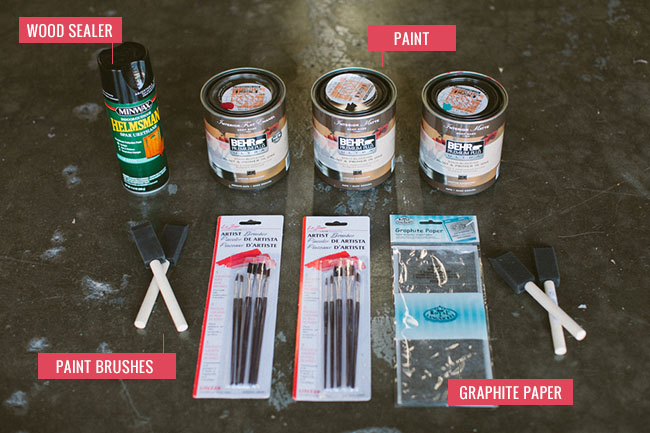
Materials needed:
• Pattern (we used a lovely pattern from designers Prim & Pixie )
• Graphite Paper
• Ruler or Straight Edge
• Pencil or Pen
• Paint
• Small & Medium Paint Brushes
• Wood Sealer – Spar Urethane
• Table
STEP-BY-STEP
1. Create a pattern (or have your invitation/graphic designer create a pattern for you)
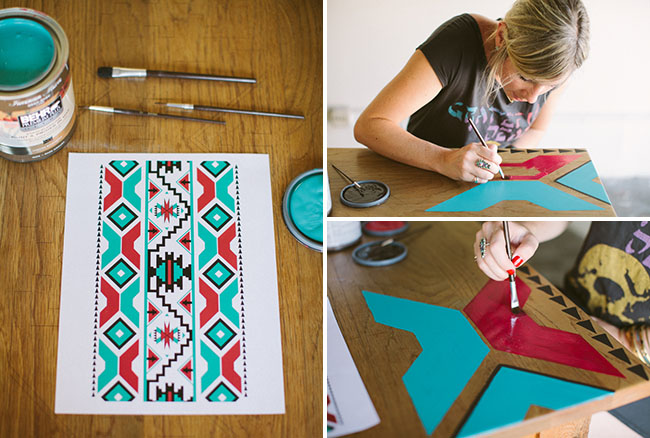
2. Print the pattern large enough to cover the surface area that you will be painting (FedEx Kinkos works just fine). Note: printing in black & white is totally fine for cost purposes, as long as you have the small colored pattern to reference when you’re painting.
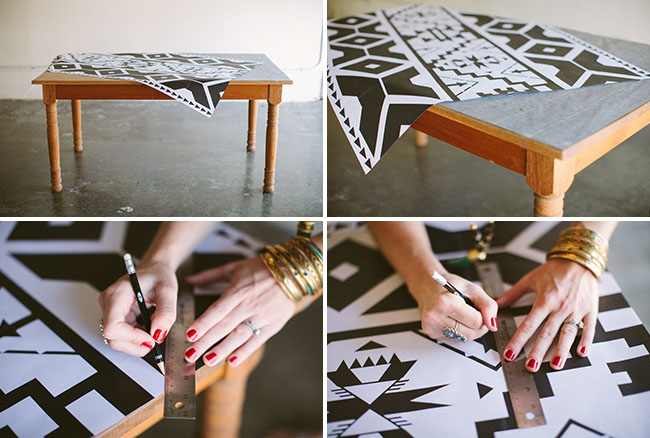
3. Place the graphite paper onto the table surface. Place a few small pieces of tape on the edges so it doesn’t move around on you.
4. Place the pattern on top of the graphite paper. A few small pieces of tape on the edges will help you here too.
5. Using your straight edge or ruler, begin tracing the lines of the pattern. Using a different color pen or pencil will help you remember what you’ve already traced.
6. Remove the pattern & graphite paper. The pattern should have transferred onto the table surface.
7. Using your small & medium brushes, hand paint the pattern according to the colors in your design. Note: I didn’t find that taping along the lines was worth it, this table is all hand-painted and turned out great!
8. Once your paint is dry, spray or brush on 2-3 coats of the clear finish wood sealer.

Such a fun idea to add a big impact to your table! Thanks to Laura Goldenberger for the photos.

Realy great idea, I will try it…
This is amazing! Is it possible to download the pattern somewhere?