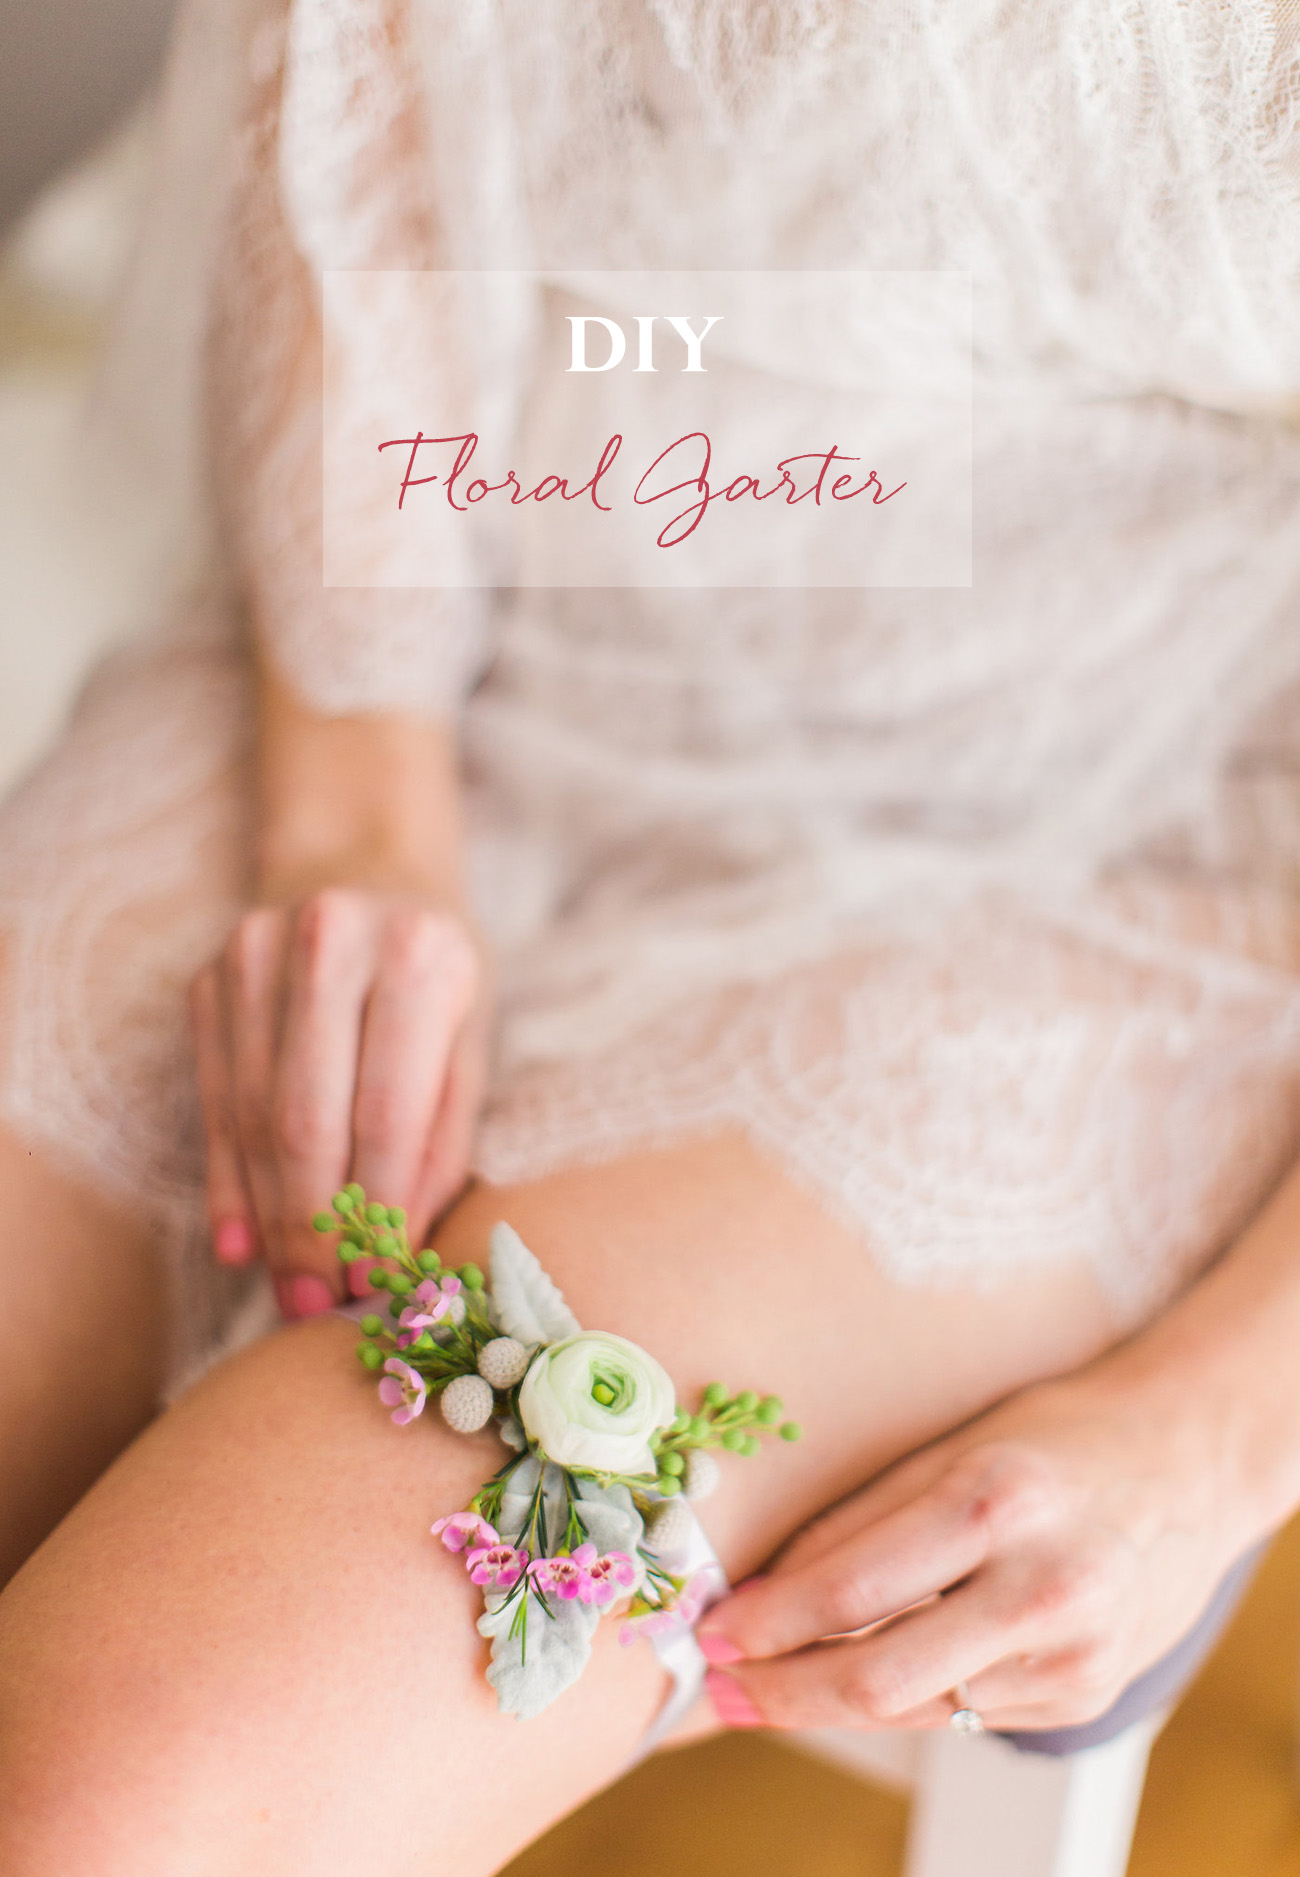
Today we are sharing a super fun DIY – a floral garter! This is a no-sew DIY project for brides who want make something fun and fresh for their wedding day! This DIY project is so easy and anyone can make it – even if they can’t sew. :) And the best part about these floral garters that Julianne from The Garter Girl made? They smell AMAZING – plus wearing fresh flowers always makes everything better! This would be a great project for a bridal shower or even, the morning of a wedding – to take the edge off a little bit! Thanks so much to Julianne for sending this over, let’s see how she did it…
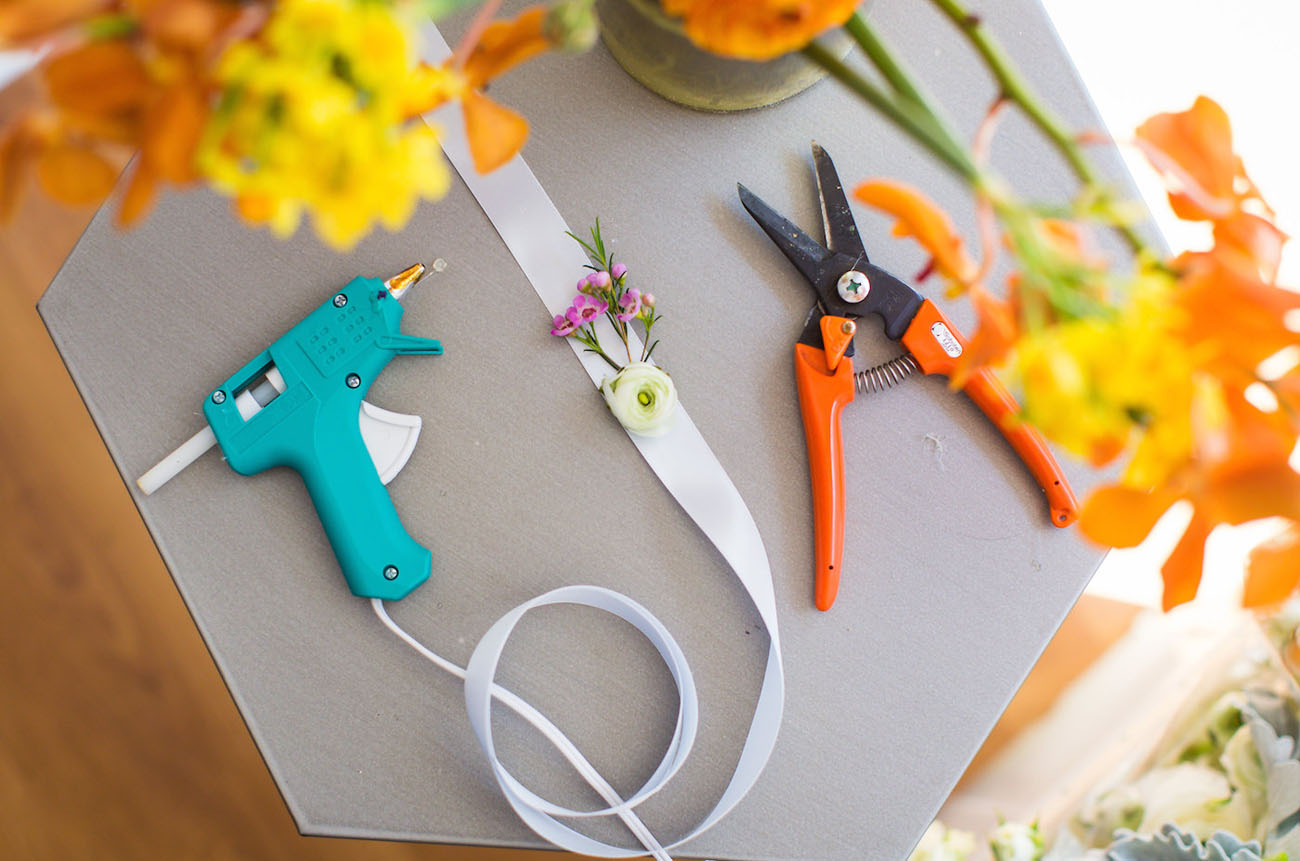
What You’ll Need:
• Garter base (such as ribbon, lace trim, glitter elastic or stretchy lace) I’d recommended a piece of ribbon or lace that is 2 inches wide or less. For length, if you using a non stretch material, like ribbon, try for about 40 inches long. With a longer piece, you can safely tie it and then cut off the tails to your desired length. For stretchy materials, like elastic, go for about 30 inches or more. Once you tie it on securely, you’ll be able to trim the tails.
• Flowers
• Hot glue
• Scissors


Prep: While the glue gun is heating up, play around with the flowers and try a few designs. You’ll need to trim the flowers from the stems. Cut as close as you can to the flower bud while still keeping the base in tact so the petals stay together. Lay flowers out on a table and try a few different options. Maybe start with your favorite flower in the middle and add a few pieces of greenery around the flower. Because it is a such a small space, less is more on your floral garter. The lighter the garter the better so that it won’t fall down from being too heavy.
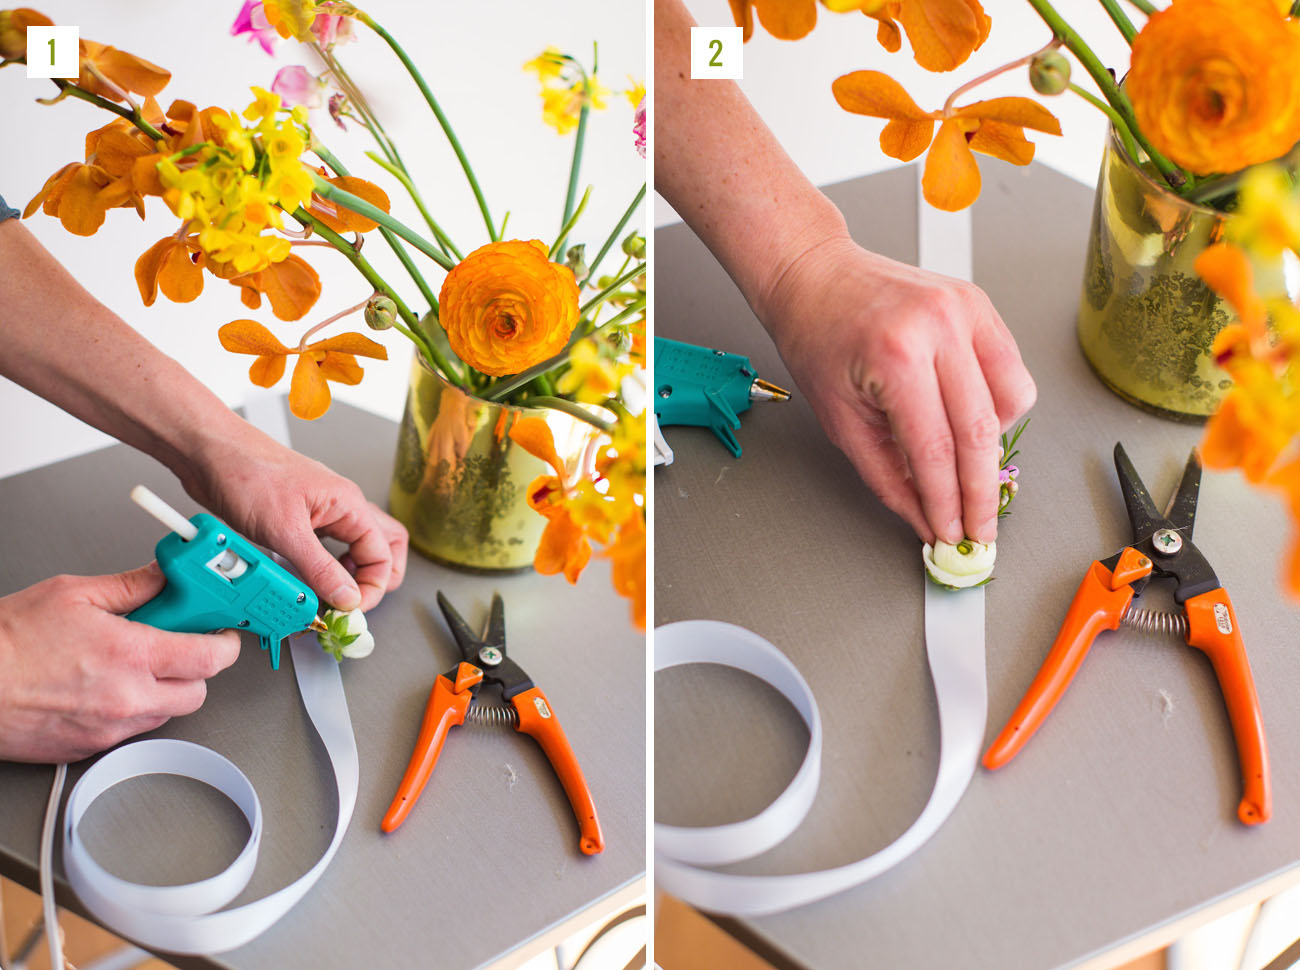
Step 1-2: Once you are ready to glue, fold your ribbon or garter base material in half to find the middle. Mark the middle of the material and this is where you’ll begin to glue your flowers. Add a small dot of glue onto the base or back of the flower and press it down onto the ribbon where you want it. Add more glue onto each piece as you add it to the ribbon.
Allow the glue to dry fully before holding it up and trying it on. When the glue is dry, hold your garter up slightly to make sure that all of the flowers are properly secured. If anything flops or droops, add more glue. Remember to remove any of the little glue string pieces that might be floating around.
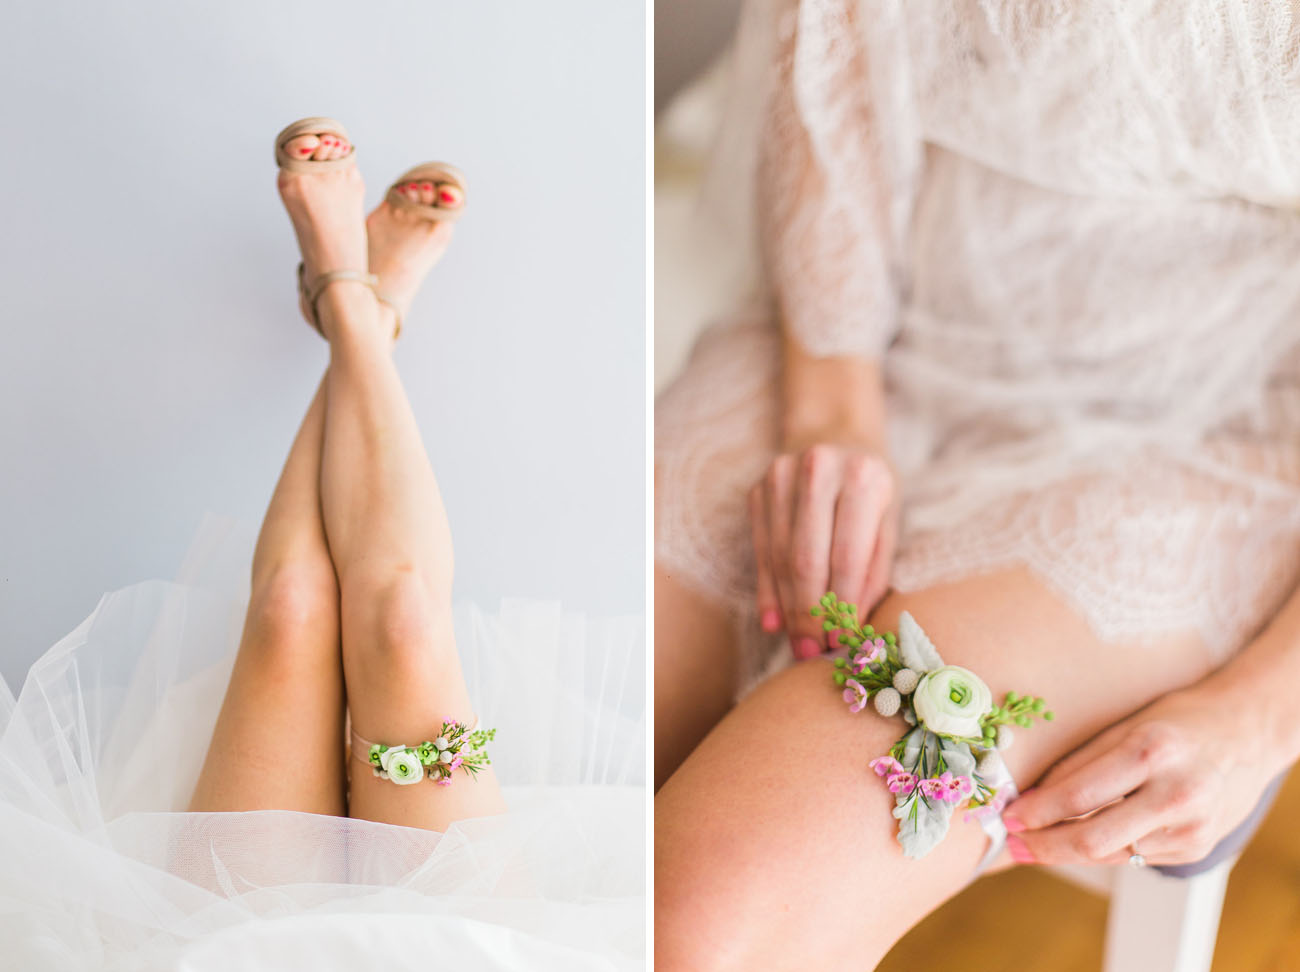
When you are ready to try it on, tie your garter on your leg tightly and securely. Tie it in a tight bow so that you can un-tie and re-tie with ease. I recommend that you wear it on either leg half way between your knee and your hip. You can certainly tie on wherever you like and where it feels the most comfortable to you. I recommend that you stand up when you tie it on and put the floral part in the front of your leg. The garter should be tight enough that it doesn’t fall down, but not so tight that it hurts. Be sure to walk around in your garter a little bit before walking down the aisle to get comfortable with it. Re-tie the garter if necessary. Once you tie your bow in the back, trim off the tails to your desired length, but don’t cut them so close that you can’t easily re-tie the garter, if necessary.

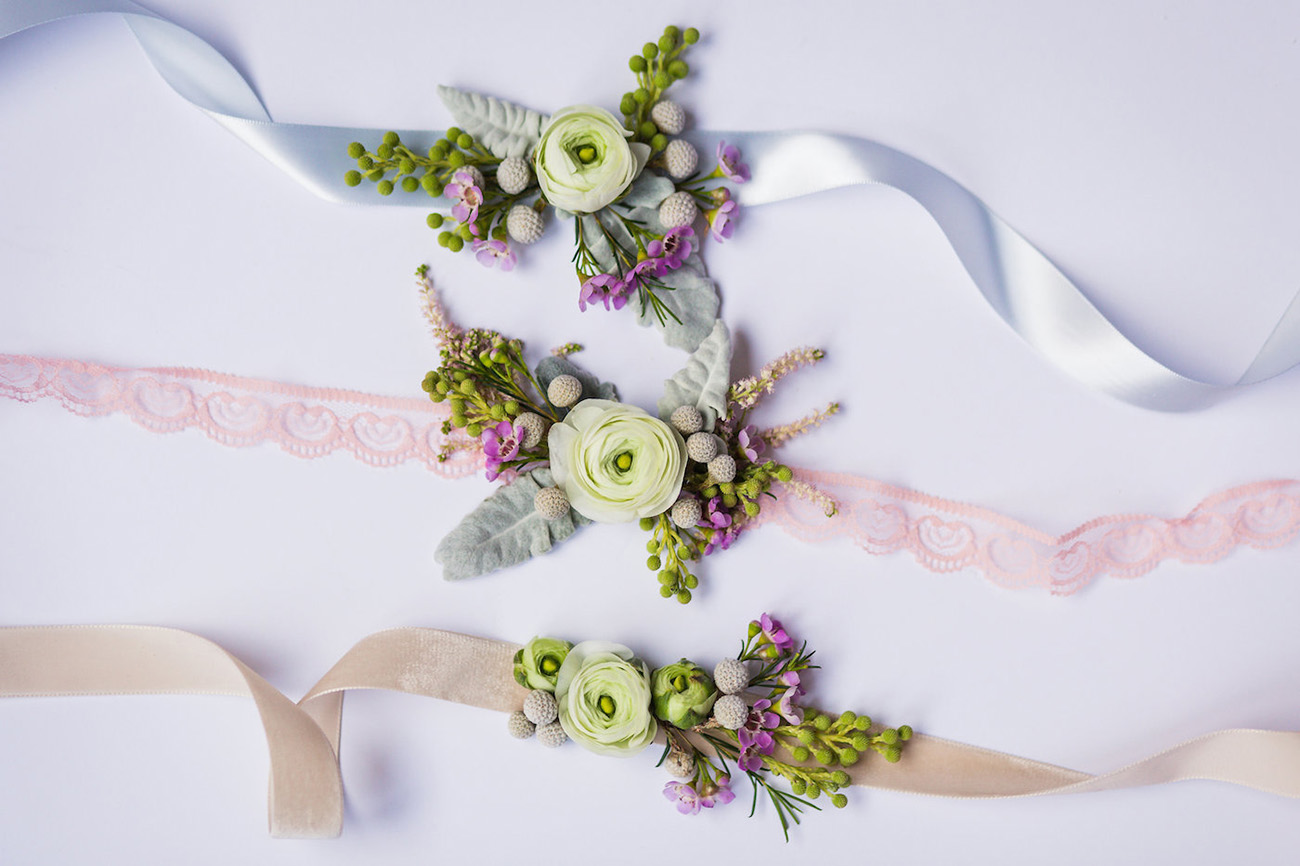


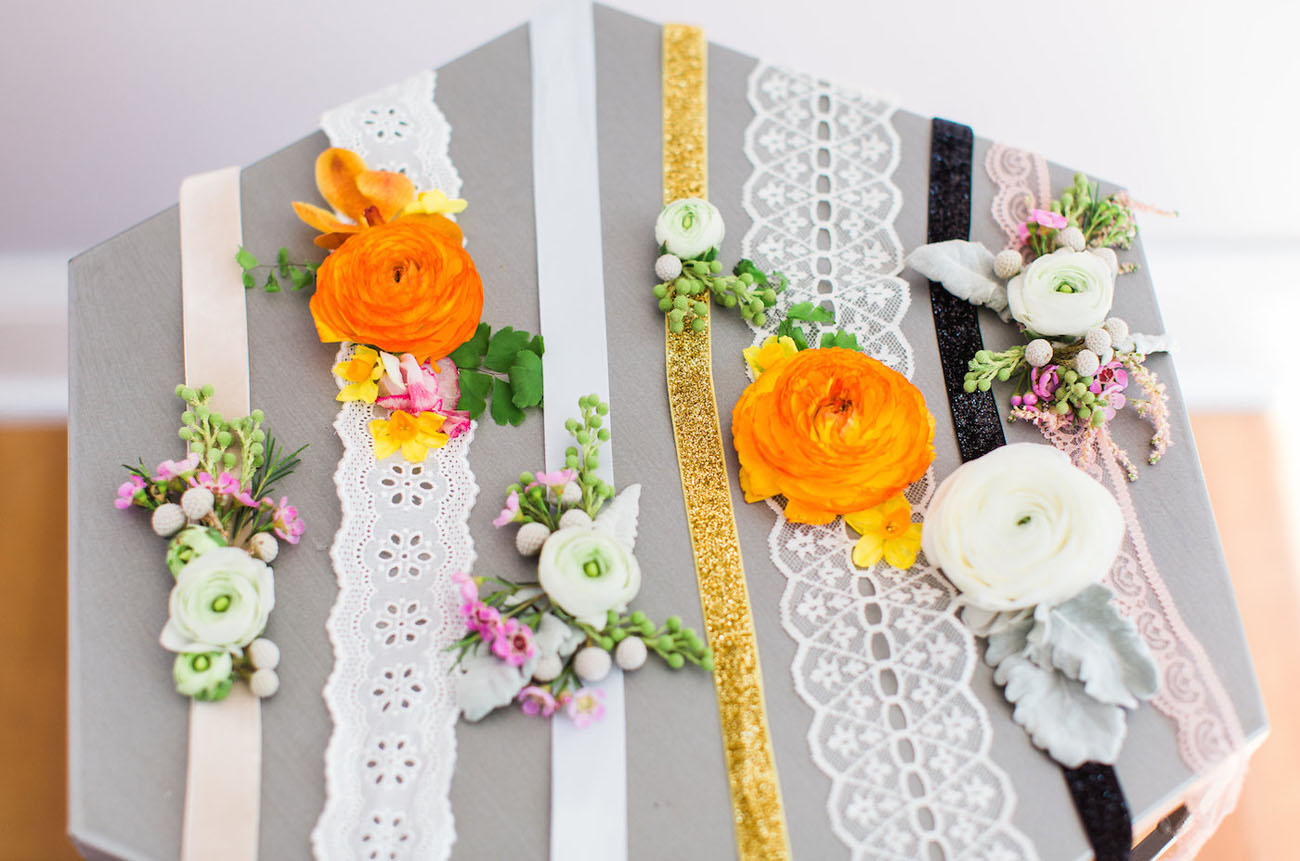
With all of the different flowers and greenery options, the possibilities are truly endless as far as design. You could make a garter to match your bridal bouquet or just make a garter for fun with flowers that you love!
If you make your own Floral Garter using these steps or supplies, we’d love to see how it turns out, so please share on Instagram along with the hashtag #GreenWeddingShoesDIY. We’ll regram our faves!

photography: Love Knot Photo // event design: The Garter Girl // florals: Elegance & Simplicity // production: The Garter Girl // styling: Bellwether Events // blue shoes: Manolo Blahnik // nude Shoes: Jimmy Choo // robes: BHLDN // ring box: The Mrs. Box

We would love to sponsor your next DIY tutorial that features ribbons. Please let me know if you are interested: [email protected]
LOVE! That model is SO gorgeous!!!! If you want buy wedding supplies, i recommend this shop: https://www.asiteoneworld.com/Weddings-Events You can get cheap wedding supplies. thanks