
Happy Thursday! Today we are sharing a fun DIY that will add a modern + customized touch to your reception (and will make for amazing favors to use at home for your guests too!) with the ever-so-popular marble trend going on right now! We partnered with Avery to use their White Square Labels + a simple DIY inspired by Homey Oh My‘s post to create these fun coasters for your wedding.
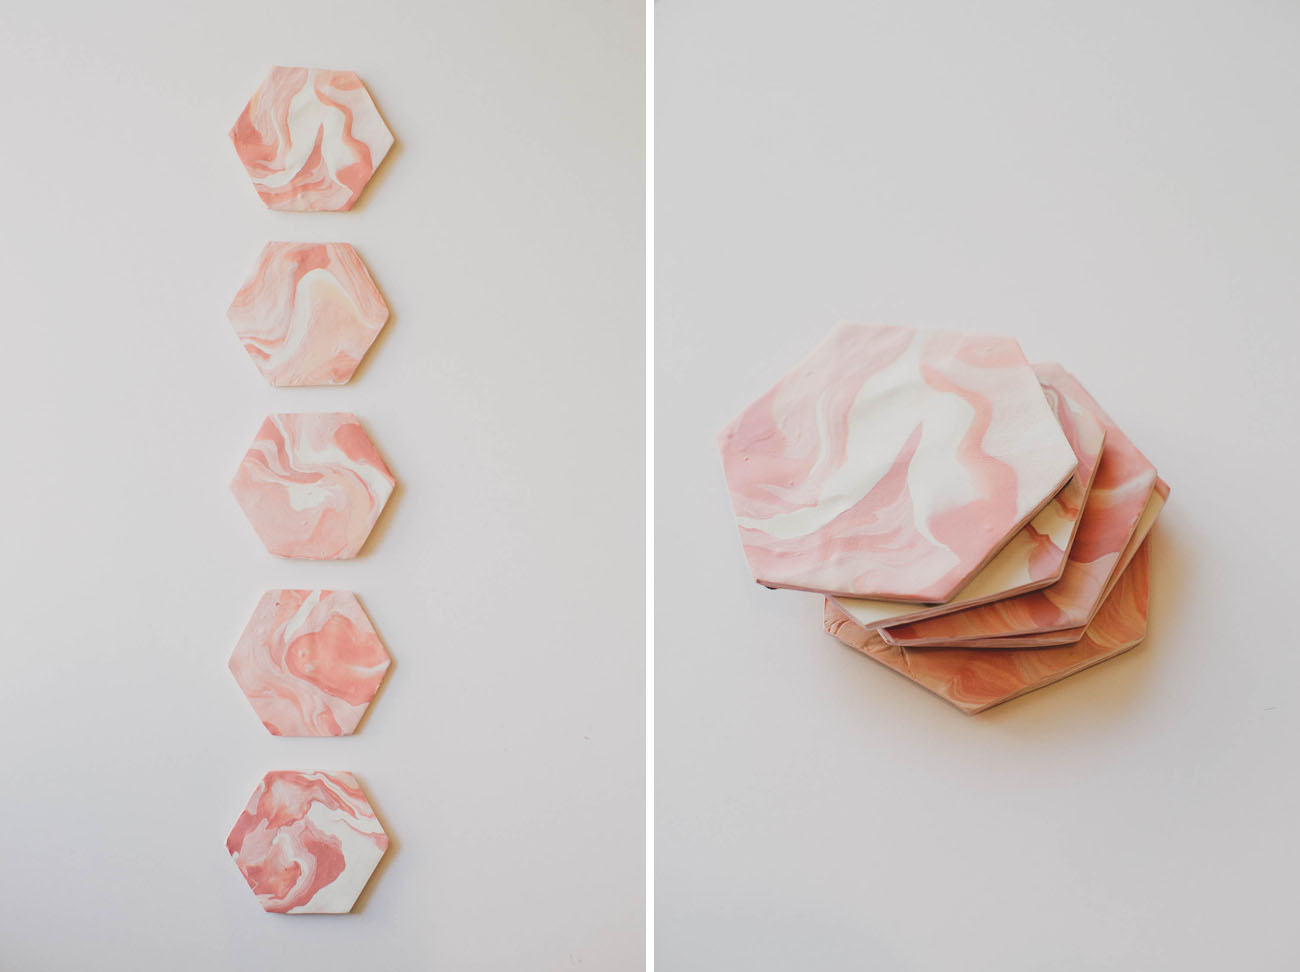
What we especially love about these is the endless color combinations! Keep it chic with our blush color tone, go modern with the classic black and white or even go bold with a rainbow of colors! So many fun choices to make it custom to your wedding! Here’s how we did it…
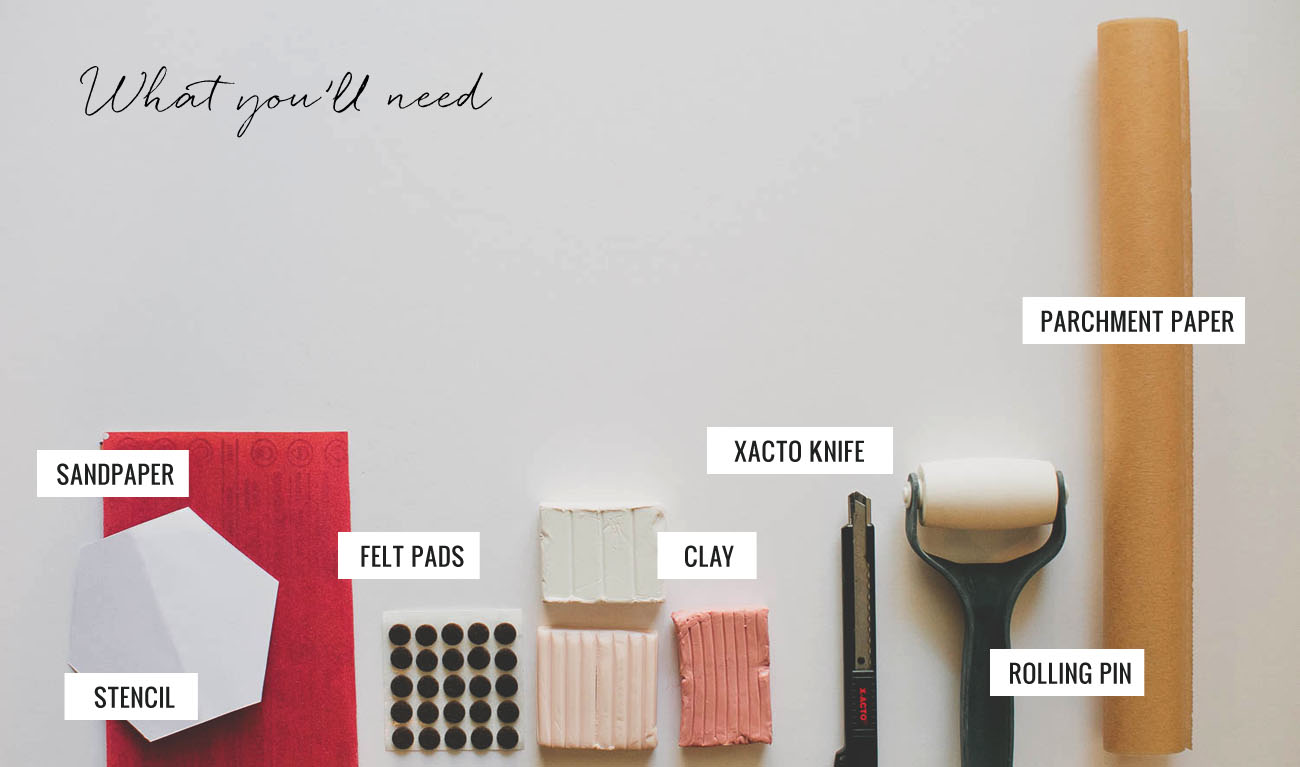
What You’ll Need:
• Clay – we used these colors: dusty rose, flesh & white.
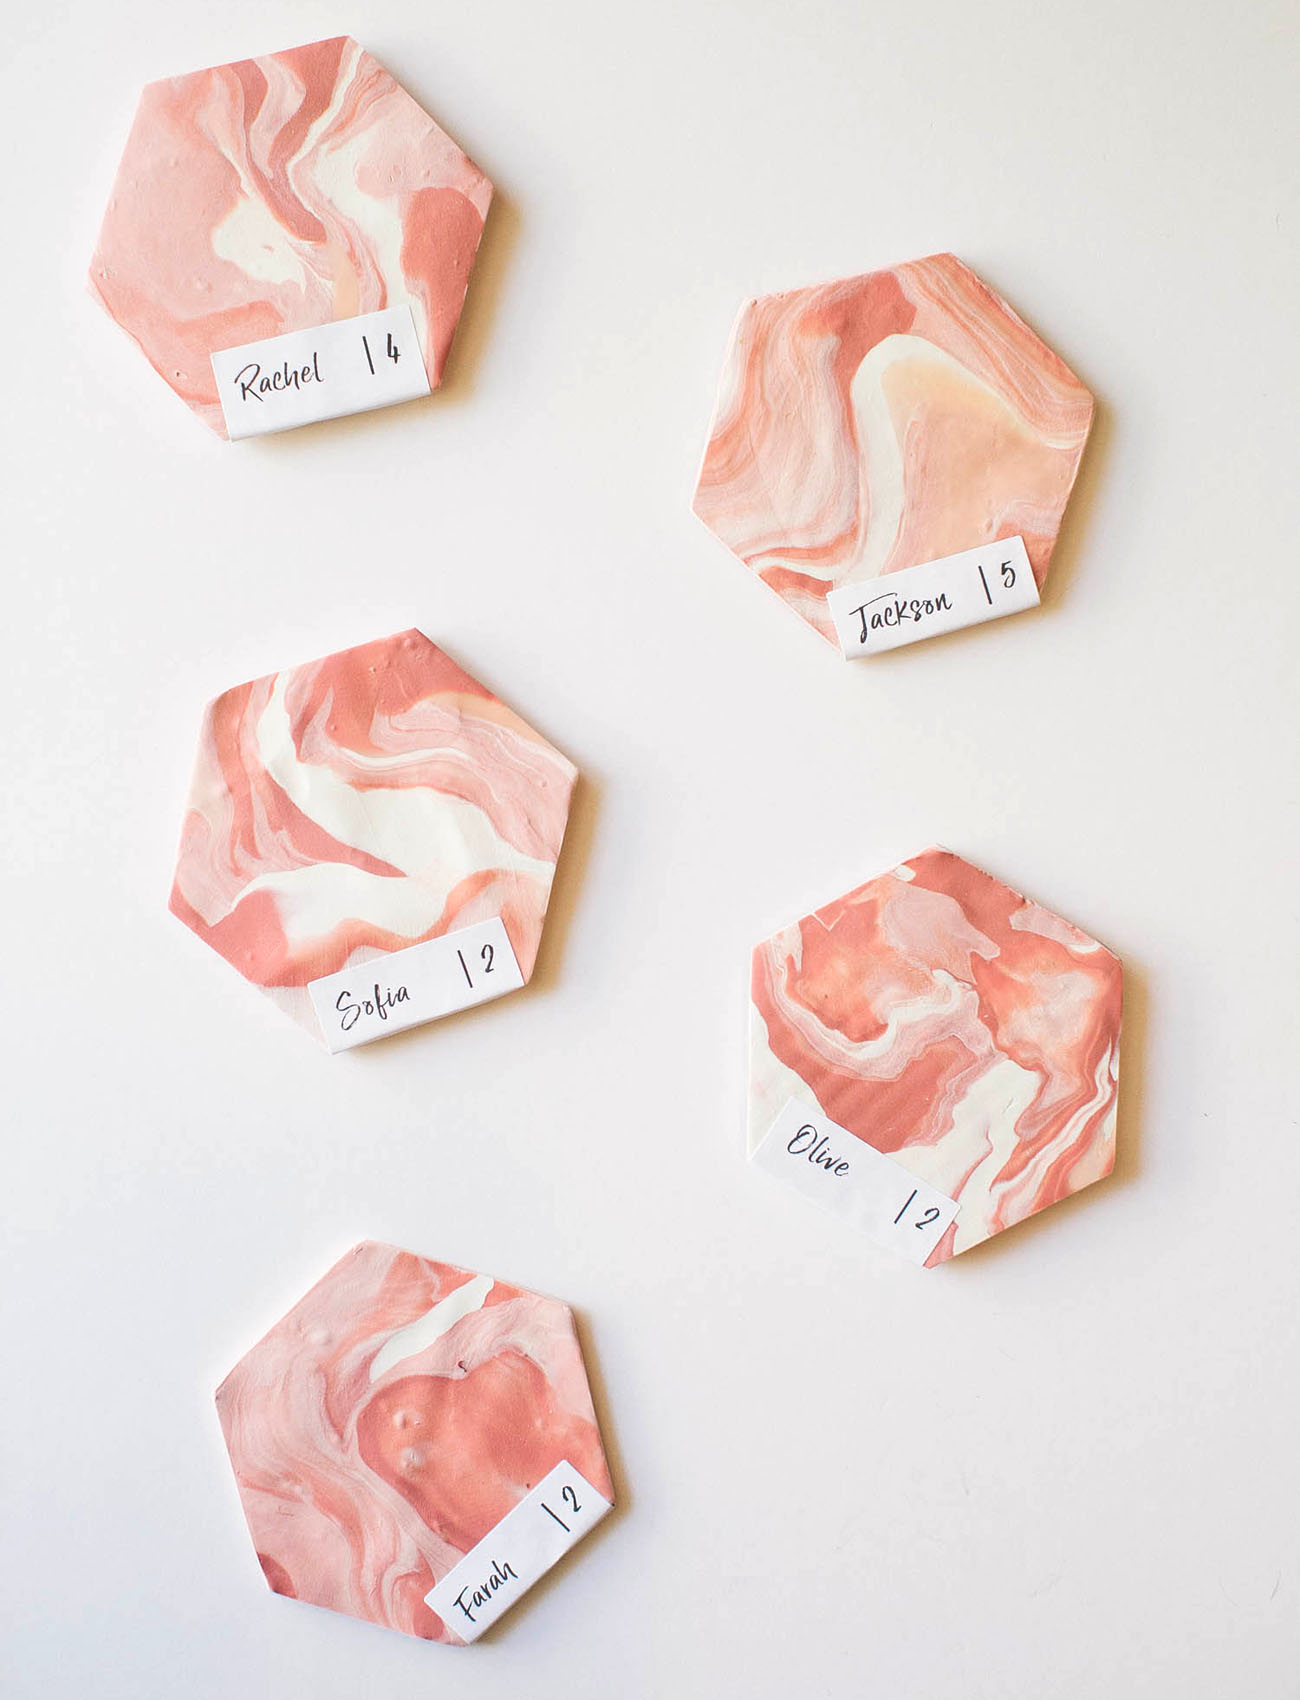
• Our Escort Card Templates – you can download them here
• Avery White Square Labels 22806
• Rolling Pin
• Parchment Paper
• Baking Sheet
• Cookie Cutter/Stencil (the top of a glass works too, if you want a round shape)
• Sandpaper
• Felt Self Stick Pads
• X-ACTO knife
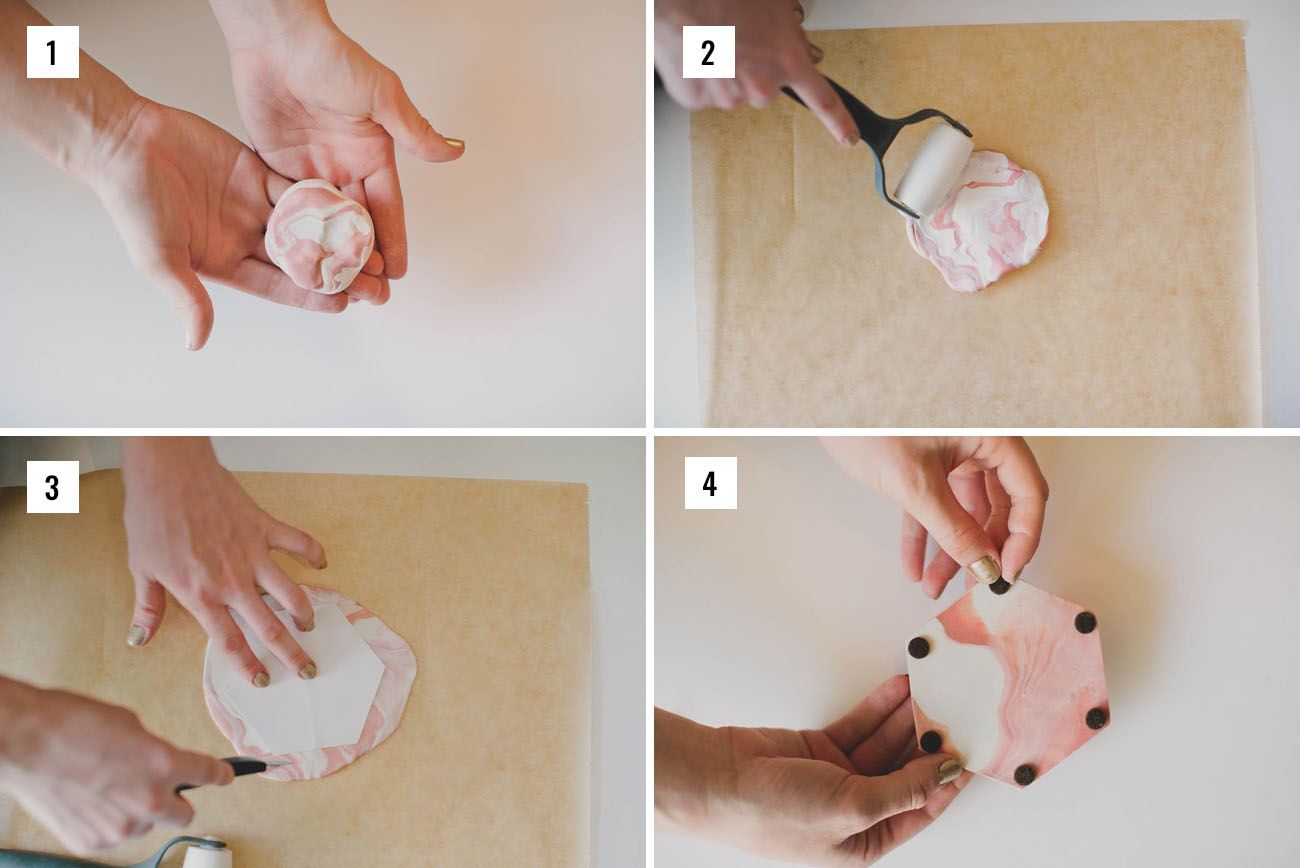
Step 1: To start off, lay down a piece of parchment paper — the clay is a tad oily and leaves residue, so this helps with clean up. Unwrap clay, tear off several pieces and roll until slightly softened. Randomly stick pieces + twist them into each other. Then, begin to smash the twisted pieces into a ball.
Step 2: Use a rolling pin to flatten the clay into a pancake shape large enough for your stencil. (Note: Do not make this too thin as it will be flimsy; a good thickness level ~ 3 pennies stacked)
Step 3: Place your stencil onto the clay (we created our own stencil by tracing over a hexagon shape from the computer screen. A cookie cutter could would great for this, too! Just make sure it’s the right size to fit a glass/mug on). Use an X-ACTO knife to trace/cut the shape out from the clay. We did this step on top of the tracing paper and placed scrap cardboard underneath as to not ruin any surface.
Step 4: Remove excess clay and transfer clay shape onto a baking sheet. Use the remaining clay from each shape to mold into the next coaster. Pop the baking sheet into the oven at 275F for about 25 minutes (check the package of your clay for different brands). While cooling, print out the Avery escort card stickers. Once cooled, sand down the edges to remove any rough edges. Following this, apply the escort card sticker, then place felt self stick pads on the bottom of the coaster.
tip: We found it best to create the coasters one at a time, rather than rolling out all the clay and cutting (preventing it from drying out).
After you download the files, you can open the .avery files in Avery Design & Print by going to avery.com/open and opening the file from there. You can customize each with a name and table number from there – as well as change up the font!
As a heads up, you won’t be able to print the .avery files without opening them in Avery Design & Print. Print out your stickers and place on your desired location of the coaster – we chose to put half on the bottom and wrap the other half of the stick on the bottom. So easy!!

We hope you have fun using our Avery printables to create a fun detail for your wedding or party!

* This post is sponsored by Avery. All content, ideas, and words are by Green Wedding Shoes. Thanks for supporting our sponsors!
so cute :) very effective details :)