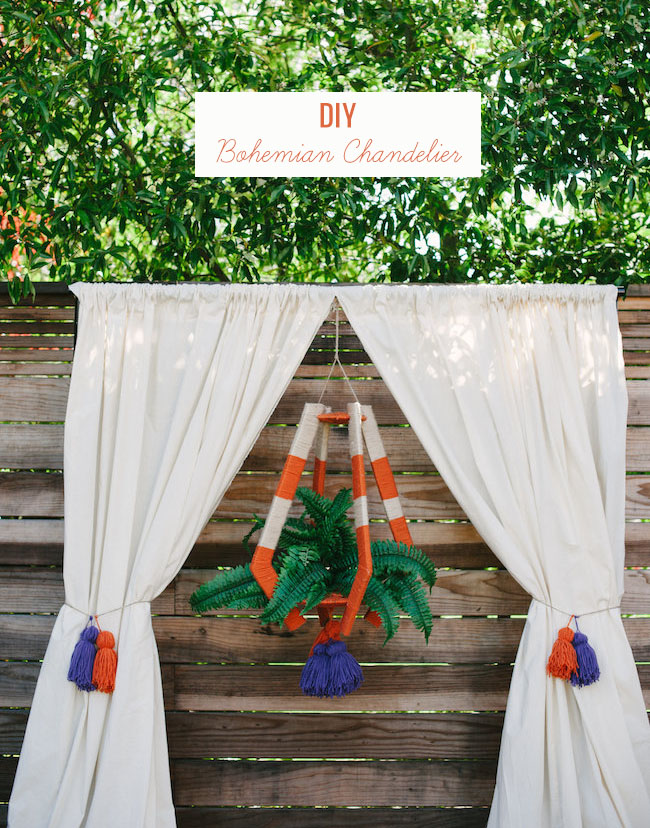
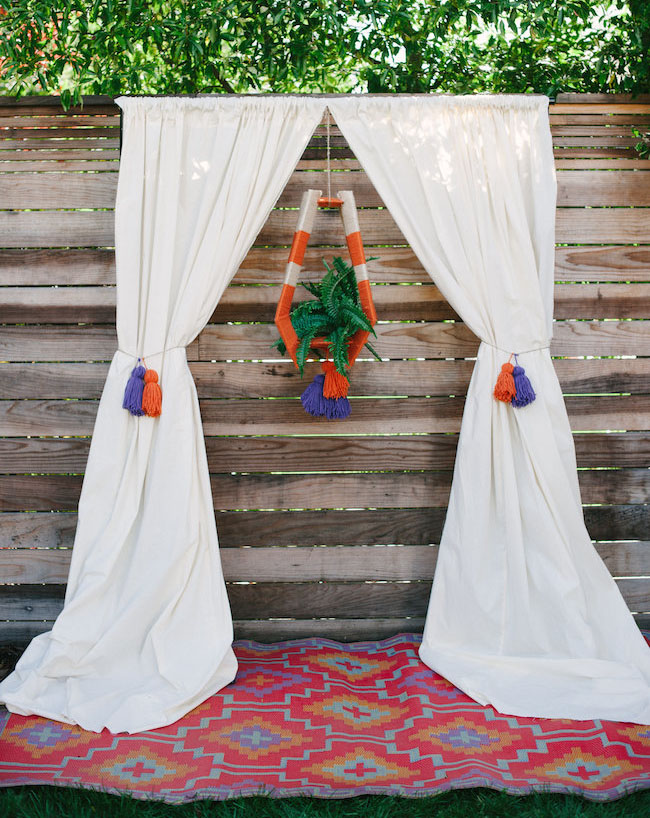
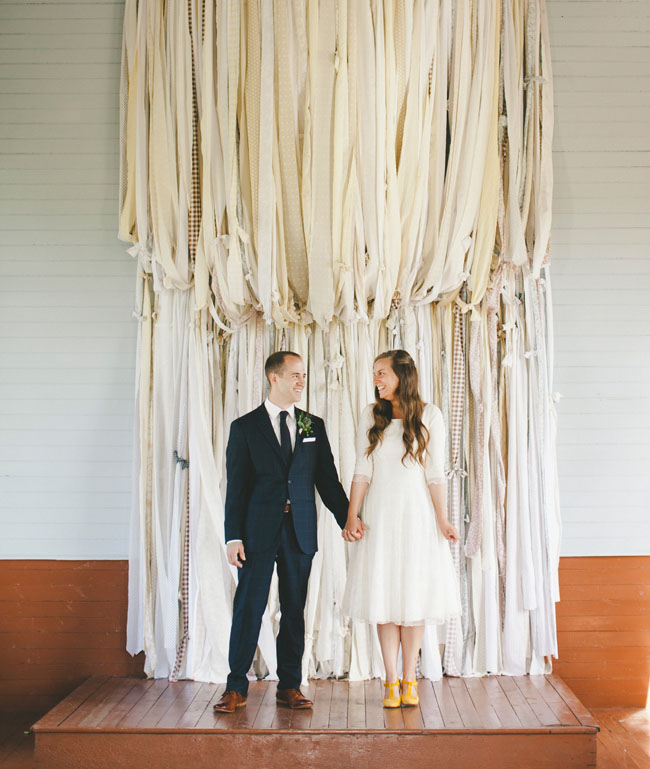
Today we are sharing a rad DIY from Going Lovely on how to make a bohemian chandelier wrapped in yarn and embellished with tassels! This chandelier makes for the most perfect rustic ceremony backdrop, but we could also see it used above your sweetheart table or your dining room table at home! Lets see how the Going Lovely gals made one…
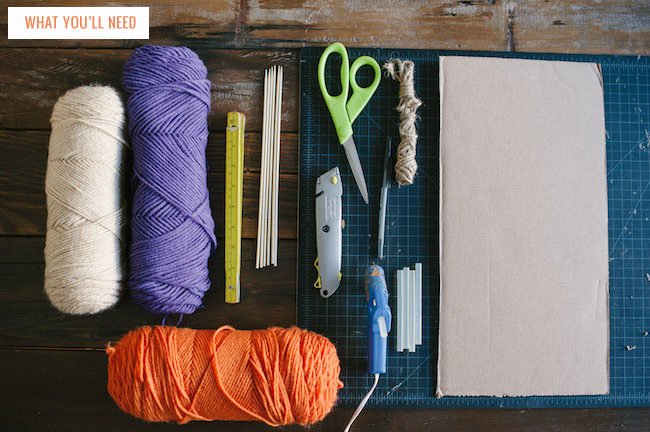
What You’ll Need
• Large cardboard boxes
• Utility blade/knife
• Scissors
• Hot glue gun & glue sticks
• Yarn in your colors of choice
• Twine
• Self healing cutting mat
• Ruler or yardstick
• Pencil
• Extra scrap yarn + cardboard for tassels (see end)

Step 1: Using your ruler and pencil, draw out the shape that will serve as the sides of your chandelier.
Note: We wanted to create a larger chandelier and made the top 18.5” long, the bottom 8” long, the width 2″ wide and connected the lines at an angle.
Step 2: Cut out the shape you created for your ‘side’ from your cardboard using your knife and ruler and repeat this step until you have 12 pieces total.
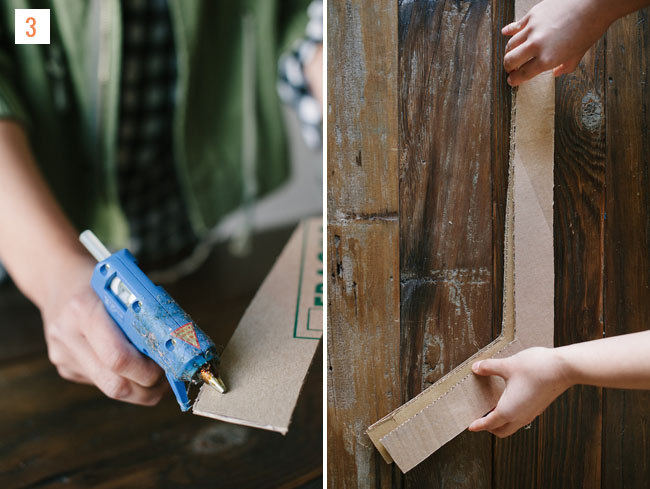
Step 3: Using your hot glue gun, layer 3 pieces on top of each other and make sure they all line up. Repeat this until you have a total of 4 sides, each with 3 layers of cardboard.
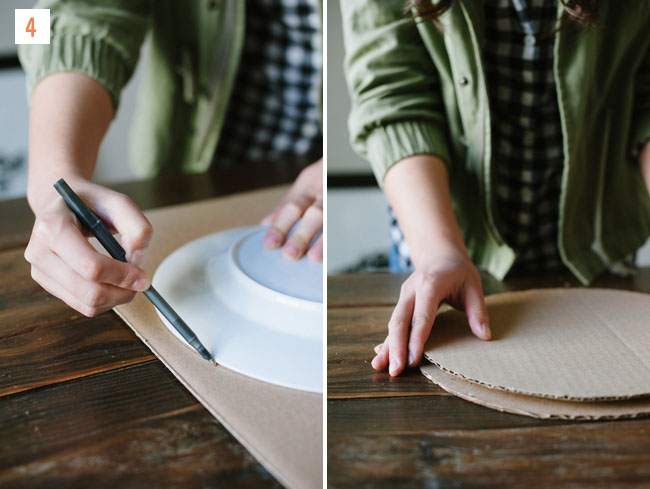
Step 4: Draw 2 circles that are 11 inches in diameter and cut them out. Glue these pieces together. Draw 2 more circles that are 6 inches in diameter, cut them out and glue them together.
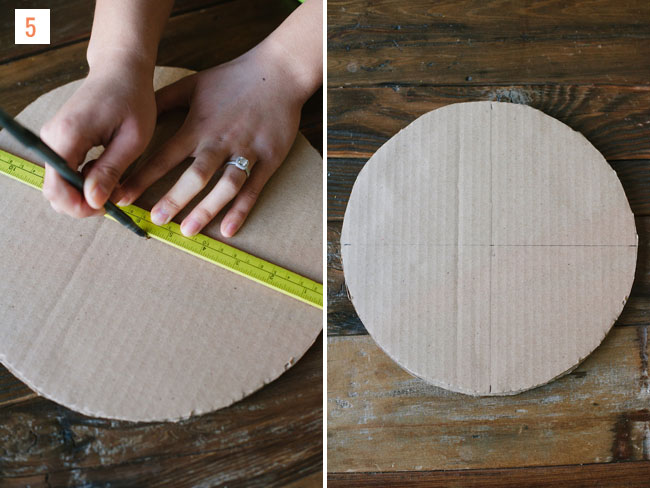
Step 5: Find the center of the 11 inch circle using your ruler and draw a grid. Repeat with the 6 inch circle. These end points will be where you attach the cardboard sides.
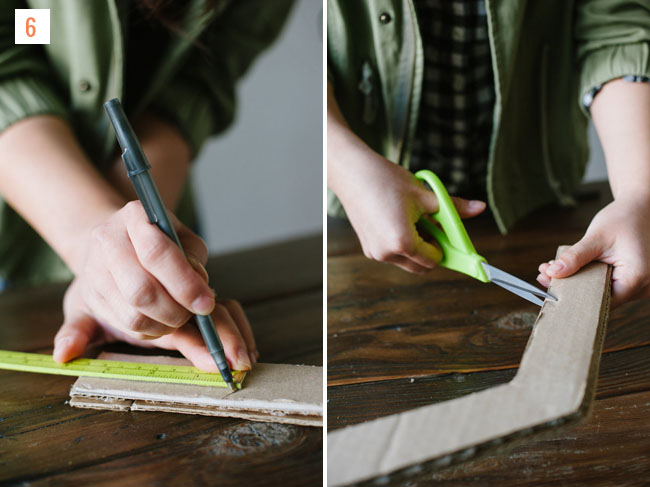
Step 6: Draw a line on the top of the cardboard sides that is 1.5 inches from the top. Repeat this on the bottom of the cardboard side 3.5″ inches from the bottom. Using your utility knife or scissors make a notch on those lines.
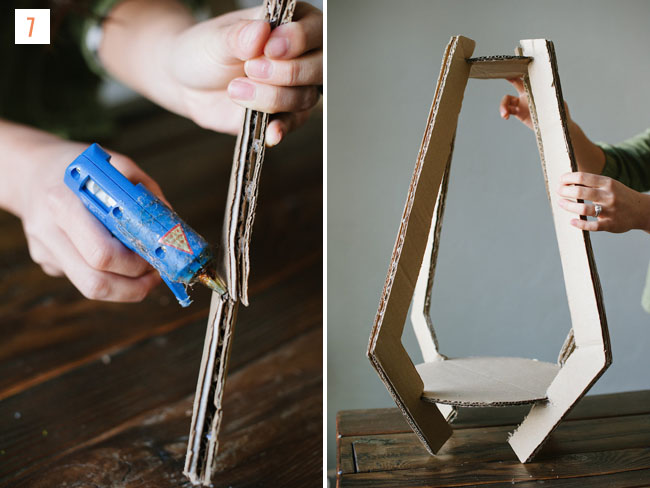
Step 7: Apply hot glue to the notches and attach the sides to the circles.
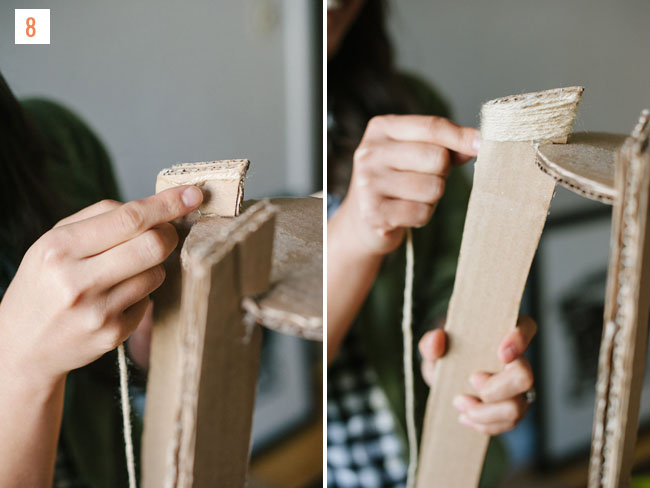
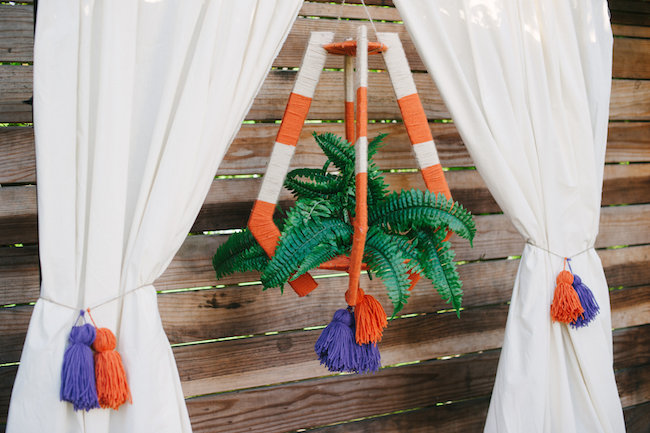
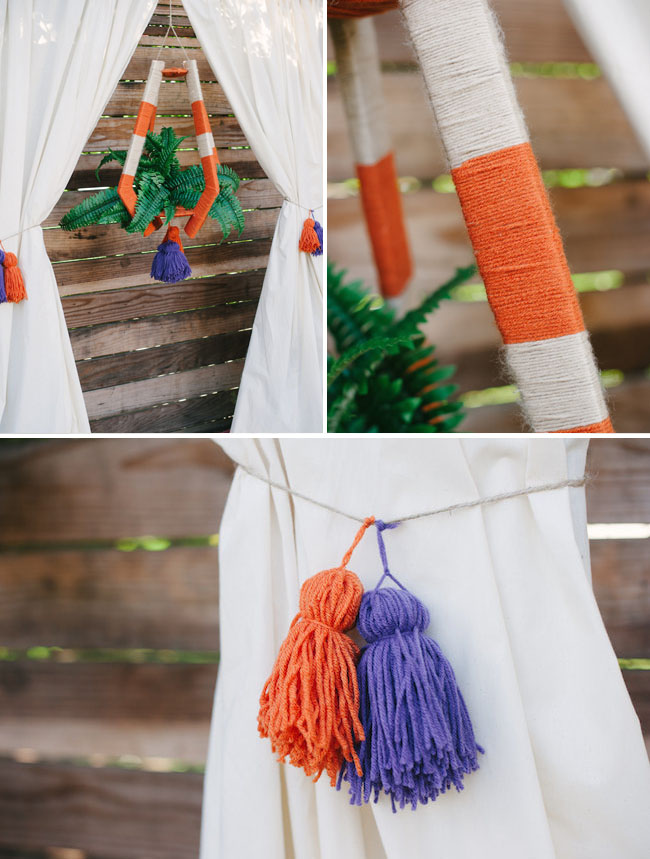
Step 8: Once all the sides are secure, you are ready to wrap your chandelier in yarn! Apply glue to the end of the cardboard and attach the tip of your yarn. Wrap the yarn around the cardboard until it is completely covered. Repeat this on all the sides and the top and bottom circles.
Note: We chose to use two colors to create a pattern, but you can use as many or as little colors of your choice.
We also chose to create some yarn tassels to attach to the bottom of the chandelier (optional) which continues below!
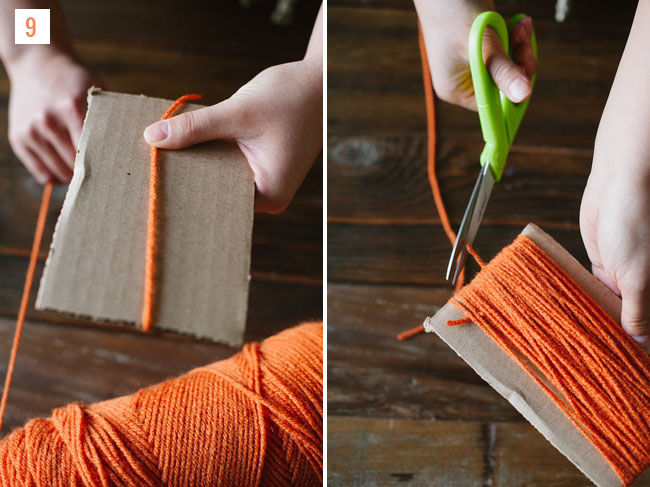
Step 9: We salvaged a scrap piece of cardboard that was 4×8 inches and wrapped the yarn tightly around it. The more yarn you wrap, the wider the tassel will be. Once the yarn is wide enough to your liking, snip the end with your scissors.
Step 10: Cut 2 pieces of yarn that are each 6 inches long. Slip one of the 6 inch pieces of yarn under the wrapped yarn against the cardboard and tie it in a knot.
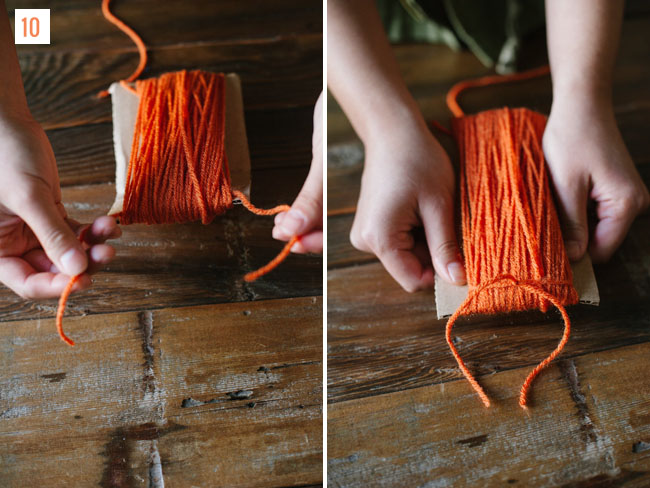
Step 11: Slide the yarn off the cardboard and tie the other piece of yarn around it, leaving about 1 inch of room from the top.
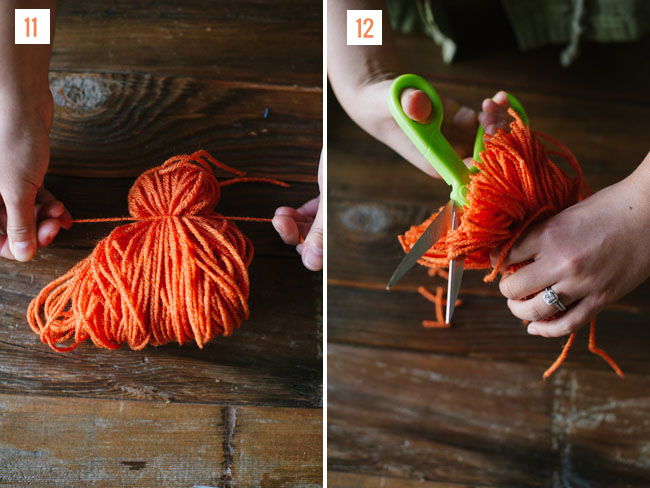
Step 12: Cut open the yarn loops at the bottom of the tassel and trim any uneven ends.
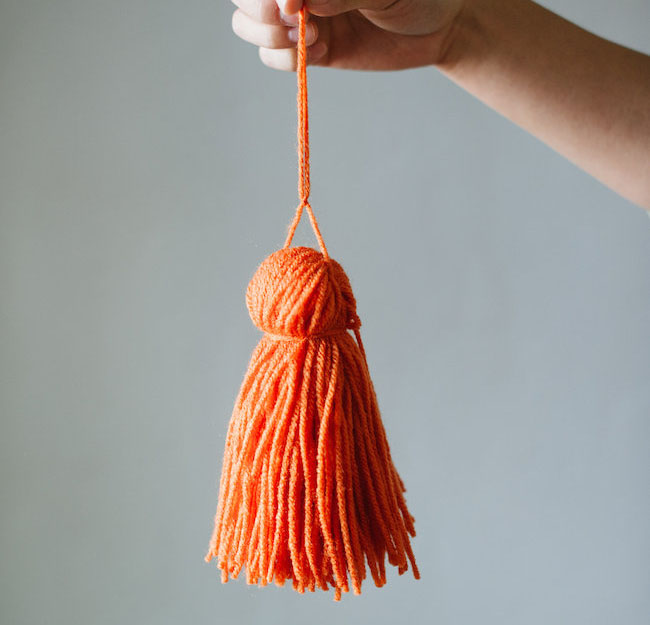
And your tassel is all finished! We made 3 tassels for the chandelier in orange and purple, and also 4 more for fabric ties (see below) but you can make them in any color combination to match your chandelier!
Time to hang up the chandelier! A pretty fern makes for a lovely addition for the center as well.

If you make your own boho chandlier, we’d love to see how it turns out, so please share on Instagram along with the hashtag #GreenWeddingShoesDIY
DIY created by Going Lovely exclusively for Green Wedding Shoes. Looking for creative event design + coordination? Check out San Francisco based Going Lovely for your wedding day! Big thanks also to the talented duo Pictilio for the photography.
Yay, thanks for the feature!
Such a cool tutorial! Thanks!
Great work of art!
The actual backdrop itself, is it on a normal backdrop stand that you’d use for photoshoots?
I should say I absolutely love the chandelier too, but I’ve been trying to figure out a good stand for my backdrop, as I won’t have walls I can attach things too.
Thanks!